Canon CanoScan LiDE 80 CanoScan LiDE80 Quick Start Guide - Page 17
Post Film Scanning Procedures - film adapter kit
 |
View all Canon CanoScan LiDE 80 manuals
Add to My Manuals
Save this manual to your list of manuals |
Page 17 highlights
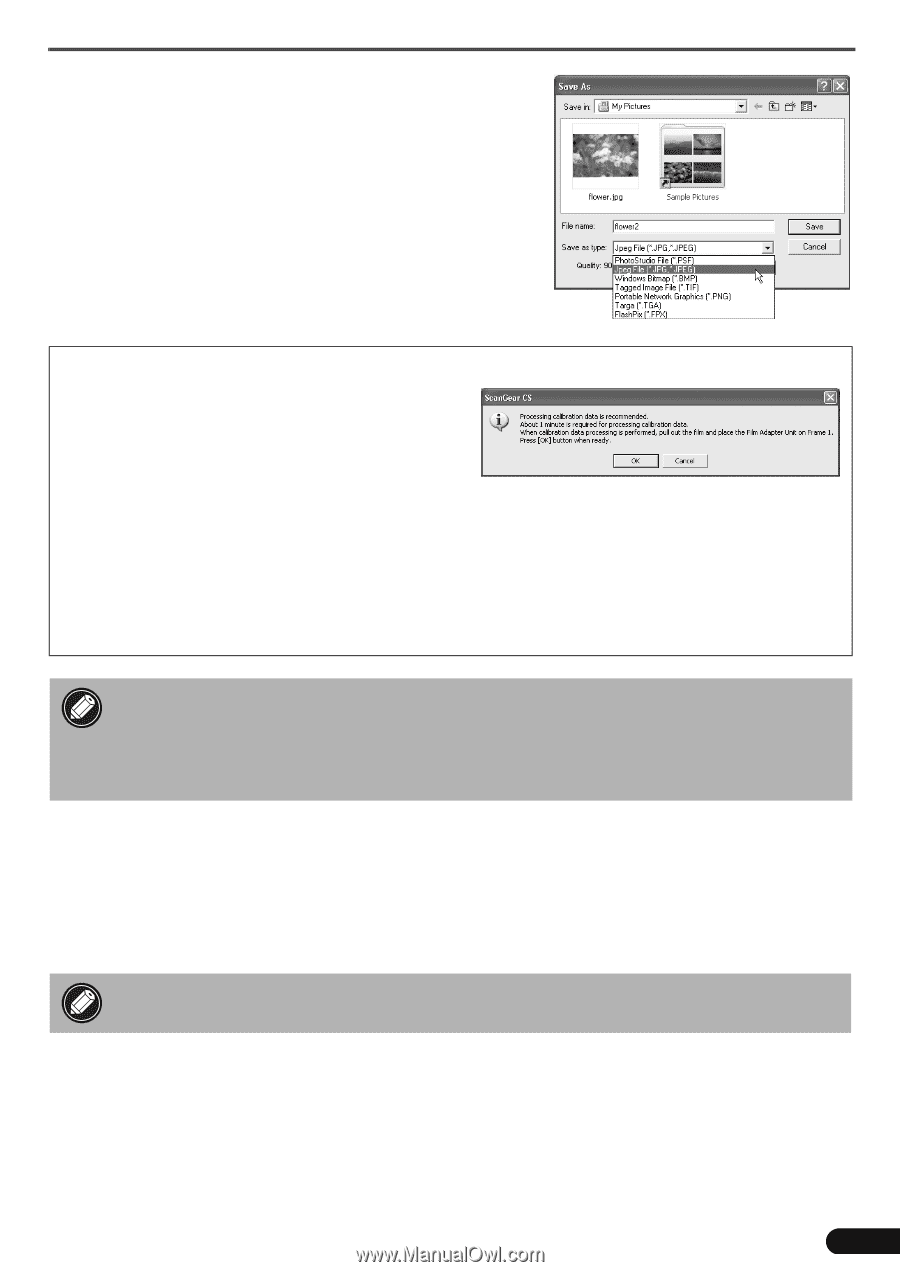
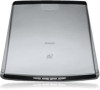
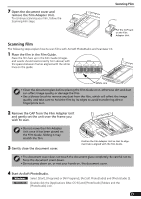
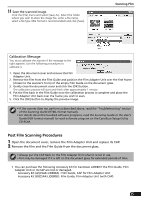
11 Save the scanned image. Click the [File] menu and select [Save As]. Select the folder where you wish to store the image file, enter a file name, select a file type (JPG format is recommended) and click [Save]. Scanning Film Calibration Message You must calibrate the scanner if the message to the right appears. Use the following procedures to calibrate it. 1. Open the document cover and remove the Film Adapter Unit. 2. Remove the film from the Film Guide and position the Film Adapter Unit over the first frame (closest to the scanner's front) of the empty Film Guide on the document glass. 3. Gently close the document cover and click the [OK] button. The calibration process will start and finish after approximately 1 minute. 4. Put the film back in the Film Guide once the calibration process is complete and place the Film Adapter Unit back over the frame you wish to scan. 5. Click the [OK] button to display the preview image. • If the scanner does not perform as described above, read the "Troubleshooting" section of the Scanning Guide (HTML format manual). • For details about the bundled software programs, read the Scanning Guide or the User's Guide (PDF format manual) for each software program on the CanoScan Setup Utility CD-ROM. Post Film Scanning Procedures 1 Open the document cover, remove the Film Adapter Unit and replace its CAP. 2 Remove the film and the Film Guide from the document glass. • Always put the CAP back on the Film Adapter Unit when it is not in use. • Film may be damaged if it is left on the document glass for extended periods of time. • You can purchase the following Accessory Kit for CanoScan LiDE80 if the Film Guide, Film Adapter Unit or its CAP are lost or damaged. Accessory Kit (A)(CSAK-LiDE80A) : Film Guide, CAP for Film Adapter Unit Accessory Kit (B)(CSAK-LiDE80B) : Film Guide, Film Adapter Unit (with CAP) 15
-
 1
1 -
2
-
3
-
4
-
5
-
6
-
7
-
8
-
9
-
10
-
11
-
 12
12 -
 13
13 -
 14
14 -
 15
15 -
 16
16 -
 17
17 -
 18
18 -
 19
19 -
 20
20
 |
 |