Canon DC220 Digital Video Software (Macintosh) Ver.25 Instruction Manual - Page 25
Before Downloading Images - power adapter
 |
UPC - 013803079500
View all Canon DC220 manuals
Add to My Manuals
Save this manual to your list of manuals |
Page 25 highlights
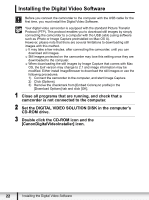
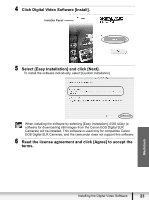
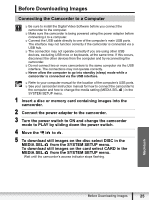
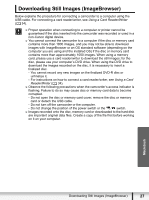
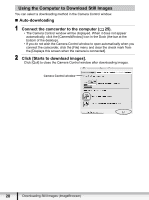
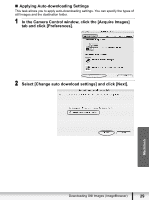
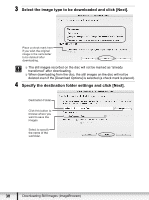
Before Downloading Images Connecting the Camcorder to a Computer Be sure to install the Digital Video Software before you connect the camcorder to the computer. Make sure the camcorder is being powered using the power adapter before connecting it to a computer. Connect the USB cable directly to one of the computer's main USB ports. The interface may not function correctly if the camcorder is connected via a USB hub. The connection may not operate correctly if you are using other USB devices, excluding USB mice or keyboards, at the same time. If this occurs, disconnect the other devices from the computer and try reconnecting the camcorder. Do not connect two or more camcorders to the same computer via the USB interface. The connections may not operate correctly. Never allow the computer to go into standby (sleep) mode while a camcorder is connected via the USB interface. Refer to your computer manual for the location of the computer's USB ports. See your camcorder instruction manual for how to connect the camcorder to the computer and how to change the media setting (MEDIA SEL. ) in the SYSTEM SETUP menu. 1 Insert a disc or memory card containing images into the camcorder. 2 Connect the power adapter to the camcorder. 3 Turn the power switch to ON and change the camcorder mode to PLAY by sliding down the power switch. 4 Move the / to . 5 To download still images on the disc select DISC in the MEDIA SEL. from the SYSTEM SETUP menu. To download still images on the card select CARD in the MEDIA SEL. from the SYSTEM SETUP menu. Wait until the camcorder's access indicator stops flashing. Macintosh Before Downloading Images 25
-
 1
1 -
2
-
3
-
4
-
5
-
6
-
7
-
8
-
9
-
10
-
11
-
12
-
13
-
14
-
15
-
16
-
17
-
18
-
19
-
 20
20 -
 21
21 -
 22
22 -
 23
23 -
 24
24 -
 25
25 -
 26
26 -
 27
27 -
 28
28 -
 29
29 -
 30
30 -
31
-
32
-
33
-
34
-
35
-
36
-
37
-
38
-
39
-
40
-
41
-
42
-
43
-
44
-
45
-
46
-
47
-
48
-
49
-
50
-
51
-
52
-
53
-
54
-
55
-
56
-
57
-
58
-
59
-
60
-
61
-
62
-
63
-
64
-
65
-
66
-
67
-
68
-
69
-
70
-
71
-
72
-
73
-
74
-
75
-
76
 |
 |