Canon MX310 MX310 series Quick Start Guide - Page 66
Print Head Cleaning, MAINTENANCE, CLEANING - ink absorber full
 |
UPC - 013803081282
View all Canon MX310 manuals
Add to My Manuals
Save this manual to your list of manuals |
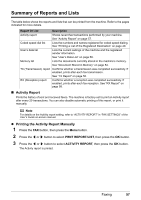
Page 66 highlights
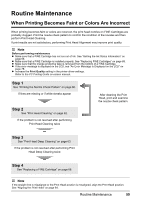
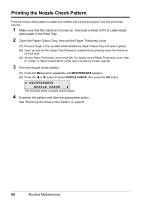
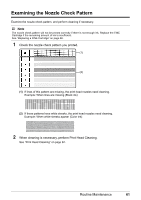
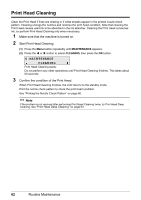
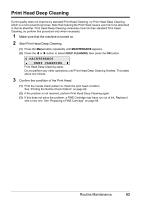
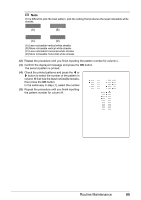
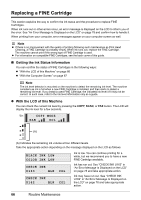
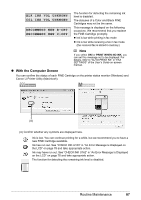
Print Head Cleaning Clean the Print Head if lines are missing or if white streaks appear in the printed nozzle check pattern. Cleaning unclogs the nozzles and restores the print head condition. Note that cleaning the Print Head causes used ink to be absorbed in the ink absorber. Cleaning the Print Head consumes ink, so perform Print Head Cleaning only when necessary. 1 Make sure that the machine is turned on. 2 Start Print Head Cleaning. (1) Press the Menu button repeatedly until MAINTENANCE appears. (2) Press the [ or ] button to select CLEANING, then press the OK button. 4.MAINTENANCE CLEANING Print Head Cleaning starts. Do not perform any other operations until Print Head Cleaning finishes. This takes about 50 seconds. 3 Confirm the condition of the Print Head. When Print Head Cleaning finishes, the LCD returns to the standby mode. Print the nozzle check pattern to check the print head condition. See "Printing the Nozzle Check Pattern" on page 60. Note If the problem is not resolved after performing Print Head Cleaning twice, try Print Head Deep Cleaning. See "Print Head Deep Cleaning" on page 63. 62 Routine Maintenance
-
 1
1 -
2
-
3
-
4
-
5
-
6
-
7
-
8
-
9
-
10
-
11
-
12
-
13
-
14
-
15
-
16
-
17
-
18
-
19
-
20
-
21
-
22
-
23
-
24
-
25
-
26
-
27
-
28
-
29
-
30
-
31
-
32
-
33
-
34
-
35
-
36
-
37
-
38
-
39
-
40
-
41
-
42
-
43
-
44
-
45
-
46
-
47
-
48
-
49
-
50
-
51
-
52
-
53
-
54
-
55
-
56
-
57
-
58
-
59
-
60
-
 61
61 -
 62
62 -
 63
63 -
 64
64 -
 65
65 -
 66
66 -
 67
67 -
 68
68 -
 69
69 -
 70
70 -
 71
71 -
72
-
73
-
74
-
75
-
76
-
77
-
78
-
79
-
80
-
81
-
82
-
83
-
84
-
85
-
86
-
87
-
88
-
89
-
90
-
91
-
92
-
93
-
94
-
95
-
96
-
97
-
98
-
99
-
100
-
101
-
102
-
103
-
104
-
105
-
106
-
107
-
108
-
109
-
110
-
111
-
112
-
113
-
114
-
115
-
116
-
117
-
118
-
119
-
120
-
121
-
122
-
123
-
124
 |
 |
