Canon PowerShot G5 X Mark II PowerShot G5X MarkII Advanced User Guide - Page 286
Using Optional Accessories
 |
View all Canon PowerShot G5 X Mark II manuals
Add to My Manuals
Save this manual to your list of manuals |
Page 286 highlights
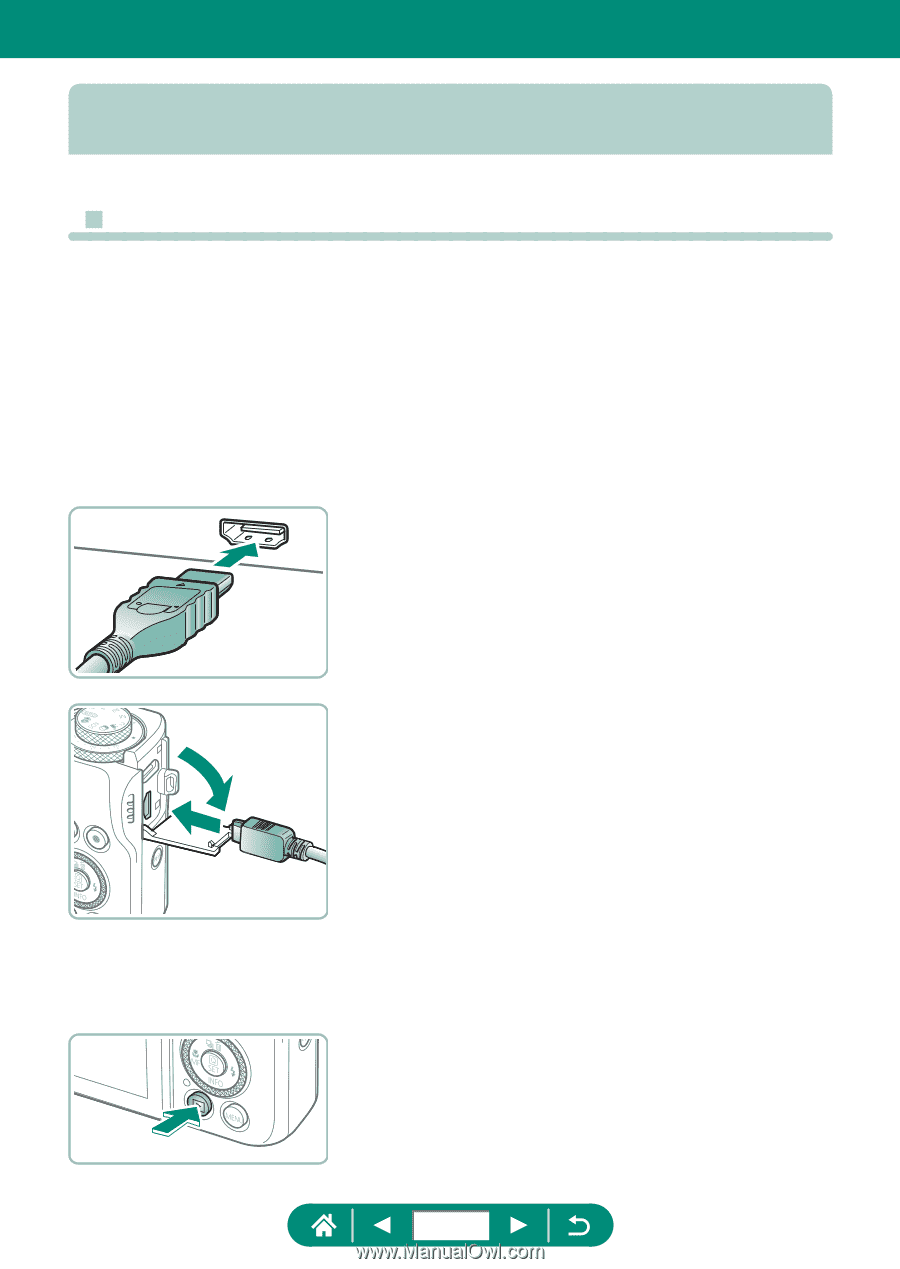
Using Optional Accessories zz Playback on a TV You can view your shots on a TV by connecting the camera to an HDTV with a commercially available HDMI cable (not exceeding 2.5 m / 8.2 ft., with a Type D terminal on the camera end). You can also shoot while previewing shots on the larger screen of the TV. For details on connection or how to switch inputs, refer to the TV manual. 1 Make sure the camera and TV are off. 2 Connect the camera to the TV. 3 Turn the TV on and switch TV input to the connected terminal. 4 Switch to playback. zz Images from the camera are now displayed on the TV. (Nothing is displayed on the camera screen.) 286
-
 1
1 -
2
-
3
-
4
-
5
-
6
-
7
-
8
-
9
-
10
-
11
-
12
-
13
-
14
-
15
-
16
-
17
-
18
-
19
-
20
-
21
-
22
-
23
-
24
-
25
-
26
-
27
-
28
-
29
-
30
-
31
-
32
-
33
-
34
-
35
-
36
-
37
-
38
-
39
-
40
-
41
-
42
-
43
-
44
-
45
-
46
-
47
-
48
-
49
-
50
-
51
-
52
-
53
-
54
-
55
-
56
-
57
-
58
-
59
-
60
-
61
-
62
-
63
-
64
-
65
-
66
-
67
-
68
-
69
-
70
-
71
-
72
-
73
-
74
-
75
-
76
-
77
-
78
-
79
-
80
-
81
-
82
-
83
-
84
-
85
-
86
-
87
-
88
-
89
-
90
-
91
-
92
-
93
-
94
-
95
-
96
-
97
-
98
-
99
-
100
-
101
-
102
-
103
-
104
-
105
-
106
-
107
-
108
-
109
-
110
-
111
-
112
-
113
-
114
-
115
-
116
-
117
-
118
-
119
-
120
-
121
-
122
-
123
-
124
-
125
-
126
-
127
-
128
-
129
-
130
-
131
-
132
-
133
-
134
-
135
-
136
-
137
-
138
-
139
-
140
-
141
-
142
-
143
-
144
-
145
-
146
-
147
-
148
-
149
-
150
-
151
-
152
-
153
-
154
-
155
-
156
-
157
-
158
-
159
-
160
-
161
-
162
-
163
-
164
-
165
-
166
-
167
-
168
-
169
-
170
-
171
-
172
-
173
-
174
-
175
-
176
-
177
-
178
-
179
-
180
-
181
-
182
-
183
-
184
-
185
-
186
-
187
-
188
-
189
-
190
-
191
-
192
-
193
-
194
-
195
-
196
-
197
-
198
-
199
-
200
-
201
-
202
-
203
-
204
-
205
-
206
-
207
-
208
-
209
-
210
-
211
-
212
-
213
-
214
-
215
-
216
-
217
-
218
-
219
-
220
-
221
-
222
-
223
-
224
-
225
-
226
-
227
-
228
-
229
-
230
-
231
-
232
-
233
-
234
-
235
-
236
-
237
-
238
-
239
-
240
-
241
-
242
-
243
-
244
-
245
-
246
-
247
-
248
-
249
-
250
-
251
-
252
-
253
-
254
-
255
-
256
-
257
-
258
-
259
-
260
-
261
-
262
-
263
-
264
-
265
-
266
-
267
-
268
-
269
-
270
-
271
-
272
-
273
-
274
-
275
-
276
-
277
-
278
-
279
-
280
-
 281
281 -
 282
282 -
 283
283 -
 284
284 -
 285
285 -
 286
286 -
 287
287 -
 288
288 -
 289
289 -
 290
290 -
 291
291 -
292
-
293
-
294
-
295
-
296
-
297
-
298
-
299
-
300
-
301
-
302
-
303
-
304
-
305
-
306
-
307
-
308
-
309
-
310
-
311
-
312
-
313
-
314
-
315
-
316
-
317
-
318
 |
 |
Using Optional Accessories
z
Playback on a TV
You can view your shots on a TV by connecting the camera to an HDTV
with a commercially available HDMI cable (not exceeding 2.5 m / 8.2 ft.,
with a Type D terminal on the camera end). You can also shoot while
previewing shots on the larger screen of the TV.
For details on connection or how to switch inputs, refer to the TV manual.
1
Make sure the camera and TV are
off.
2
Connect the camera to the TV.
3
Turn the TV on and switch TV input
to the connected terminal.
4
Switch to playback.
z
Images from the camera are now
displayed on the TV. (Nothing is
displayed on the camera screen.)
286