Canon PowerShot SX610 HS User Guide - Page 33
Movies, Still Images/Movies, Still Images
 |
View all Canon PowerShot SX610 HS manuals
Add to My Manuals
Save this manual to your list of manuals |
Page 33 highlights
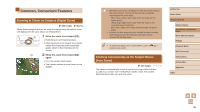
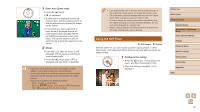
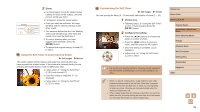
Still Images/Movies ●● If the camera is turned on while the [ ] button is held down, the camera will no longer sound. To activate sounds again, press the [ ] button and choose [Mute] on the [ ] tab, and then press the [ ][ ] buttons to choose [Off]. Still Images ●● A blinking [ ] icon warns that images are more likely to be blurred by camera shake. In this case, mount the camera on a tripod or take other measures to keep it still. ●● If your shots are dark despite the flash firing, move closer to the subject. For details on the flash range, see "Flash Range" (= 158). ●● The subject may be too close if the camera only beeps once when you press the shutter button halfway. For details on the range of focus (shooting range), see "Shooting Range" (= 158). ●● To reduce red-eye and to assist in focusing, the lamp may be lit when shooting in low-light conditions. ●● A blinking [ ] icon displayed when you attempt to shoot indicates that shooting is not possible until the flash has finished recharging. Shooting can resume as soon as the flash is ready, so either press the shutter button all the way down and wait, or release it and press it again. ●● Although you can shoot again before the shooting screen is displayed, your previous shot may determine the focus, brightness, and colors used. ●● You can change how long images are displayed after shots (= 46). Movies ●● Before shooting a movie, lower the flash with your finger. Be careful not to touch the microphone (1) when shooting a movie. Leaving the flash raised, or blocking the microphone may prevent audio from being recorded or may cause the recording to sound muffled. (1) ●● Avoid touching camera controls other than the movie button when shooting movies, because sounds made by the camera will be recorded. ●● Once movie recording begins, the image display area changes and subjects are enlarged to allow for correction of significant camera shake. To shoot subjects at the same size shown before shooting, adjust the image stabilization setting (=44). ●● Audio recording is monaural. Before Use Basic Guide Advanced Guide Camera Basics Auto Mode / Hybrid Auto Mode Other Shooting Modes P Mode Playback Mode Wi-Fi Functions Setting Menu Accessories Appendix Index 33
-
 1
1 -
2
-
3
-
4
-
5
-
6
-
7
-
8
-
9
-
10
-
11
-
12
-
13
-
14
-
15
-
16
-
17
-
18
-
19
-
20
-
21
-
22
-
23
-
24
-
25
-
26
-
27
-
 28
28 -
 29
29 -
 30
30 -
 31
31 -
 32
32 -
 33
33 -
 34
34 -
 35
35 -
 36
36 -
 37
37 -
 38
38 -
39
-
40
-
41
-
42
-
43
-
44
-
45
-
46
-
47
-
48
-
49
-
50
-
51
-
52
-
53
-
54
-
55
-
56
-
57
-
58
-
59
-
60
-
61
-
62
-
63
-
64
-
65
-
66
-
67
-
68
-
69
-
70
-
71
-
72
-
73
-
74
-
75
-
76
-
77
-
78
-
79
-
80
-
81
-
82
-
83
-
84
-
85
-
86
-
87
-
88
-
89
-
90
-
91
-
92
-
93
-
94
-
95
-
96
-
97
-
98
-
99
-
100
-
101
-
102
-
103
-
104
-
105
-
106
-
107
-
108
-
109
-
110
-
111
-
112
-
113
-
114
-
115
-
116
-
117
-
118
-
119
-
120
-
121
-
122
-
123
-
124
-
125
-
126
-
127
-
128
-
129
-
130
-
131
-
132
-
133
-
134
-
135
-
136
-
137
-
138
-
139
-
140
-
141
-
142
-
143
-
144
-
145
-
146
-
147
-
148
-
149
-
150
-
151
-
152
-
153
-
154
-
155
-
156
-
157
-
158
-
159
-
160
-
161
-
162
 |
 |
