Canon S330 S330 User's Guide - Page 45
Borderless Printing, Amount of Extension, Scale, Orientation, Custom, Paper Size, Utilities
 |
View all Canon S330 manuals
Add to My Manuals
Save this manual to your list of manuals |
Page 45 highlights
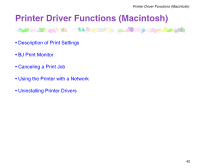
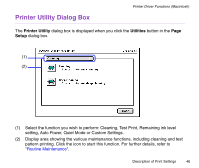
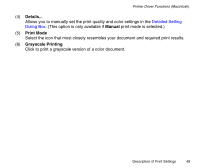
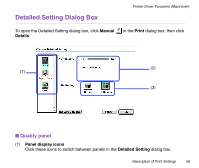
Printer Driver Functions (Macintosh) (3) Borderless Printing The image is printed on the entire paper surface, so that no margins are left on the four sides of the paper. The media types available for Borderless Printing are Photo Paper Pro, Glossy Photo Paper, Photo Paper Plus Glossy and Matte Photo Paper. For all other media types, the print quality may decrease if borderless printing is selected. (4) Amount of Extension When you select Borderless Printing, the sections that extend beyond the paper are not printed because the image is enlarged to a size slightly larger than the paper size. You can use the slider to adjust how much the image extends beyond the paper. It is recommended that you normally set the slider to the right end. If you move the slider to the left to reduce the extension amount, a border may appear. (5) Scale Specify the scaling percentage to resize the document for printing. (6) Orientation Select landscape or portrait printing. (7) Custom To specify a custom paper size, select Custom 1 to Custom 3 from the Paper Size pop-up menu (1), then click this button to open the Custom dialog box. In the Custom dialog box, specify the length and width of the paper. (8) Utilities Click to open the Printer Utility dialog box for maintenance operations such as print head cleaning and nozzle check pattern printing, as well as for changing the print mode. (9) Save Settings Saves the settings specified in the Page Setup dialog box. Description of Print Settings 45
-
 1
1 -
2
-
3
-
4
-
5
-
6
-
7
-
8
-
9
-
10
-
11
-
12
-
13
-
14
-
15
-
16
-
17
-
18
-
19
-
20
-
21
-
22
-
23
-
24
-
25
-
26
-
27
-
28
-
29
-
30
-
31
-
32
-
33
-
34
-
35
-
36
-
37
-
38
-
39
-
 40
40 -
 41
41 -
 42
42 -
 43
43 -
 44
44 -
 45
45 -
 46
46 -
 47
47 -
 48
48 -
 49
49 -
 50
50 -
51
-
52
-
53
-
54
-
55
-
56
-
57
-
58
-
59
-
60
-
61
-
62
-
63
-
64
-
65
-
66
-
67
-
68
-
69
-
70
-
71
-
72
-
73
-
74
-
75
-
76
-
77
-
78
-
79
-
80
-
81
-
82
-
83
-
84
-
85
-
86
-
87
-
88
-
89
-
90
-
91
-
92
-
93
-
94
-
95
-
96
-
97
-
98
-
99
-
100
-
101
-
102
-
103
-
104
-
105
-
106
-
107
-
108
-
109
-
110
-
111
-
112
-
113
-
114
-
115
-
116
-
117
-
118
-
119
-
120
-
121
-
122
-
123
-
124
-
125
-
126
-
127
-
128
-
129
-
130
-
131
-
132
-
133
-
134
-
135
-
136
-
137
-
138
-
139
-
140
-
141
-
142
-
143
-
144
-
145
-
146
-
147
-
148
-
149
-
150
-
151
-
152
-
153
-
154
-
155
-
156
-
157
-
158
-
159
-
160
-
161
-
162
-
163
-
164
-
165
-
166
-
167
-
168
-
169
-
170
-
171
-
172
-
173
-
174
-
175
-
176
-
177
-
178
-
179
-
180
-
181
-
182
-
183
-
184
-
185
-
186
-
187
-
188
-
189
-
190
-
191
-
192
-
193
-
194
-
195
-
196
-
197
-
198
-
199
 |
 |