Canon SD940 PowerShot SD940 IS / DIGITAL IXUS 120 IS Camera User Guide - Page 72
Adjusting the White Balance
 |
UPC - 013803114973
View all Canon SD940 manuals
Add to My Manuals
Save this manual to your list of manuals |
Page 72 highlights
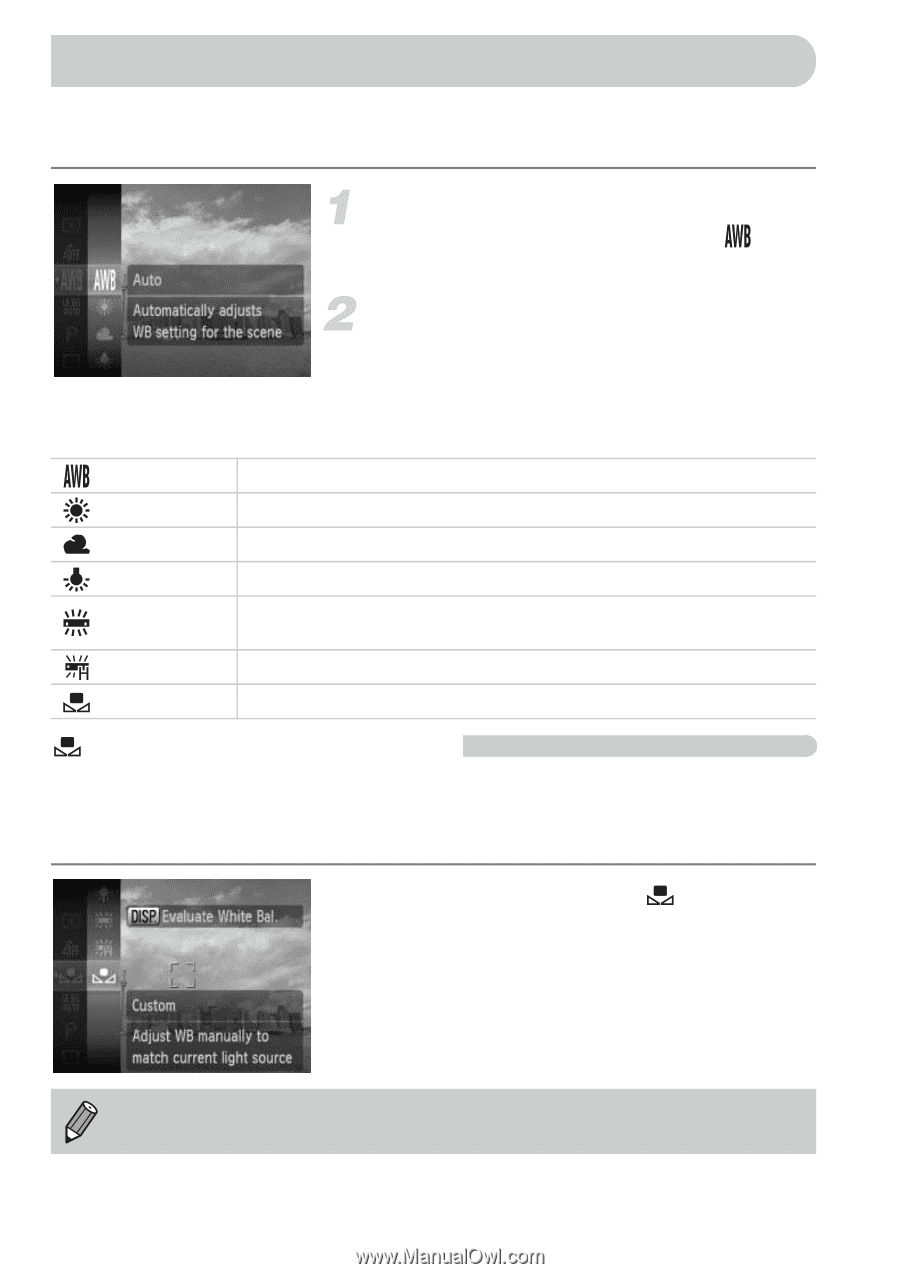
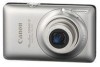
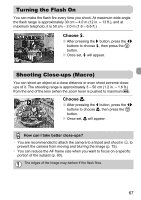
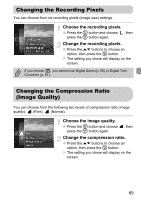
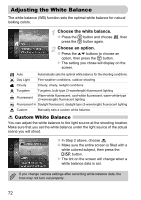
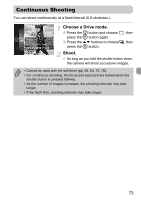
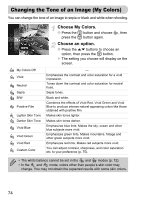
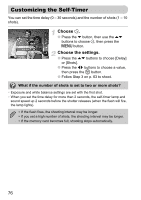
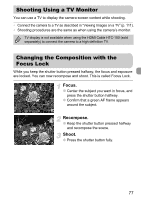
Adjusting the White Balance The white balance (WB) function sets the optimal white balance for natural looking colors. Choose the white balance. ● Press the m button and choose press the m button again. , then Choose an option. ● Press the op buttons to choose an option, then press the m button. X The setting you chose will display on the screen. Auto Automatically sets the optimal white balance for the shooting conditions. Day Light Fine weather conditions, outdoor shooting Cloudy Cloudy, shady, twilight conditions Tungsten Tungsten, bulb-type (3-wavelength) fluorescent lighting Fluorescent Warm-white fluorescent, cool-white fluorescent, warm-white-type (3-wavelength) fluorescent lighting Fluorescent H Daylight fluorescent, daylight-type (3-wavelength) fluorescent lighting Custom Manually sets a custom white balance. Custom White Balance You can adjust the white balance to the light source at the shooting location. Make sure that you set the white balance under the light source of the actual scene you will shoot. ● In Step 2 above, choose . ● Make sure the entire screen is filled with a white colored subject, then press the l button. X The tint on the screen will change when a white balance data is set. If you change camera settings after recording white balance data, the tone may not turn out properly. 72
-
 1
1 -
2
-
3
-
4
-
5
-
6
-
7
-
8
-
9
-
10
-
11
-
12
-
13
-
14
-
15
-
16
-
17
-
18
-
19
-
20
-
21
-
22
-
23
-
24
-
25
-
26
-
27
-
28
-
29
-
30
-
31
-
32
-
33
-
34
-
35
-
36
-
37
-
38
-
39
-
40
-
41
-
42
-
43
-
44
-
45
-
46
-
47
-
48
-
49
-
50
-
51
-
52
-
53
-
54
-
55
-
56
-
57
-
58
-
59
-
60
-
61
-
62
-
63
-
64
-
65
-
66
-
 67
67 -
 68
68 -
 69
69 -
 70
70 -
 71
71 -
 72
72 -
 73
73 -
 74
74 -
 75
75 -
 76
76 -
 77
77 -
78
-
79
-
80
-
81
-
82
-
83
-
84
-
85
-
86
-
87
-
88
-
89
-
90
-
91
-
92
-
93
-
94
-
95
-
96
-
97
-
98
-
99
-
100
-
101
-
102
-
103
-
104
-
105
-
106
-
107
-
108
-
109
-
110
-
111
-
112
-
113
-
114
-
115
-
116
-
117
-
118
-
119
-
120
-
121
-
122
-
123
-
124
-
125
-
126
-
127
-
128
-
129
-
130
-
131
-
132
-
133
-
134
-
135
-
136
-
137
-
138
-
139
-
140
-
141
-
142
-
143
-
144
-
145
-
146
-
147
-
148
-
149
-
150
-
151
-
152
-
153
-
154
-
155
-
156
-
157
-
158
-
159
-
160
-
161
-
162
-
163
-
164
 |
 |