Canon UHD DIGISUPER 90 manual for UJ27x6.5B - Page 40
How To Mount
 |
View all Canon UHD DIGISUPER 90 manuals
Add to My Manuals
Save this manual to your list of manuals |
Page 40 highlights
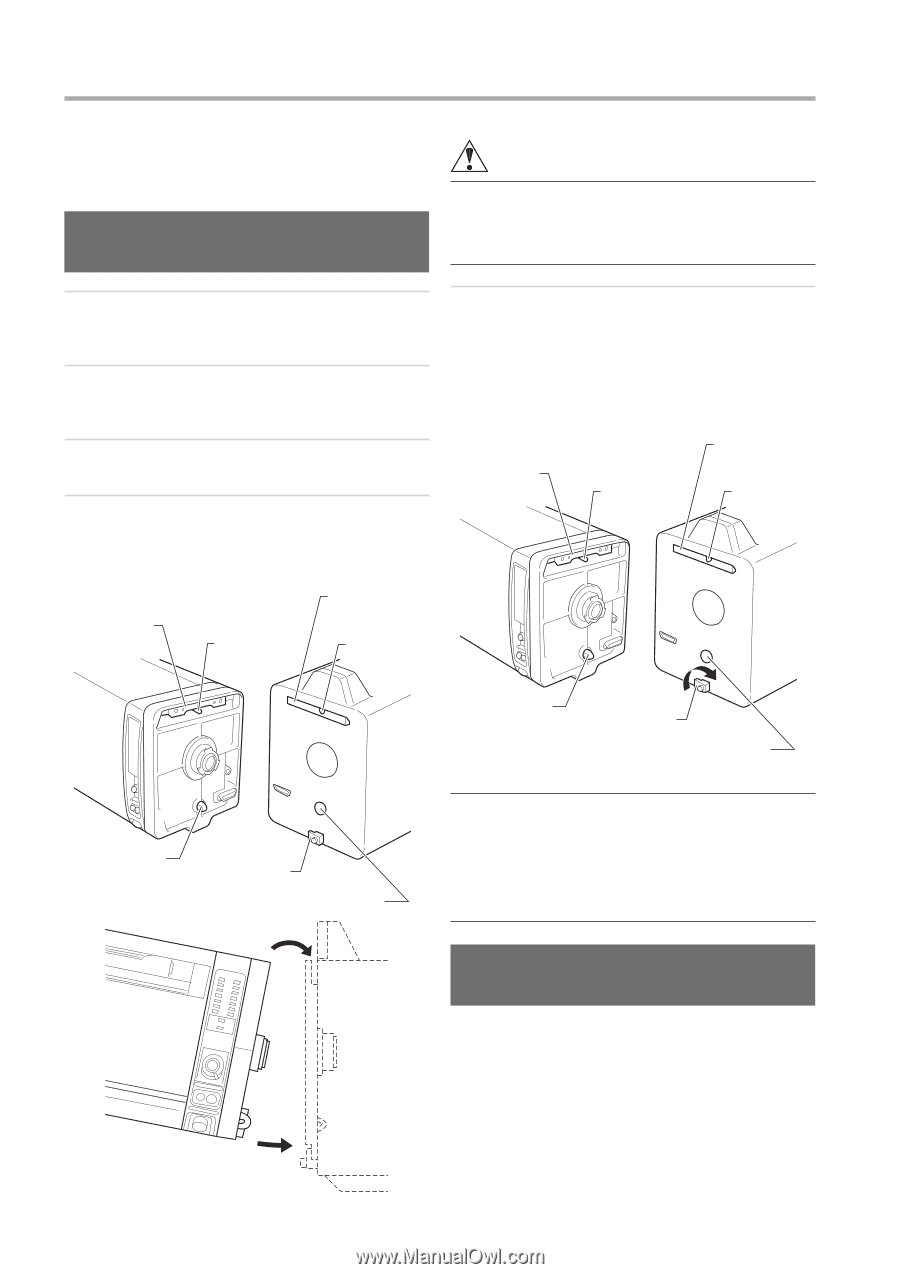
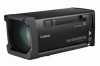
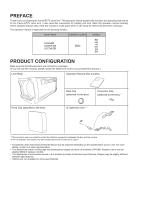
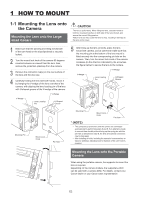
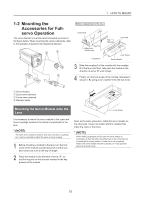
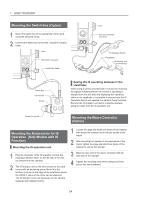
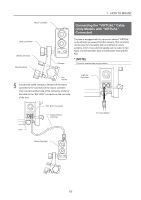
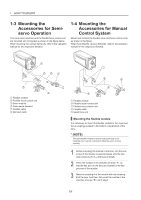
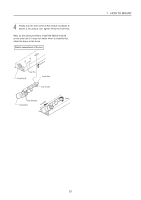
1 HOW TO MOUNT 1-1 Mounting the Lens onto the Camera Mounting the Lens onto the Largesized Camera CAUTION The lens is quite heavy. When lifting the lens, use both hands to hold two recessed handles on both side of the lens shroud, and assure the correct lifting posture. Failure to do so may cause the lens to drop, resulting in damage to the lens and/or injury. 1 Make sure that the panning and tilting mechanism of the cam head on the tripod/pedestal is securely locked. 2 Turn the mount lock knob of the camera 90 degrees counterclockwise as viewed from the lens. Also, remove the protection plate/cap from the camera. 3 Remove the connector cap(s) on the rear surface of the lens and the dust cap. 4 Carefully holding the lens with both hands, mount it by hanging the V-wedge of the lens over that of the camera, with aligning the lens locating pin of the lens with U-shaped groove of the V-wedge of the camera. V-Wedge V-Wedge Lens Locating Pin U-Shaped Groove 5 After lining up the lens correctly, press the lens toward the camera, and at same time make sure that the mounting pin at the bottom of the lens mount is fitted securely into the corresponding pin hole on the camera. Then, turn the mount lock knob of the camera clockwise (to the direction indicated by the arrow/see the figure below) to secure the lens to the camera. V-Wedge V-Wedge Lens Locating Pin U-Shaped Groove Mounting Pin Mount Lock Knob Pin Hole Mounting Pin Mount Lock Knob Pin Hole * (NOTE) • The connector(s) on the lens and the camera are connected automatically by performing steps 4 and 5. If an attempt is made to connect them forcibly without lining up the spring pin with the pin hole as described in step 5, the lens and camera connectors may be damaged. • After installing all units, including the operation's accessories, on tripod or pedestal, adjusting work for balance of the cam head is required. Mounting the Lens onto the Portable Camera When using the portable camera, the supporter to mount the lens is required. Depending on the camera models, the supporters which can be used with a camera differ. For details, contact your Canon dealer or your Canon sales representative. E2
-
 1
1 -
2
-
3
-
4
-
5
-
6
-
7
-
8
-
9
-
10
-
11
-
12
-
13
-
14
-
15
-
16
-
17
-
18
-
19
-
20
-
21
-
22
-
23
-
24
-
25
-
26
-
27
-
28
-
29
-
30
-
31
-
32
-
33
-
34
-
 35
35 -
 36
36 -
 37
37 -
 38
38 -
 39
39 -
 40
40 -
 41
41 -
 42
42 -
 43
43 -
 44
44 -
 45
45 -
46
-
47
-
48
-
49
-
50
-
51
-
52
-
53
-
54
-
55
-
56
-
57
-
58
-
59
-
60
-
61
-
62
-
63
-
64
-
65
-
66
-
67
-
68
-
69
-
70
-
71
-
72
-
73
-
74
-
75
-
76
-
77
-
78
-
79
-
80
-
81
-
82
-
83
-
84
-
85
-
86
-
87
-
88
-
89
-
90
-
91
-
92
-
93
-
94
-
95
-
96
-
97
-
98
-
99
-
100
-
101
-
102
-
103
-
104
-
105
-
106
-
107
-
108
-
109
-
110
-
111
-
112
-
113
-
114
-
115
-
116
-
117
-
118
-
119
-
120
-
121
-
122
-
123
-
124
-
125
-
126
-
127
-
128
-
129
-
130
-
131
-
132
-
133
-
134
-
135
-
136
-
137
-
138
-
139
-
140
-
141
-
142
-
143
-
144
 |
 |