Canon VB-S800D User Manual - Page 39
Host Name Registration with DDN, erver Address DHCP]
 |
View all Canon VB-S800D manuals
Add to My Manuals
Save this manual to your list of manuals |
Page 39 highlights
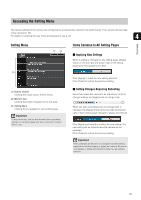
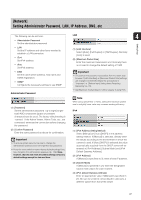
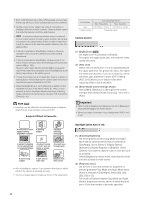
[Network] Setting Administrator Password, LAN, IP Address, DNS, etc (3) [Name Server Address (DHCP)] Select [Use DHCP] or [Use DHCP/DHCPv6] in [AutoSetting of Name Server Address] to display the name server address acquired from the DHCP server. (1) [SNMP] Set SNMP use to [Disable] or [Enable]. Camera information can be referenced by the SNMP Manager if [Enable] is specified. (4) [Name Server Address (DHCPv6)] (2) [Community Name] Select [Use DHCPv6] or [Use DHCP/DHCPv6] in [Auto-Setting of Name Server Address] to display the Set a community name for SNMP. It is recommended that you change the community name to ensure 4 name server address acquired from the DHCPv6 system security. Setting Page server. (3) [Administrator Contact Information] (5) [Host Name] Set contact information (e-mail address, etc.) for the You can register the host name of the camera in the Administrator of the camera. Setting information can name server. be referenced by the SNMP manager. Characters A to Z, a to z, 0 to 9, "-" (hyphen), "_" (underscore) and "." (period) may be used up to 63 (single-byte) characters in length. (4) [Administration Function Name] Set the camera name used for administration. Setting information can be referenced by the SNMP manager. (6) [Host Name Registration with DDNS] If left blank, the following will be used by default: Select [Enable] to register the entered name server VB-S30D address and host name of the camera. VB-S31D (7) [Search Domain] Specify the host name, without specifying a domain VB-S800D VB-S900F name, for a server, such as the upload server, to (5) [Installation Location] search domains in the form "host name + domain Set information regarding the installation location of name", where the domain names are specified in the this camera. Setting information can be referenced by server domain list. Enter a domain name and click the SNMP manager. [Add] to add the domain name to the search domain list. Note (8) [Search Domain List] A list of domain names added using [Search Domain] appears. The function queries DNS server for each domain name starting from the top of the list. • The information set in the camera is read-only from the SNMP manager. • Use the SNMP Manager that supports SNMP MIB2 (supporting RFC1213). Use the ▲▼ buttons on the right to change the order of the domain names. • Supports SNMP protocol versions v1 and v2c (v3 unsupported). To delete a domain name, select one from the list and then click [Delete]. Important Do not use "_" (underscore) in [Host Name] and [Search Domain] in Internet Explorer 8/9/10/11. Note • Use [Host Name Registration with DDNS] if the camera IP Address Setting Method is [Auto (DHCP)] (p. 37). DNS server registration settings must be set in advance. Contact your System Administrator for the DNS server settings. • If the name server address 1 is unavailable, the name server address 2 will be accessed. However, the name server address 2 must be set in advance. SNMP 39
-
 1
1 -
2
-
3
-
4
-
5
-
6
-
7
-
8
-
9
-
10
-
11
-
12
-
13
-
14
-
15
-
16
-
17
-
18
-
19
-
20
-
21
-
22
-
23
-
24
-
25
-
26
-
27
-
28
-
29
-
30
-
31
-
32
-
33
-
 34
34 -
 35
35 -
 36
36 -
 37
37 -
 38
38 -
 39
39 -
 40
40 -
 41
41 -
 42
42 -
 43
43 -
 44
44 -
45
-
46
-
47
-
48
-
49
-
50
-
51
-
52
-
53
-
54
-
55
-
56
-
57
-
58
-
59
-
60
-
61
-
62
-
63
-
64
-
65
-
66
-
67
-
68
-
69
-
70
-
71
-
72
-
73
-
74
-
75
-
76
-
77
-
78
-
79
-
80
-
81
-
82
-
83
-
84
-
85
-
86
-
87
-
88
-
89
-
90
-
91
-
92
-
93
-
94
-
95
-
96
-
97
-
98
-
99
-
100
-
101
-
102
-
103
-
104
-
105
-
106
-
107
-
108
-
109
-
110
-
111
-
112
-
113
-
114
-
115
-
116
-
117
-
118
-
119
-
120
-
121
-
122
-
123
-
124
-
125
-
126
-
127
-
128
-
129
-
130
-
131
-
132
-
133
-
134
-
135
-
136
-
137
-
138
-
139
-
140
-
141
-
142
-
143
-
144
-
145
-
146
-
147
-
148
-
149
-
150
-
151
-
152
-
153
-
154
-
155
-
156
-
157
-
158
-
159
-
160
-
161
-
162
-
163
-
164
-
165
-
166
-
167
-
168
-
169
-
170
-
171
-
172
-
173
-
174
-
175
-
176
 |
 |