Canon imageCLASS MF4450 imageCLASS D550 Basic Operation Guide - Page 71
Cleaning the Fixing Unit, Maintenance>, and then press [OK].
 |
View all Canon imageCLASS MF4450 manuals
Add to My Manuals
Save this manual to your list of manuals |
Page 71 highlights
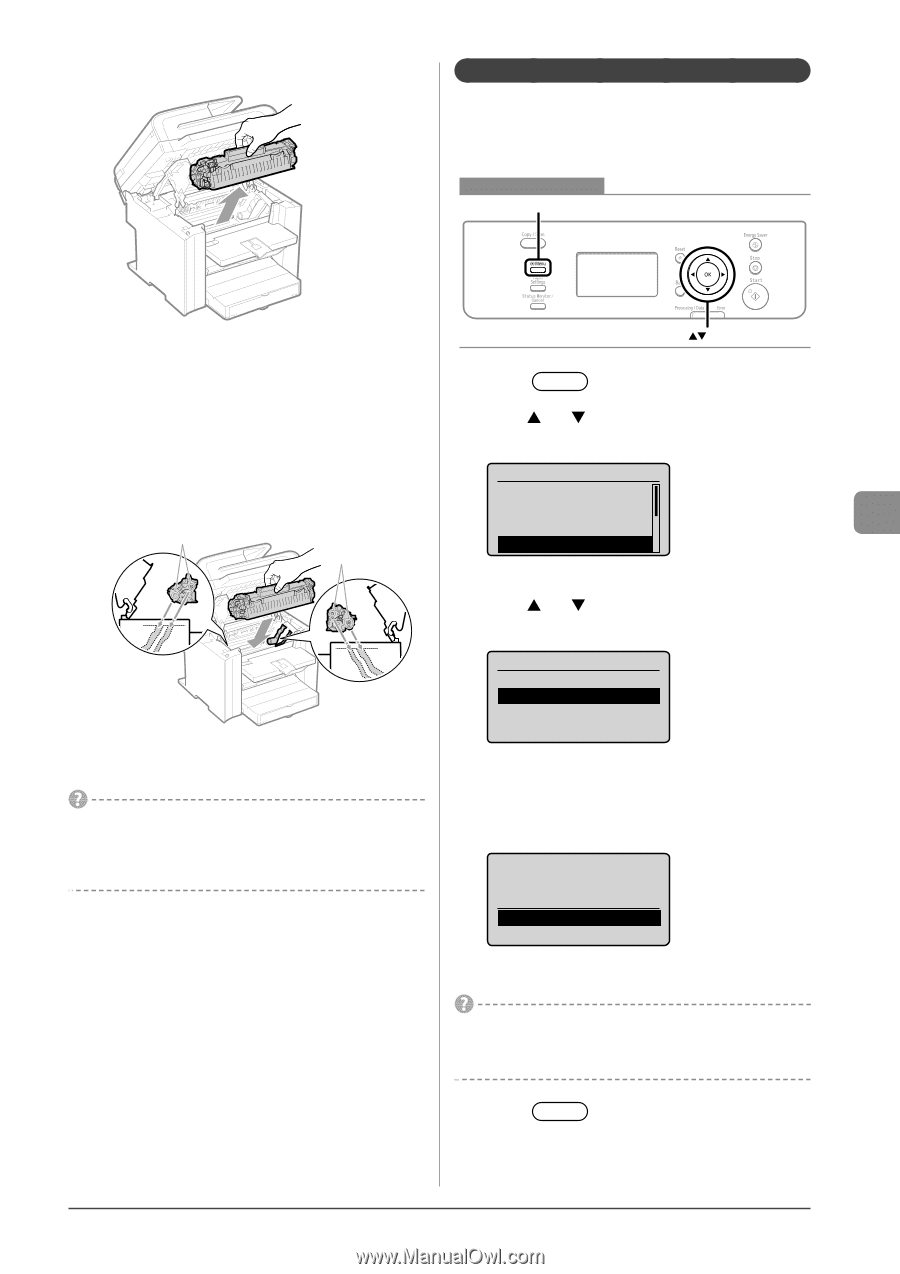
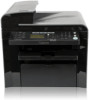
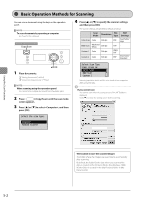
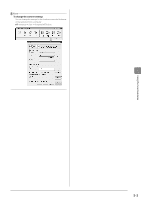
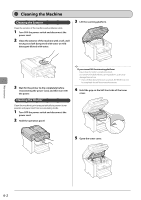
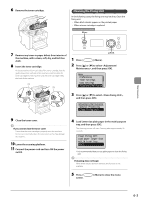
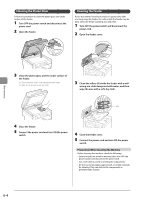
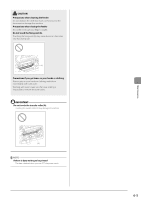
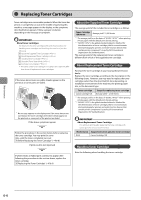
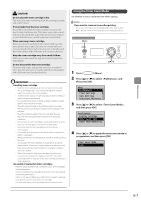
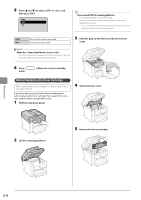
6 Remove the toner cartridge. Cleaning the Fixing Unit In the following cases, the fixing unit may be dirty. Clean the fixing unit. • When black streaks appear on the printed paper • When a toner cartridge is replaced Keys to be used for this operation Menu Maintenance 7 Remove any toner or paper debris from interior of the machine, with a clean, soft, dry, and lint-free cloth. 8 Insert the toner cartridge. Fit the protrusions (A) on each side of the toner cartridge into the guides located on each side of the machine, and then slide the toner cartridge into the machine until the toner cartridge meets the back of the machine. (A) (A) OK 1 Press [ ] (Menu). 2 Press [ ] or [ ] to select , and then press [OK]. Menu Preferences Timer Settings Copy Settings Adjustment/Maintenan 3 Press [ ] or [ ] to select , and then press [OK]. Adjustment/Maintenance Special Processing Clean Fixing Unit 9 Close the toner cover. If you cannot close the toner cover Ensure that the toner cartridge is properly set in the machine. Do not try to forcefully close the toner cover, as this may damage the machine. 10 Lower the scanning platform. 11 Connect the power cord and turn ON the power switch. 4 Load Letter size plain paper in the multi-purpose tray, and then press [OK]. The cleaning process will start. Cleaning takes approximately 90 seconds. Clean Fixing Unit Load paper larger than A4/LTR in MP Tray. Start * It is recommended that you use plain paper to clean the fixing unit. If cleaning does not begin When there are jobs stored in memory, this function is not available. 5 Press [ screen. ] (Menu) to close the menu 6-3
-
 1
1 -
2
-
3
-
4
-
5
-
6
-
7
-
8
-
9
-
10
-
11
-
12
-
13
-
14
-
15
-
16
-
17
-
18
-
19
-
20
-
21
-
22
-
23
-
24
-
25
-
26
-
27
-
28
-
29
-
30
-
31
-
32
-
33
-
34
-
35
-
36
-
37
-
38
-
39
-
40
-
41
-
42
-
43
-
44
-
45
-
46
-
47
-
48
-
49
-
50
-
51
-
52
-
53
-
54
-
55
-
56
-
57
-
58
-
59
-
60
-
61
-
62
-
63
-
64
-
65
-
 66
66 -
 67
67 -
 68
68 -
 69
69 -
 70
70 -
 71
71 -
 72
72 -
 73
73 -
 74
74 -
 75
75 -
 76
76 -
77
-
78
-
79
-
80
-
81
-
82
-
83
-
84
-
85
-
86
-
87
-
88
-
89
-
90
-
91
-
92
-
93
-
94
-
95
-
96
-
97
-
98
-
99
-
100
-
101
-
102
-
103
-
104
-
105
-
106
-
107
-
108
-
109
-
110
-
111
-
112
-
113
-
114
-
115
-
116
 |
 |