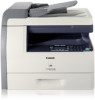
Canon imageCLASS MF6530 imageCLASS MF6500 Series Basic Guide
Canon imageCLASS MF6530 Manual
 |
View all Canon imageCLASS MF6530 manuals
Add to My Manuals
Save this manual to your list of manuals |
Canon imageCLASS MF6530 manual content summary:
- Canon imageCLASS MF6530 | imageCLASS MF6500 Series Basic Guide - Page 1
/MF6560/ MF6580 Only) Receiving Faxes (MF6550/MF6560/ MF6580 Only) Copying Printing Scanning PC Faxing (MF6550/MF6560/ MF6580 Only) Remote UI (MF6580 Only) Maintenance Troubleshooting Machine Settings Appendix Please read this guide before operating this equipment. After you finish reading this - Canon imageCLASS MF6530 | imageCLASS MF6500 Series Basic Guide - Page 2
- Canon imageCLASS MF6530 | imageCLASS MF6500 Series Basic Guide - Page 3
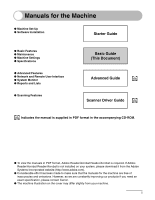
● Software Installation Starter Guide ● Basic Features ● Maintenance ● Machine Settings ● Specifications ● Advanced Features ● Network and Remote User Interface ● System Monitor ● Reports and Lists ● Scanning Features Basic Guide (This Document) Advanced Guide CD-ROM Scanner Driver Guide CD - Canon imageCLASS MF6530 | imageCLASS MF6500 Series Basic Guide - Page 4
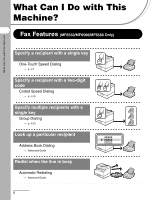
What Can I Do with This Machine? Specify a recipient with a single key One-Touch Speed Dialing → p. 4-7 Specify a recipient with a two-digit code Coded Speed Dialing → p. 4-15 Specify multiple recipients with a single key Group Dialing → p. 4-23 Look up a particular recipient Address Book Dialing - Canon imageCLASS MF6530 | imageCLASS MF6500 Series Basic Guide - Page 5
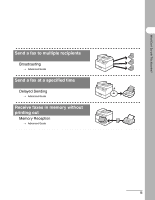
What Can I Do with This Machine? Send a fax to multiple recipients Broadcasting → Advanced Guide Send a fax at a specified time Delayed Sending → Advanced Guide Receive faxes in memory without printing out Memory Reception → Advanced Guide iii - Canon imageCLASS MF6530 | imageCLASS MF6500 Series Basic Guide - Page 6
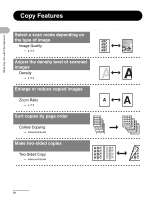
images Density → p. 6-4 Enlarge or reduce copied images Zoom Ratio A → p. 6-6 Sort copies by page order Collate Copying → Advanced Guide Make two-sided copies Two-Sided Copy → Advanced Guide AAAA ABABABAB ABACBACBACBC ABBACCCBB1ADDDCCC2BBADDDCCCBBDDDCCCDDD DD3 DD 4 ABC ABC ABC ABC 1 DEF DEF - Canon imageCLASS MF6530 | imageCLASS MF6500 Series Basic Guide - Page 7
What Can I Do with This Machine? Copy two documents on one sheet 2 on 1 Combination → Advanced Guide ABC A A A BBBDDD1 CCCEEE F F F DEF 2 DDEDEFAAAEFFBBB C C C ABC 1 ABC DEF ABC DEF ABC DEF ABC DEF 1 2 v - Canon imageCLASS MF6530 | imageCLASS MF6500 Series Basic Guide - Page 8
What Can I Do with This Machine? Printer Feature Print a document from a PC Printing → Online help DDEDFEFAAAEFBBBCCC A BC 1 Scanner Feature Specify detailed scanning options to suit various images Scanning → Scanner Driver Guide DDEDFEFAAAEFBBBCCC ABC 1 vi - Canon imageCLASS MF6530 | imageCLASS MF6500 Series Basic Guide - Page 9
What Can I Do with This Machine? PC Fax Feature (MF6550/MF6560/MF6580 Only) Send a fax from a PC PC Faxing → Online help Remote UI Feature (MF6580 Only) Access and manage the machine from a PC Remote UI → Advanced Guide vii - Canon imageCLASS MF6530 | imageCLASS MF6500 Series Basic Guide - Page 10
viii Preface xiii Important Safety Instructions xiii Handling and Maintenance xiii Location xiv Power Supply xv Customer Support (U.S.A xvi Customer Support (Canada xvi How to Use This Guide xvii Symbols Used in This Manual xvii Illustrations Used in This Manual xviii Legal Notices xix - Canon imageCLASS MF6530 | imageCLASS MF6500 Series Basic Guide - Page 11
Notice xxvii Laser Safety xxix CDRH Regulations xxix 1 Before Using the Machine 1-1 Machine Components 1-1 Operation Panel 1-3 Main Operation Panel 1-3 Facsimile Operation Panel (MF6550/MF6560/MF6580 Only 1-5 LCD (Standby Mode 1-6 Copy Mode 1-6 Fax Mode 1-6 Scan Mode 1-6 Toner Cartridge - Canon imageCLASS MF6530 | imageCLASS MF6500 Series Basic Guide - Page 12
What Can I Do with This Machine? 3 Print Media 3-1 Paper Requirements 3-1 Printable Area 3-3 Paper Guidelines 3-4 Loading Paper 3-5 In the Multi-Purpose Tray (e.g., Envelopes 3-5 Setting Paper Type and Size 3-8 For the Paper Cassette 3-8 For the Multi-Purpose Tray 3-11 4 Sending Faxes ( - Canon imageCLASS MF6530 | imageCLASS MF6500 Series Basic Guide - Page 13
Toner Cartridge 11-12 Recycling Used Cartridges 11-16 The Clean Earth Campaign 11-16 U.S.A. PROGRAM 11-17 CANADA PROGRAM-CANADA PROGRAMME ......11-20 Transporting the Machine 11-22 12 Troubleshooting 12-1 Clearing Jams 12-1 Document Jams 12-1 Paper Jams 12-3 LCD Messages 12-6 Error Codes - Canon imageCLASS MF6530 | imageCLASS MF6500 Series Basic Guide - Page 14
-10 FAX SETTINGS (MF6550/MF6560/MF6580 Only 13-12 ADDRESS BOOK SET. (MF6550/MF6560/MF6580 Only 13-18 PRINTER SETTINGS 13-20 TIMER SETTINGS 13-24 ADJUST./CLEANING 13-26 REPORT SETTINGS 13-28 SYSTEM SETTINGS 13-30 14 Appendix 14-1 Specifications 14-1 General 14-1 Copier 14-2 Printer - Canon imageCLASS MF6530 | imageCLASS MF6500 Series Basic Guide - Page 15
moving or cleaning it. - To avoid paper jams, never unplug the power cord, open the left cover, or add or remove paper in the machine while printing. - When transporting the machine, be sure to remove the toner cartridge from the machine. - Place the toner cartridge in its original protective bag or - Canon imageCLASS MF6530 | imageCLASS MF6500 Series Basic Guide - Page 16
servicing. Location - Place the machine on a flat, stable, vibration-free surface that is strong enough to support you have to place the machine near a window, install heavy curtains or blinds. - Do not easy connection of the telephone line cord, and to avoid the expense of installing a new outlet. - Canon imageCLASS MF6530 | imageCLASS MF6500 Series Basic Guide - Page 17
surface. Do not place the machine in a cupboard or built-in installation, or near a radiator or other heat source unless proper ventilation is provided odors, noises) around the machine, unplug the power cord immediately. Contact Canon Customer Care Center. - Do not allow anything to rest on the - Canon imageCLASS MF6530 | imageCLASS MF6500 Series Basic Guide - Page 18
the website http://www.canontechsupport.com/ Customer Support (Canada) Canon Canada Inc., offers a full range of customer technical support options*: - For step-by-step troubleshooting, e-mail technical support, the latest driver or document downloads, and answers to frequently asked questions visit - Canon imageCLASS MF6530 | imageCLASS MF6500 Series Basic Guide - Page 19
This Machine? How to Use This Guide Symbols Used in This Manual The following symbols are used throughout the manuals for the machine and indicate the restrictions and how to avoid minor difficulties. In addition, this guide uses distinctive notations to identify keys and information in the LCD: - Canon imageCLASS MF6530 | imageCLASS MF6500 Series Basic Guide - Page 20
are those taken when no optional equipment is attached to the imageCLASS MF6550. The model imageCLASS MF6550 is used for illustration purposes in this manual. When there is any difference among MF6530, MF6531, MF6550, MF6560, MF6580, it is clearly indicated in the text, e.g., "MF6580 Only." xviii - Canon imageCLASS MF6530 | imageCLASS MF6500 Series Basic Guide - Page 21
? Legal Notices Copyright Copyright © 2006 by Canon Inc. All rights reserved. No part of this publication may be reproduced, transmitted, manual, or otherwise, without the prior written permission of Canon Inc. Disclaimer The information in this document is subject to change without notice. CANON - Canon imageCLASS MF6530 | imageCLASS MF6500 Series Basic Guide - Page 22
list is intended to be a guide only. If you are uncertain about the legality of using your product to scan, print or otherwise reproduce any particular Papers uncanceled) - Identifying Badges or Insignias - Internal Revenue Stamps (canceled or uncanceled) - Selective Service or Draft Papers - Canon imageCLASS MF6530 | imageCLASS MF6500 Series Basic Guide - Page 23
Canon, the Canon logo and imageCLASS are trademarks of Canon Inc. All other product and brand names are registered trademarks, trademarks or service marks of their respective owners. As an ENERGY STAR® Partner, Canon as computers, displays, printers, facsimiles, and copiers. Their standards and logos - Canon imageCLASS MF6530 | imageCLASS MF6500 Series Basic Guide - Page 24
with This Machine? Users in the U.S.A. Pre-Installation Requirements for Canon Facsimile Equipment A. Location Supply a suitable table, codes, which may cause a fax error. This machine is not supported on Voice Over Internet Protocol (VOIP). C. Power Requirements This equipment should be connected - Canon imageCLASS MF6530 | imageCLASS MF6500 Series Basic Guide - Page 25
and modular jack are provided with this equipment. This equipment is designed to be connected to the telephone network or premises wiring using a compatible modular jack which is Part 68 compliant. See the Starter Guide for details. The Ringer Equivalence Number (REN) is used to determine the number - Canon imageCLASS MF6530 | imageCLASS MF6500 Series Basic Guide - Page 26
What Can I Do with This Machine? FCC Notice imageCLASS MF6530: Model F189100 imageCLASS MF6531: Model F189100 imageCLASS MF6550: Model F189102 imageCLASS MF6560: Model F189102 imageCLASS MF6580: Model F189102 This device complies with Part 15 of the FCC Rules. Operation is subject to the following - Canon imageCLASS MF6530 | imageCLASS MF6500 Series Basic Guide - Page 27
unless such message clearly contains in a margin at the top or bottom of each transmitted page or on the first page of the transmission, the date and time it is sent and an identification of the order to program this information into the machine, follow the instructions in the Starter Guide. xxv - Canon imageCLASS MF6530 | imageCLASS MF6500 Series Basic Guide - Page 28
code), which should be installed by the telephone company. If the CA11A jack is not present, installation COMMUNICATE OVERSEAS NOTE Canon recommends an error. C. Power Requirements The power outlet should be a three-prong grounded receptacle (Single or Duplex). It should be independent from copiers - Canon imageCLASS MF6530 | imageCLASS MF6500 Series Basic Guide - Page 29
of the local telecommunications company. The equipment must also be installed using an acceptable method of connection. The customer should be aware that compliance with the above conditions may not prevent degradation of service in some situations. Repairs to certified equipment should be - Canon imageCLASS MF6530 | imageCLASS MF6500 Series Basic Guide - Page 30
terminal equipment provides an indication of the maximum number of terminals allowed to be connected to a telephone interface. The termination on an interface may consist of any tous les appareils ne soit pas supérieure à 5. CANON CANADA INC. 1-800-263-1121 24 HOURS A DAY, SEVEN DAYS A WEEK xxviii - Canon imageCLASS MF6530 | imageCLASS MF6500 Series Basic Guide - Page 31
1 Subchapter J as a Class 1 laser product under the U.S. Department of Health and Human Services (DHHS) Radiation Performance Standard according to than those specified in this manual may result in hazardous radiation exposure. The label is attached to the laser scanner machine inside the machine - Canon imageCLASS MF6530 | imageCLASS MF6500 Series Basic Guide - Page 32
the scanning area. B Slide guides Adjusts to the width of the document. C Document feeder tray Holds documents. D Document delivery tray Receives documents. E Paper delivery tray Receives copies, prints and faxes. F Paper stopper Prevents the paper from falling off the paper delivery tray. Open the - Canon imageCLASS MF6530 | imageCLASS MF6500 Series Basic Guide - Page 33
toner cartridge or clearing paper jams. J Scanning area Scans documents from the ADF. K Platen glass cover Open this cover when placing a document on the platen glass. L Platen glass Place documents. M Multi-purpose tray Feeds non-standard size or thick/thin type paper stacks. N Slide guides - Canon imageCLASS MF6530 | imageCLASS MF6500 Series Basic Guide - Page 34
/OFF Stop Start Processing/ Data Error Power dc b a Z YXW V U T SR A Paper Select indicator Indicates the selected paper source. * The number of paper sources varies depending on the model used. B Jam Location indicator Indicates the location of paper jams. C LCD display Displays messages - Canon imageCLASS MF6530 | imageCLASS MF6500 Series Basic Guide - Page 35
. ● MF6530/MF6531 A B C D E G H IJ K L M NO P Q COPY SCAN System View Monitor Settings Clear 123C ON/OFF Reset Collate 456 Stop Start Paper Select Additional 2 on 1 OK Functions 789 Frame Erase Image Quality Density Enlarge/Reduce Two-Sided 0 # Processing/ Data Error Power dc - Canon imageCLASS MF6530 | imageCLASS MF6500 Series Basic Guide - Page 36
TX Pause Hook Redial Dial Book 01 02 03 04 05 06 07 08 09 10 11 12 CO Paper Select Image Quality G H G A Direct TX key Press to set Direct Sending. E Coded Dial key Press to perform coded speed dialing. B Pause key F Address Book key Inserts a pause when entering a fax number - Canon imageCLASS MF6530 | imageCLASS MF6500 Series Basic Guide - Page 37
Before Using the Machine LCD (Standby Mode) Copy Mode ● Without optional cassette A B C 100% LTR A TEXT O1 D E A Zoom ratio B Paper size C Quantity D Density E Image quality Fax Mode* A 12/31/2006 SUN 10:50 FaxOnly FINE B C A Date & Time B Receive mode C Image quality * MF6550/ - Canon imageCLASS MF6530 | imageCLASS MF6500 Series Basic Guide - Page 38
Machine Toner Cartridge The lifetime of the Canon Genuine starter toner cartridge which comes with the machine is approximately 2,500 pages, the Canon genuine replacement toner cartridge is approximately 5,000 pages. The page counts are on the basis of "ISO/ IEC 19752"* when printing A4 size paper - Canon imageCLASS MF6530 | imageCLASS MF6500 Series Basic Guide - Page 39
● Do not open the drum protective shutter on the toner cartridge. Print quality may deteriorate if the drum surface is exposed to light or is damaged. ● Always hold the toner cartridge by its handle to avoid touching the drum protective shutter. ● Do not stand the toner cartridge on end, and do - Canon imageCLASS MF6530 | imageCLASS MF6500 Series Basic Guide - Page 40
@./ 1 ABC 2 DEF 3 Reset Collate GHI 4 JKL MNO 56 Paper Select Additional 2 on 1 PQRS TUV WXYZ OK Functions 789 Frame Erase /Reduce Two-Sided SYMBOLS 0# Tone Clear C ON/OFF Stop Start Processing/ Data Error Power 1 Press [Additional Functions]. 2 Press [ ] or [ ] to select - Canon imageCLASS MF6530 | imageCLASS MF6500 Series Basic Guide - Page 41
/OFF 123C Reset Collate GHI JKL MNO Stop 6 456 Start Paper Select Additional 2 on 1 PQRS TUV WXYZ OK Functions 789 Frame Erase Image Quality Density Enlarge/Reduce Two-Sided Tone SYMBOLS 0# Processing/ Data Error Power 4 Confirm that is displayed, then press [OK]. 5 Press - Canon imageCLASS MF6530 | imageCLASS MF6500 Series Basic Guide - Page 42
Sleep mode, press [ON/OFF] on the operation panel. - To enter Sleep mode manually, press [ON/OFF] on the operation panel. - The machine will not enter Sleep mode when: • the machine is in operation • a system error occurs • the handset of the external telephone is off the hook* - The machine will - Canon imageCLASS MF6530 | imageCLASS MF6500 Series Basic Guide - Page 43
certain period of time, the display returns to standby mode (Auto Clear function). 1 2 ded Address 3 Reset Collate GHI 4 JKL MNO 56 Paper Select Additional 2 on 1 PQRS TUV WXYZ Tone Clear C ON/OFF Stop Start Processing/ Data Error Power 1 Press [Additional Functions]. 2 Press [ - Canon imageCLASS MF6530 | imageCLASS MF6500 Series Basic Guide - Page 44
/OFF 123C Reset Collate GHI JKL MNO Stop 6 456 Start Paper Select Additional 2 on 1 PQRS TUV WXYZ OK Functions 789 Frame Erase Image Quality Density Enlarge/Reduce Two-Sided Tone SYMBOLS 0# Processing/ Data Error Power 4 Confirm that is displayed, then press [OK]. 5 Press - Canon imageCLASS MF6530 | imageCLASS MF6500 Series Basic Guide - Page 45
Settings @./ 1 ABC 2 DEF 3 Reset Collate GHI 4 JKL MNO 56 Paper Select Additional 2 on 1 PQRS TUV WXYZ OK Functions 789 Frame Erase Reduce Two-Sided SYMBOLS 0# Tone Clear C ON/OFF Stop Start Processing/ Data Error Power 1 Press [Additional Functions]. 2 Press [ ] or [ ] to - Canon imageCLASS MF6530 | imageCLASS MF6500 Series Basic Guide - Page 46
@./ 1 ABC 2 DEF 3 Reset Collate GHI 4 JKL MNO 56 Paper Select Additional 2 on 1 PQRS TUV WXYZ OK Functions 789 Frame Erase Reduce Two-Sided SYMBOLS 0# Tone Clear C ON/OFF Stop Start Processing/ Data Error Power 6 Confirm that is displayed, then press [OK]. 7 Press - Canon imageCLASS MF6530 | imageCLASS MF6500 Series Basic Guide - Page 47
2 DEF 3 Reset Collate GHI 4 JKL MNO 56 Paper Select Additional 2 on 1 PQRS TUV WXYZ OK Functions 789 Frame Erase Image Quality Density Enlarge/Reduce Two-Sided SYMBOLS 0# Tone Clear C ON/OFF Stop Start Processing/ Data Error Power 10 Confirm that is displayed, then press - Canon imageCLASS MF6530 | imageCLASS MF6500 Series Basic Guide - Page 48
ABC 2 DEF 3 Reset Collate GHI 4 JKL MNO 56 Paper Select Additional 2 on 1 PQRS TUV WXYZ OK Functions 789 Frame -Sided SYMBOLS 0# Tone Clear ON/OFF C 19 Stop Start Processing/ Data Error Power 14 Press [ ] or [ ] to select the month, then press to return to standby mode. 1-17 - Canon imageCLASS MF6530 | imageCLASS MF6500 Series Basic Guide - Page 49
Before Using the Machine 1-18 - Canon imageCLASS MF6530 | imageCLASS MF6500 Series Basic Guide - Page 50
- Small documents (e.g., index cards) - Special types of paper (e.g., tracing paper*1, transparencies*1, etc.) - Book (Height: max. 7/8" (20 mm)) Plain paper (Multipage documents of the same size, thickness and weight or one page documents.) Size (W x L) Max. 8 1/2" x 14" (Max. 216 x 356 - Canon imageCLASS MF6530 | imageCLASS MF6500 Series Basic Guide - Page 51
jams in the ADF, do not use any of the following: - Wrinkled or creased paper - Carbon paper or carbon-backed paper - Curled or rolled paper - Coated paper - Torn paper - Onion skin or thin paper - Documents with staples or paper clips attached - Paper printed with a thermal transfer printer - Canon imageCLASS MF6530 | imageCLASS MF6500 Series Basic Guide - Page 52
Document Handling Scanning Area Make sure your document's text and graphics fall within the shaded area in the following diagram. Note that the margin widths listed are approximate and there may be slight variations in actual use. 1/8" (2 mm) 1/8" (2 mm) 1/8" (2 mm) 1/8" (2 mm) 2-3 - Canon imageCLASS MF6530 | imageCLASS MF6500 Series Basic Guide - Page 53
Handling Loading Documents On the Platen Glass 1 Lift up the platen glass cover. 2 Place your document face down. 3 Align the document with the appropriate paper size marks. If your document does not match any of the paper size marks, align the center of your document with the arrow mark. 2-4 - Canon imageCLASS MF6530 | imageCLASS MF6500 Series Basic Guide - Page 54
result in personal injury. - Do not press down the platen glass cover forcefully, as this may damage the platen glass and cause personal injury. NOTE Remove the document from the platen glass when scanning is complete. 2-5 - Canon imageCLASS MF6530 | imageCLASS MF6500 Series Basic Guide - Page 55
Document Handling In the ADF 1 Fan the document stack and even the edges. 2 Adjust the slide guides to the width of the documents. 2-6 - Canon imageCLASS MF6530 | imageCLASS MF6500 Series Basic Guide - Page 56
document feeder tray. The document is ready for scanning. NOTE - Do not add or remove documents while they are being scanned. - When scanning is complete, remove the documents from the document delivery tray to avoid paper jams. - Avoid using ADF to scan the same document more than 30 times. When - Canon imageCLASS MF6530 | imageCLASS MF6500 Series Basic Guide - Page 57
Document Handling 2-8 - Canon imageCLASS MF6530 | imageCLASS MF6500 Series Basic Guide - Page 58
Print Media Print Media Paper Requirements Size (W x L) Paper cassette Legal, Letter Weight Quantity Type 18 to 24 lb bond (64 to 90 g/m2) Plain *2 Color *2 Recycled *2 Heavy 1 *3 Max. 500 sheets *1 { { { { Heavy 2 *4 - Heavy 3 *5 - Bond *6 { 3hole punch paper *7 { Transparency *8 - - Canon imageCLASS MF6530 | imageCLASS MF6500 Series Basic Guide - Page 59
Print Media *1 22 lb bond (80 g/m2) paper *2 From 18 to 22 lb bond (64 to 80 g/m2) *3 From 22 to 24 lb bond (81 to 90 g/m2) *4 From 24 to 28 lb bond (91 to 105 g/m2) *5 From 28 - Canon imageCLASS MF6530 | imageCLASS MF6500 Series Basic Guide - Page 60
Print Media Printable Area The shaded area indicates the approximate printable area of LTR paper. 1/8" (2.9 mm) 1/4" (4.7 mm) 1/8" (3.6 mm) 1/8" (2.7 mm) 3-3 - Canon imageCLASS MF6530 | imageCLASS MF6500 Series Basic Guide - Page 61
surface until ready for use. Keep opened packs in their original packaging in a cool, dry location. ● Store paper at 64.4°F-75.2°F (18°C-24°C), 40%-60% relative humidity. ● Use only transparencies designed for laser printers. Canon recommends you use Canon type transparencies with this machine. 3-4 - Canon imageCLASS MF6530 | imageCLASS MF6500 Series Basic Guide - Page 62
: - Envelopes with windows, holes, perforations, cutouts, or double flaps - Envelopes made with special coated paper or deeply embossed paper - Envelopes with peel-off sealing strips - Envelopes with letters enclosed ● Make sure to set the correct envelope size in the printer driver. (See online - Canon imageCLASS MF6530 | imageCLASS MF6500 Series Basic Guide - Page 63
Print Media 2 Pull out the multi-purpose tray extension until it clicks, then open it. NOTE Do not load the paper without using the multi-purpose tray extension. 3 Gently load the stack of envelopes with the address side facing down and the flap side to the - Canon imageCLASS MF6530 | imageCLASS MF6500 Series Basic Guide - Page 64
to the width of the paper stack. NOTE - Make sure that the paper stack does not exceed the paper limit guide. - Some types of paper may not feed properly into the multi-purpose tray. For high quality copies, be sure to use the paper and transparencies recommended by Canon. - When making copies of - Canon imageCLASS MF6530 | imageCLASS MF6500 Series Basic Guide - Page 65
Print Media Setting Paper Type and Size For the Paper Cassette The default settings are and . When you place other types and/or sizes of paper, 0# Tone Clear C ON/OFF Stop Start Processing/ Data Error Power 1 Press [Additional Functions]. 2 Confirm that - Canon imageCLASS MF6530 | imageCLASS MF6500 Series Basic Guide - Page 66
Print Media 3 ded Address 4 al Book 04 5 08 2 [OK] COPY FAX SCAN System Monitor View Settings @./ 1 ABC 2 DEF 3 Reset Collate GHI 4 JKL MNO 56 Paper C ON/OFF Stop Start Processing/ Data Error Power 3 Press [ ] or [ ] to select , then press [OK]. 4 Confirm that - Canon imageCLASS MF6530 | imageCLASS MF6500 Series Basic Guide - Page 67
Processing/ Data Error Power 6 Confirm that is paper size, then press [OK]. , , If you use the optional paper cassette, confirm that is displayed and repeat this step to set the paper size for . 9 Press [Stop] to return to standby mode. 3-10 - Canon imageCLASS MF6530 | imageCLASS MF6500 Series Basic Guide - Page 68
Print Media For the Multi-Purpose Tray If you use same kind of paper for the multi-purpose tray, you can specify the paper size and type. 1 2 ded Address 3 al Book 04 4 08 2 [OK] COPY FAX SCAN System Monitor View Settings @./ 1 ABC 2 DEF 3 Reset Collate GHI 4 JKL MNO 56 Paper Select - Canon imageCLASS MF6530 | imageCLASS MF6500 Series Basic Guide - Page 69
Print Media 5 ded Address 6 al Book 04 08 2 [OK] COPY FAX SCAN System Monitor View Settings @./ 1 ABC 2 DEF 3 Reset Collate GHI 4 JKL MNO 56 Paper Processing/ Data Error Power 5 Confirm that is displayed, then press [OK]. 6 Press [ ] or [ ] to select the paper size, then - Canon imageCLASS MF6530 | imageCLASS MF6500 Series Basic Guide - Page 70
SELECT PAPER TYPE> is displayed, then press [OK]. 8 Press [ ] or [ ] to select the paper type, then press [OK]. , , , , , , , , , , 9 Press [Stop] to return to standby - Canon imageCLASS MF6530 | imageCLASS MF6500 Series Basic Guide - Page 71
Print Media 3-14 - Canon imageCLASS MF6530 | imageCLASS MF6500 Series Basic Guide - Page 72
in the Advanced Guide. 1 Set a Document 2 Enter the Fax Mode ABC COPY FAX SCAN System View s Monitor Settings Reset Collate Paper Select Image Quality The FAX indicator lights up and the machine enters fax standby mode. What if... ● You want to adjust the resolution and density: See "Scan Settings," - Canon imageCLASS MF6530 | imageCLASS MF6500 Series Basic Guide - Page 73
Tone Clear C ON/OFF Stop Start Processing/ Data Error Power Dial the recipient's fax number with the numeric press [OK] to start dialing. If the output paper in the recipient's machine is not equal to the scanned be reduced in size or divided into smaller parts before it is sent. What if... ● - Canon imageCLASS MF6530 | imageCLASS MF6500 Series Basic Guide - Page 74
1 ded Address al Book 04 08 2 COPY FAX SCAN System Monitor View Settings @./ 1 ABC 2 DEF 3 Reset Collate GHI 4 JKL MNO 56 Paper Select Additional 2 on 1 PQRS TUV WXYZ OK Functions 789 Frame Erase Image Quality Density Enlarge/Reduce Two-Sided SYMBOLS 0# Tone Clear C ON/OFF - Canon imageCLASS MF6530 | imageCLASS MF6500 Series Basic Guide - Page 75
DEF 3 Reset Collate GHI 4 JKL MNO 56 Paper Select Additional 2 on 1 PQRS TUV WXYZ OK Clear C ON/OFF Stop Start Processing/ Data Error Power 2 Press [Image Quality] repeatedly to ] to select the image quality. for fine-print documents (the resolution is twice that of ). - Canon imageCLASS MF6530 | imageCLASS MF6500 Series Basic Guide - Page 76
/OFF 123C Reset Collate GHI JKL MNO Stop 3 456 Start Paper Select Additional 2 on 1 PQRS TUV WXYZ OK Functions 789 Frame Erase Image Quality Density Enlarge/Reduce Two-Sided Tone SYMBOLS 0# Processing/ Data Error Power 1 Press [FAX]. 2 Press [Density]. 3 Press [ ] or [ - Canon imageCLASS MF6530 | imageCLASS MF6500 Series Basic Guide - Page 77
dialing, then to send a document to all numbers in that group, simply press the one-touch speed dialing key, or press [Coded Dial] and enter the two-digit code assigned to that group. You can register up to 122 groups. Registering Recipients for Speed Dialing For each recipient, you can register - Canon imageCLASS MF6530 | imageCLASS MF6500 Series Basic Guide - Page 78
Only) ● Registering One-Touch Speed Dialing 1 2 3 4 [OK] Coded Address Direct TX Pause Hook Redial Dial Book 01 02 03 04 05 06 07 08 09 10 11 12 COPY FAX SCAN System Monitor View Settings @./ 1 Reset Collate GHI 4 Paper Select Additional 2 on 1 PQRS OK Functions 7 Frame - Canon imageCLASS MF6530 | imageCLASS MF6500 Series Basic Guide - Page 79
Settings @./ 1 ABC 2 DEF 3 Reset Collate GHI 4 JKL MNO 56 Paper Select Additional 2 on 1 PQRS TUV WXYZ OK Functions 789 Frame Erase Image Sided SYMBOLS 0# Tone Clear C ON/OFF Stop Start Processing/ Data Error Power 5 Confirm that is displayed, then press - Canon imageCLASS MF6530 | imageCLASS MF6500 Series Basic Guide - Page 80
ABC DEF Clear ON/OFF 123C Reset Collate GHI JKL MNO Stop 9 456 Start Paper Select Additional 2 on 1 PQRS TUV WXYZ OK Functions 789 Frame Erase Image see Chapter 1, "Advanced Fax Features," in the Advanced Guide. Ex. NAME :A CAN 9 Press [Stop] to return to standby mode. 4-9 - Canon imageCLASS MF6530 | imageCLASS MF6500 Series Basic Guide - Page 81
3 4 [OK] Coded Address Direct TX Pause Hook Redial Dial Book 01 02 03 04 05 06 07 08 09 10 11 12 COPY FAX SCAN System Monitor View Settings @./ 1 Reset Collate GHI 4 Paper Select Additional 2 on want to edit, then press [OK]. Sending Faxes (MF6550/MF6560/MF6580 Only) 4-10 - Canon imageCLASS MF6530 | imageCLASS MF6500 Series Basic Guide - Page 82
GHI JKL MNO Stop 7 456 Start Paper Select Additional 2 on 1 PQRS TUV Enlarge/Reduce Two-Sided Tone SYMBOLS 0# Processing/ Data Error Power 5 Confirm that is displayed Clear]. 7 Enter a new number with the numeric keys, then press [OK]. Sending Faxes (MF6550/ - Canon imageCLASS MF6530 | imageCLASS MF6500 Series Basic Guide - Page 83
DEF 3 Reset Collate GHI 4 JKL MNO 56 Paper Select Additional 2 on 1 PQRS TUV WXYZ OK Functions 789 Frame Erase Image Quality Density Enlarge/Reduce Two-Sided SYMBOLS 0# Tone 9 10 Clear ON/OFF C 11 Stop Start Processing/ Data Error Power 8 Confirm that is displayed, then - Canon imageCLASS MF6530 | imageCLASS MF6500 Series Basic Guide - Page 84
● Deleting One-Touch Speed Dialing 1 2 3 4 [OK] Coded Address Direct TX Pause Hook Redial Dial Book 01 02 03 04 05 06 07 08 09 10 11 12 COPY FAX SCAN System Monitor View Settings @./ 1 Reset Collate GHI 4 Paper Select Additional 2 on 1 PQRS OK Functions 7 Frame Erase - Canon imageCLASS MF6530 | imageCLASS MF6500 Series Basic Guide - Page 85
Collate GHI JKL MNO Stop 7 456 Start Paper Select Additional 2 on 1 PQRS TUV WXYZ Enlarge/Reduce Two-Sided Tone SYMBOLS 0# Processing/ Data Error Power 5 Confirm that is standby mode. NOTE When deleting all numbers, the registered name is cleared automatically. - Canon imageCLASS MF6530 | imageCLASS MF6500 Series Basic Guide - Page 86
Enlarge/Reduce Two-Sided SYMBOLS 0# Tone Clear C ON/OFF Stop Start Processing/ Data Error Power 1 Press [Additional Functions]. 2 Press [ ] or [ ] to select , then press [OK]. 3 Press [ ] or [ ] to select , then press [OK]. 4 Press [ ] or [ ] to select - Canon imageCLASS MF6530 | imageCLASS MF6500 Series Basic Guide - Page 87
Settings @./ 1 ABC 2 DEF 3 Reset Collate GHI 4 JKL MNO 56 Paper Select Additional 2 on 1 PQRS TUV WXYZ OK Functions 789 Frame Erase Image Sided SYMBOLS 0# Tone Clear C ON/OFF Stop Start Processing/ Data Error Power 5 Confirm that is displayed, then press - Canon imageCLASS MF6530 | imageCLASS MF6500 Series Basic Guide - Page 88
Collate GHI JKL MNO Stop 9 456 Start Paper Select Additional 2 on 1 PQRS TUV WXYZ Two-Sided Tone SYMBOLS 0# Processing/ Data Error Power 8 Enter the destination name (max. numeric keys, then press [OK]. To register another coded speed dialing number, press [Additional Functions], then - Canon imageCLASS MF6530 | imageCLASS MF6500 Series Basic Guide - Page 89
Enlarge/Reduce Two-Sided SYMBOLS 0# Tone Clear C ON/OFF Stop Start Processing/ Data Error Power 1 Press [Additional Functions]. 2 Press [ ] or [ ] to select , then press [OK]. 3 Press [ ] or [ ] to select , then press [OK]. 4 Press [ ] or [ ] to select the - Canon imageCLASS MF6530 | imageCLASS MF6500 Series Basic Guide - Page 90
Collate GHI JKL MNO Stop 7 456 Start Paper Select Additional 2 on 1 PQRS TUV WXYZ Enlarge/Reduce Two-Sided Tone SYMBOLS 0# Processing/ Data Error Power 5 Confirm that is ]. 7 Enter a new number with the numeric keys, then press [OK]. Sending Faxes (MF6550/ - Canon imageCLASS MF6530 | imageCLASS MF6500 Series Basic Guide - Page 91
3 Reset Collate GHI 4 JKL MNO 56 Paper Select Additional 2 on 1 PQRS TUV WXYZ OK Functions 789 Frame Erase Image Quality Density Enlarge/Reduce Two-Sided SYMBOLS 0# Tone 9 10 Clear ON/OFF C 11 Stop Start Processing/ Data Error Power 8 Confirm that is displayed, then - Canon imageCLASS MF6530 | imageCLASS MF6500 Series Basic Guide - Page 92
Enlarge/Reduce Two-Sided SYMBOLS 0# Tone Clear C ON/OFF Stop Start Processing/ Data Error Power 1 Press [Additional Functions]. 2 Press [ ] or [ ] to select , then press [OK]. 3 Press [ ] or [ ] to select , then press [OK]. 4 Press [ ] or [ ] to select the - Canon imageCLASS MF6530 | imageCLASS MF6500 Series Basic Guide - Page 93
Collate GHI JKL MNO Stop 7 456 Start Paper Select Additional 2 on 1 PQRS TUV WXYZ Enlarge/Reduce Two-Sided Tone SYMBOLS 0# Processing/ Data Error Power 5 Confirm that is standby mode. NOTE When deleting all numbers, the registered name is cleared automatically. - Canon imageCLASS MF6530 | imageCLASS MF6500 Series Basic Guide - Page 94
/MF6580 Only) ● Registering Group Dialing 1 2 3 4 [OK] Coded Address Direct TX Pause Hook Redial Dial Book 01 02 03 04 05 06 07 08 09 10 11 12 COPY FAX SCAN System Monitor View Settings @./ 1 Reset Collate GHI 4 Paper Select Additional 2 on 1 PQRS OK Functions 7 Frame - Canon imageCLASS MF6530 | imageCLASS MF6500 Series Basic Guide - Page 95
Sending Faxes (MF6550/MF6560/MF6580 Only) 5 7 [OK] Coded Address Direct TX Pause Hook Redial Dial Book 01 02 03 04 05 06 07 08 09 10 11 12 COPY FAX SCAN System Monitor View Settings @./ 1 Reset Collate GHI 4 Paper Select Additional 2 on 1 PQRS OK Functions 7 Frame Erase - Canon imageCLASS MF6530 | imageCLASS MF6500 Series Basic Guide - Page 96
123C Reset Collate GHI JKL MNO Stop 9 456 Start Paper Select Additional 2 on 1 PQRS TUV WXYZ OK Functions Error Power 8 Enter the group name (max. 16 letters, including spaces) with the numeric keys, then press [OK]. Ex. NAME :A CANON GROUP 9 Press [Stop] to return to standby - Canon imageCLASS MF6530 | imageCLASS MF6500 Series Basic Guide - Page 97
/MF6560/MF6580 Only) ● Adding New Destination to Group 1 2 3 Coded Address Direct TX Pause Hook Redial Dial Book 4 5 01 02 03 04 05 06 07 08 6 09 10 11 12 [OK] COPY FAX SCAN System View Monitor ClSeeatrtin ON/OFF Reset C Colla 7 Stop Start Paper Select Image Quality - Canon imageCLASS MF6530 | imageCLASS MF6500 Series Basic Guide - Page 98
Reset Collate GHI 4 JKL MNO 56 Paper Select Additional 2 on 1 PQRS TUV C ON/OFF Stop Start Processing/ Data Error Power 1 Press [Additional Functions]. 2 Press group stored under the coded speed dialing number, press [Coded Dial], then enter the two-digit code using the numeric keys. - Canon imageCLASS MF6530 | imageCLASS MF6500 Series Basic Guide - Page 99
/OFF 123C Reset Collate GHI JKL MNO Stop 9 456 Start Paper Select Additional 2 on 1 PQRS TUV WXYZ OK Functions 789 Frame Erase Image Quality Density Enlarge/Reduce Two-Sided Tone SYMBOLS 0# Processing/ Data Error Power 6 Press [ ] or [ ] to display the speed dial number you - Canon imageCLASS MF6530 | imageCLASS MF6500 Series Basic Guide - Page 100
Start Paper Select Additional Tone SYMBOLS 0# Processing/ Data Error Power 1 Press [Additional Functions group stored under the coded speed dialing number, press [Coded Dial], then enter the two-digit code using the numeric new character with the numeric keys, then press [OK]. 8 Press [Stop] to return - Canon imageCLASS MF6530 | imageCLASS MF6500 Series Basic Guide - Page 101
Reset Collate GHI 4 JKL MNO 56 Paper Select Additional 2 on 1 PQRS TUV C ON/OFF Stop Start Processing/ Data Error Power 1 Press [Additional Functions]. 2 Press group stored under the coded speed dialing number, press [Coded Dial], then enter the two-digit code using the numeric keys - Canon imageCLASS MF6530 | imageCLASS MF6500 Series Basic Guide - Page 102
ON/OFF 123C Reset Collate GHI JKL MNO Stop 9 456 Start Paper Select Additional 2 on 1 PQRS TUV WXYZ OK Functions 789 Frame Erase Image Quality Density Enlarge/Reduce Two-Sided Tone SYMBOLS 0# Processing/ Data Error Power 6 Press [ ] or [ ] to display a speed dial number. - Canon imageCLASS MF6530 | imageCLASS MF6500 Series Basic Guide - Page 103
ClSeeatrtin C ON/OFF 01 02 03 04 4 05 06 07 08 Paper Select Reset Colla Stop Start Additional 2 on Functions 5 OK 09 10 11 12 Image Quality Density Enlarge/Reduce Two-Sided Frame E rocessing/ Data Error Power Sending Faxes (MF6550/MF6560/MF6580 Only) 1 Place the document on - Canon imageCLASS MF6530 | imageCLASS MF6500 Series Basic Guide - Page 104
settings for your document. For details, see "Scan Settings," on p. 4-3. 4 Press [Coded Dial]. 5 Enter the desired two-digit code (00 to 99) with the numeric keys. Ex. TEL=012XXXXXXX [*01]CANON If you entered a wrong code, press [Clear], then repeat the procedure from step 3. 6 Press [Start] to dial - Canon imageCLASS MF6530 | imageCLASS MF6500 Series Basic Guide - Page 105
platen glass for manual sending. - You cannot use group dialing for manual sending. 3 Coded Address Direct TX Paper Select Additional 2 on 1 PQRS OK Functions 7 09 10 11 12 Frame Erase Image Quality Density Enlarge/Reduce Two-Sided To Sending Faxes (MF6550/MF6560/MF6580 Only) 1 Connect - Canon imageCLASS MF6530 | imageCLASS MF6500 Series Basic Guide - Page 106
Sending Faxes (MF6550/MF6560/MF6580 Only) 5 TX Pause Hook Coded Address Redial Dial Book 02 03 04 06 07 08 10 11 12 6 COPY FAX View Settings @./ ABC DEF Clear 123C ON/OFF Paper Select Collate GHI 4 2 on 1 PQRS OK 7 JKL MNO 56 TUV WXYZ 89 Stop Start 9 ame Erase - Canon imageCLASS MF6530 | imageCLASS MF6500 Series Basic Guide - Page 107
it scans one page, without storing all pages into memory at Guide.) 2 3 Coded Address Direct TX Pause Hook Redial Dial Book 01 02 03 04 COPY FAX SCAN System Monitor Reset View Settings Collate @./ 1 GHI 4 05 06 07 08 Paper Select Additional 2 on 1 PQRS OK Functions 7 09 10 - Canon imageCLASS MF6530 | imageCLASS MF6500 Series Basic Guide - Page 108
View Monitor Settings @./ ABC DEF Clear 123C ON/OFF Paper Select Reset Collate GHI JKL MNO Stop 456 Start Additional /Reduce Two-Sided Tone SYMBOLS 0# Processing/ Data Error Power 4 Adjust any necessary settings for your document . 6 Press [Start]. Each page is sent as it is scanned - Canon imageCLASS MF6530 | imageCLASS MF6500 Series Basic Guide - Page 109
Sending Faxes (MF6550/MF6560/MF6580 Only) 4-38 - Canon imageCLASS MF6530 | imageCLASS MF6500 Series Basic Guide - Page 110
advanced receiving features, see Chapter 1, "Advanced Fax Features," in the Advanced Guide. 1 Enter the Setting Menu 2 Enter the Receive Mode FAX SCAN System Pro Tone COPY FAX SCAN System View Monitor Settings Reset Collate Paper Select Image Quality Additional 2 on 1 P Functions OK Frame - Canon imageCLASS MF6530 | imageCLASS MF6500 Series Basic Guide - Page 111
GH Paper Select /OFF Stop Start Processing/ Data Error Power Select the receive mode with manually receive faxes. NOTE - For , make sure an answering machine is connected to the machine. - For , subscription to a DRPD service is required. Press [Stop] to return to the standby - Canon imageCLASS MF6530 | imageCLASS MF6500 Series Basic Guide - Page 112
Advanced Guide. 1 Set a Document 2 Enter the Copy Mode ABC Address Book COPY FAX SCAN System Vie Monitor Settin Reset Colla Paper Select COPY]. The COPY indicator lights and the machine enters copy standby mode. What if... ● You want to adjust the resolution and density: See "Scan Settings - Canon imageCLASS MF6530 | imageCLASS MF6500 Series Basic Guide - Page 113
O3 What if... ● You enter a wrong number: Press [Clear], and enter a new number. ystem onitor View Settings @./ 1 ABC 2 DEF 3 Reset Collate GHI 4 Erase ed SYMBOLS 0# Tone Clear C ON/OFF Stop Start Processing/ Data Error Power Press [Start]. What if... ● You want to cancel copying: - Canon imageCLASS MF6530 | imageCLASS MF6500 Series Basic Guide - Page 114
1 ABC 2 DEF 3 Reset Collate GHI 4 JKL MNO 56 Paper Select Additional 2 on 1 PQRS TUV WXYZ OK Functions 789 Frame Erase 0# Tone Clear C ON/OFF Stop Start Processing/ Data Error Power 1 Press [COPY]. 2 Press [Image Quality] manual mode when or is set. 6-3 - Canon imageCLASS MF6530 | imageCLASS MF6500 Series Basic Guide - Page 115
appropriate level for the document either automatically or manually. ● Adjusting Automatically ded Address al Book 1 04 08 2 [OK] COPY FAX SCAN System Monitor View Settings @./ 1 ABC 2 DEF 3 Reset Collate GHI 4 JKL MNO 56 Paper Select Additional 2 on 1 PQRS TUV WXYZ OK Functions - Canon imageCLASS MF6530 | imageCLASS MF6500 Series Basic Guide - Page 116
GHI JKL MNO 2 Stop 456 Start Paper Select Additional 2 on 1 PQRS TUV WXYZ OK Functions 789 Frame Erase Image Quality Density Enlarge/Reduce Two-Sided Tone SYMBOLS 0# Processing/ Data Error Power 1 Press [Density] twice to select the manual mode. 2 Press [ ] or [ ] to adjust the - Canon imageCLASS MF6530 | imageCLASS MF6500 Series Basic Guide - Page 117
Erase Image Quality Density Enlarge/Reduce Two-Sided Tone SYMBOLS 0# Processing/ Data Error Power 1 Press [Enlarge/Reduce]. 2 Press [ ] or [ ] MAX. - 129% STMT → LTR - 100% - 78% LGL → LTR - 64% LTR → STMT - 50% MIN. NOTE When in the menu is set to or , - Canon imageCLASS MF6530 | imageCLASS MF6500 Series Basic Guide - Page 118
Settings @./ 1 ABC 2 DEF 3 Reset Collate GHI 4 JKL MNO 56 Paper Select Additional 2 on 1 PQRS TUV WXYZ OK Functions 789 Frame Erase Two-Sided SYMBOLS 0# Tone Clear C ON/OFF Stop Start Processing/ Data Error Power 1 Press [Enlarge/Reduce] twice. 2 Enter the copy ratio with - Canon imageCLASS MF6530 | imageCLASS MF6500 Series Basic Guide - Page 119
Copying 6-8 - Canon imageCLASS MF6530 | imageCLASS MF6500 Series Basic Guide - Page 120
sure that the printer driver is installed. For details on printer driver settings, see online help. 1 2 Start the Print Command Select the Printer Printing From an open document on an application, click [File] > [Print]. Select the printer icon for the machine ([Canon MF6500 Series UFRII LT - Canon imageCLASS MF6530 | imageCLASS MF6500 Series Basic Guide - Page 121
3 Adjust Preferences 4 Print the Document Printing Click [Preferences] or [Properties] to open the dialog box. After finished, click [OK]. Click [Print] or [OK]. What if... ● You want to cancel printing: See Chapter 5, "System Monitor," in the Advanced Guide. 7-2 - Canon imageCLASS MF6530 | imageCLASS MF6500 Series Basic Guide - Page 122
a document to your computer. Make sure that the scanner driver is installed. For details on scanner driver settings, see the Scanner Driver Guide (in the User Software CD). 1 Set a Document 2 Enter the Scan SCAN]. The SCAN indicator lights up and the machine enters scan standby mode. Scanning 8-1 - Canon imageCLASS MF6530 | imageCLASS MF6500 Series Basic Guide - Page 123
@./ 1 ABC 2 DEF 3 Collate GHI 4 JKL 5 MNO 6 l 2 on 1 PQRS 7 TUV WXYZ 89 Frame Erase SYMBOLS 0# Tone Clear C ON/OFF Stop Start Processing/ Data Error Power Start MF Toolbox, then set the scanning format. The mark will be displayed above the button you select. Press [Start]. What if - Canon imageCLASS MF6530 | imageCLASS MF6500 Series Basic Guide - Page 124
is installed. For details on fax driver settings, see online help. 1 2 Start the Print Command Select the Fax PC Faxing (MF6550/MF6560/MF6580 Only) From an open document on an application, click [File] > [Print]. Select the fax icon ([Canon MF6500 Series (FAX)]), then click [Print] or [OK - Canon imageCLASS MF6530 | imageCLASS MF6500 Series Basic Guide - Page 125
cover sheet attachment. Click [OK] in the Fax Sending Settings. What if... ● You want to cancel sending a fax: See Chapter 5, "System Monitor," in the Advanced Guide. 9-2 - Canon imageCLASS MF6530 | imageCLASS MF6500 Series Basic Guide - Page 126
2 Startup Set up the machine for use in a TCP/ IP network, then connect the machine and the PC to your network router or a hub. For details, see "Installing/Uninstalling Software," in the Starter Guide. Start the web browser, enter the IP address of the machine, then press [Enter] on the keyboard - Canon imageCLASS MF6530 | imageCLASS MF6500 Series Basic Guide - Page 127
3 Log on 4 Operate the Machine Select the user mode, then click [OK]. Now you can manage the machine on the web browser. For details, see Chapter 4, "Remote UI," in the Advanced Guide. Remote UI (MF6580 Only) 10-2 - Canon imageCLASS MF6530 | imageCLASS MF6500 Series Basic Guide - Page 128
turn off the main power switch and disconnect the power cord. - Use a soft cloth to avoid scratching the components. - Do not use tissue paper, paper towels, or similar materials for cleaning; they can stick to the components or generate static charges. Exterior 1 Turn off the main power switch and - Canon imageCLASS MF6530 | imageCLASS MF6500 Series Basic Guide - Page 129
's print area periodically to prevent toner powder and paper dust from accumulating inside. 4 Pull the blue plastic pull tab until you can easily hold the handle of the toner cartridge. 1 Turn off the main power switch and disconnect the power cord. 2 Open the left cover. 5 Remove the toner - Canon imageCLASS MF6530 | imageCLASS MF6500 Series Basic Guide - Page 130
-free 8 Insert the toner cartridge into cloth to remove any toner or the machine as far as it will go. paper debris from the machine's interior. CAUTION The left edge (A) and the right side protrusions (B, C) of the toner cartridge should be aligned with on the guides inside the machine. - Do - Canon imageCLASS MF6530 | imageCLASS MF6500 Series Basic Guide - Page 131
If black streaks appear with printing, the fuser roller in the main unit may be dirty. Should this occur, clean the fusing roller in the following procedure. The roller should also be cleaned each time the toner cartridge is replaced. Load a sheet of blank LTR paper into the multi-purpose tray - Canon imageCLASS MF6530 | imageCLASS MF6500 Series Basic Guide - Page 132
with water. Then wipe the area with a soft, dry cloth. Cleaning starts. When finished, the display returns to standby mode. NOTE - Use standard paper as the cleaning paper. - Throw away the cleaning paper after use. NOTE Do not dampen the cloth too much, as this may tear the document or damage - Canon imageCLASS MF6530 | imageCLASS MF6500 Series Basic Guide - Page 133
3 Close the platen glass cover. 3 Clean the rollers (A) inside the ADF with a cloth dampened with water. Then wipe the area with a soft, dry cloth. A CAUTION Be careful not to get your fingers caught. ● ADF If your documents have black streaks or appear dirty after copying them using the NOTE Do - Canon imageCLASS MF6530 | imageCLASS MF6500 Series Basic Guide - Page 134
with a cloth dampened with water. Then wipe the area with a soft, dry cloth. CAUTION Be careful not to get your fingers caught. 7 Close the ADF. 10 Close the platen glass cover. CAUTION Be careful not to get your fingers caught. 8 Open the platen glass cover. CAUTION Be careful not to get - Canon imageCLASS MF6530 | imageCLASS MF6500 Series Basic Guide - Page 135
Two-Sided SYMBOLS 0# Tone Clear C ON/OFF Stop Start Processing/ Data Error Power 1 Press [Additional Functions]. 2 Press [ ] or [ ] press [OK]. 4 Load 5 sheets of blank paper into the ADF, then press [OK]. ADF cleaning starts. When finished, the display returns to standby mode. NOTE Use LTR - Canon imageCLASS MF6530 | imageCLASS MF6500 Series Basic Guide - Page 136
of the paper is smudged after printing, the transcription Error Power 1 Press [Additional Functions]. 2 Press [ ] or [ ] to select , then press [OK]. 3 Confirm that is displayed, then press [OK]. Cleaning starts. When finished, the display returns to standby - Canon imageCLASS MF6530 | imageCLASS MF6500 Series Basic Guide - Page 137
the toner cartridge. Redistributing Toner 1 Open the left cover. 4 Remove the toner cartridge. 2 Grasp the blue plastic pull tab (A) on the toner cartridge. A CAUTION - Always hold the toner cartridge by its handle. - Do not open the drum protective shutter on the toner cartridge. Print quality - Canon imageCLASS MF6530 | imageCLASS MF6500 Series Basic Guide - Page 138
make sure it is properly set in the machine. A 7 Insert the toner cartridge into the machine as far as it will go. The left edge (A) and the right side protrusions (B, C) of the toner cartridge should be aligned with the guides inside the machine. CAUTION Do not touch the fixing assembly (A) as it - Canon imageCLASS MF6530 | imageCLASS MF6500 Series Basic Guide - Page 139
caught. - If you cannot close the left cover, do not force it to close. Open the cover and make sure the toner cartridge is properly 2 set in the machine. Grasp the blue plastic pull tab (A) on the toner cartridge. A 3 Pull the blue plastic pull tab until you can easily hold the handle of the - Canon imageCLASS MF6530 | imageCLASS MF6500 Series Basic Guide - Page 140
- Always hold the toner cartridge by its handle. - Do not open the drum protective shutter 7 Remove the seals (2 places). on the toner cartridge. Print quality may deteriorate if the drum surface is exposed to light or is damaged. 5 Remove the new toner cartridge from the protective material - Canon imageCLASS MF6530 | imageCLASS MF6500 Series Basic Guide - Page 141
(A) and the right side protrusions (B, C) of the toner cartridge should be aligned with the guides inside the machine. NOTE Do not pull out the seal at an angle. 10 Hold the toner cartridge by its handle. The arrows (A) on the toner cartridge should be pointing toward the machine. A A B C 12 - Canon imageCLASS MF6530 | imageCLASS MF6500 Series Basic Guide - Page 142
13 Close the left cover. CAUTION - Be careful not to get your fingers caught. - If you cannot close the left cover, do not force it to close. Open the cover and make sure the toner cartridge is properly set in the machine. 11-15 Maintenance - Canon imageCLASS MF6530 | imageCLASS MF6500 Series Basic Guide - Page 143
concerning this program are enclosed in each PC Cartridge box. The Clean Earth Campaign ● THE Canon CARTRIDGE RECYCLING PROGRAM The Canon Cartridge Recycling Program fulfills the first initiative of Canon's Clean Earth Campaign, which supports four critical environmental areas: ● Recycling in the - Canon imageCLASS MF6530 | imageCLASS MF6500 Series Basic Guide - Page 144
Becoming a part of this worthwhile program is easy. When your cartridge is of no further use, simply follow the instructions detailed for U.S. or Canadian residents. We appreciate your support of The Canon Cartridge Recycling Program. Working together we can make a significant contribution to a - Canon imageCLASS MF6530 | imageCLASS MF6500 Series Basic Guide - Page 145
exceeds the above limits, please call 1-800-OK-Canon for special shipping information. Please Note: Do not send defective cartridges for replacement. Defective cartridges under warranty should be exchanged by an authorized dealer or service facility as provided in the warranty. 11-18 Maintenance - Canon imageCLASS MF6530 | imageCLASS MF6500 Series Basic Guide - Page 146
Canon set up alternative mail service with the U.S. Postal Service. Please call 1-800-OK-Canon to receive U.S. Postal Service merchandise returning label. ■ Option A: UPS Pick-up ● Give the shipment to your UPS driver your used cartridge(s) will be forwarded to the Canon Cartridge Collection Center - Canon imageCLASS MF6530 | imageCLASS MF6500 Series Basic Guide - Page 147
PROGRAMME ■ Option A: Single Box Return ● Repackage the empty cartridge utilizing the wrapper and pulp mould end-blocks from the new cartridge's box. ● Place the empty cartridge in the box of your new cartridge. Seal the box. ● Apply the Canon Canada Inc./Canada Post label provided in this brochure - Canon imageCLASS MF6530 | imageCLASS MF6500 Series Basic Guide - Page 148
Working to preserve endangered species is a long-standing Canon interest. To this end, for every cartridge collected, Canon Canada donates $1, shared equally between World Wildlife Fund Canada and the Nature Conservancy of Canada. This donation is utilized in Canada. ● For further information about - Canon imageCLASS MF6530 | imageCLASS MF6500 Series Basic Guide - Page 149
tab (A) on the toner cartridge. A CAUTION - Always hold the toner cartridge by its handle. - To avoid exposing the toner cartridge to light, place it in its protective bag or wrap it in a thick cloth. - Do not open the drum protective shutter on the toner cartridge. Print quality may deteriorate if - Canon imageCLASS MF6530 | imageCLASS MF6500 Series Basic Guide - Page 150
to get your fingers caught. 7 Make sure the multi-purpose tray and the paper stopper are back in their original position. 8 Pick up the machine using the can cause personal injury. - If you have a back problem, make sure to check the weight of this machine before carrying. (See "Specifications," on - Canon imageCLASS MF6530 | imageCLASS MF6500 Series Basic Guide - Page 151
Maintenance 11-24 - Canon imageCLASS MF6530 | imageCLASS MF6500 Series Basic Guide - Page 152
Troubleshooting Clearing Jams 1 When a jam occurs in the machine, the Open the ADF. paper jam message appears on the LCD display. Check the jam location indicator where the jam occurs, then remove the jammed paper. NOTE Do not force a jammed document or paper out of the machine. Contact - Canon imageCLASS MF6530 | imageCLASS MF6500 Series Basic Guide - Page 153
feeder tray. 6 Open the platen glass cover, and remove any jammed documents. 4 Remove any jammed documents. 7 Close the platen glass cover. 5 Lower the document feeder tray and close the ADF. CAUTION Be careful not to get your fingers caught. Troubleshooting CAUTION Be careful not to get your - Canon imageCLASS MF6530 | imageCLASS MF6500 Series Basic Guide - Page 154
any torn pieces to avoid further jams. - If loose toner comes into contact with your skin or clothing, wash with cold water. Warm water will set the toner. 3 Tilt the 2-sided transport guide (A) toward the machine, then remove the jammed paper (Only for 2-sided copying). A Troubleshooting 12-3 - Canon imageCLASS MF6530 | imageCLASS MF6500 Series Basic Guide - Page 155
for 2-sided left side of the optional paper copying). cassette. Remove any jammed paper, then close the cover. A 5 Close the left cover. 7 Pull out the paper cassette and push the corners of the stack under the tabs. CAUTION Be careful not to get your fingers caught. Troubleshooting 12-4 - Canon imageCLASS MF6530 | imageCLASS MF6500 Series Basic Guide - Page 156
8 Gently push the paper cassette back into the machine until it clicks. CAUTION Be careful not to get your fingers caught. 12-5 Troubleshooting - Canon imageCLASS MF6530 | imageCLASS MF6500 Series Basic Guide - Page 157
the machine by opening the left cover and then closing it. Change paper on the paper cassette or multi-purpose tray. And you must also change the size setting in the menu. Remove the jammed document. Close the cover shown on the lower line of the LCD display. Troubleshooting 12-6 - Canon imageCLASS MF6530 | imageCLASS MF6500 Series Basic Guide - Page 158
stored in memory. - Divide the document stack or data into a few parts and try again one by one. - Send the document with low resolution. - When this message appears during using the ADF, the scanning document stops halfway. In this case, clear the paper jam from the ADF. Troubleshooting 12-7 - Canon imageCLASS MF6530 | imageCLASS MF6500 Series Basic Guide - Page 159
machine to send any faxes in memory. Also print, send, or delete any documents stored in memory. Select the paper size, or set the copy ratio. If you press [Start] while this message is displayed, the paper with the least margin is selected automatically and printing starts. Troubleshooting 12-8 - Canon imageCLASS MF6530 | imageCLASS MF6500 Series Basic Guide - Page 160
printouts from the paper delivery tray. Remove the jammed paper. The cover must be opened and closed to resume the current job. If this message disappears while printing from a PC, press [Start] to bring the printer back online. Clean the ADF scanning area, then press [OK]. Troubleshooting 12-9 - Canon imageCLASS MF6530 | imageCLASS MF6500 Series Basic Guide - Page 161
more information, see the following: "Setting Paper Type and Size," on p. 3-8 "Replacing the Toner Cartridge," on p. 11-12 "Clearing Jams," on p. 12-1 - A transmission error occurred because the line condition was poor. - The paper jammed or ran out during printing a report. [Stop] has been pressed - Canon imageCLASS MF6530 | imageCLASS MF6500 Series Basic Guide - Page 162
than 10 seconds, then turn it on again. If the message persists, unplug the machine from the power supply and contact Canon Customer Care Center. Install the toner cartridge correctly. Remove and rock the toner cartridge 5 or 6 times to distribute toner evenly, then reinstall the toner cartridge. If - Canon imageCLASS MF6530 | imageCLASS MF6500 Series Basic Guide - Page 163
MF6580 Only) An error code is a four-digit code shown on an ERROR TX REPORT or an ERROR RX REPORT when an error occurs. 12/31/2006 10:50 FAX 123XXXXXX CANON 001 ERROR TX REPORT TX FUNCTION WAS NOT COMPLETED TX/RX NO RECIPIENT ADDRESS DESTINATION ID ST. TIME TIME USE PAGES SENT RESULT 0005 - Canon imageCLASS MF6530 | imageCLASS MF6500 Series Basic Guide - Page 164
Error Code #0005 #0009 #0012 #0018 #0037 #0995 Description - The other fax machine did not respond within 35 seconds. - The other party may not be using a G3 fax machine. The paper has run out or the paper cassette is not set properly. You could not send because the other party's fax machine is out - Canon imageCLASS MF6530 | imageCLASS MF6500 Series Basic Guide - Page 165
in memory are backed up for about 60 minutes. During a power cut, functions are limited as follows: - You cannot send, receive, copy, scan, or print documents. - You may not be able to make telephone calls using an external telephone, depending on the type of telephone you use. - You can receive - Canon imageCLASS MF6530 | imageCLASS MF6500 Series Basic Guide - Page 166
through Friday and 10:00 A.M. to 8:00 P.M. on Saturday. Please have the following information ready when you contact Canon: - Product name (imageCLASS MF6530/MF6531/MF6550/MF6560/MF6580) - Serial number (On the label located on the left cover) - Place of purchase - Nature of problem - Steps you have - Canon imageCLASS MF6530 | imageCLASS MF6500 Series Basic Guide - Page 167
Troubleshooting 12-16 - Canon imageCLASS MF6530 | imageCLASS MF6500 Series Basic Guide - Page 168
see the list of current settings, print out USER'S DATA LIST. Printing USER'S DATA LIST 1 ded Address Paper Select Additional 2 on 1 PQRS TUV WXYZ OK Functions 789 Frame Erase Image Quality Density Enlarge/Reduce Two-Sided SYMBOLS 0# Tone Clear C ON/OFF Stop Start Processing/ Data Error - Canon imageCLASS MF6530 | imageCLASS MF6500 Series Basic Guide - Page 169
Settings @./ 1 ABC 2 DEF 3 Reset Collate GHI 4 JKL MNO 56 Paper Select Additional 2 on 1 PQRS TUV WXYZ OK Functions 789 Frame Erase Image ON/OFF Stop Start Processing/ Data Error Power 3 Press [ 4 Press [ ] or [ ] or [ ] to select , then press [OK]. ] to select - Canon imageCLASS MF6530 | imageCLASS MF6500 Series Basic Guide - Page 170
DEF 3 Reset Collate GHI 4 JKL MNO 56 Paper Select Additional 2 on 1 PQRS TUV WXYZ OK Clear C ON/OFF Stop Start Processing/ Data Error Power 1 Press [Additional Functions]. 2 Press > * * - Canon imageCLASS MF6530 | imageCLASS MF6500 Series Basic Guide - Page 171
GHI JKL MNO Stop 5 456 Start Paper Select Additional 2 on 1 PQRS TUV Density Enlarge/Reduce Two-Sided Tone SYMBOLS 0# Processing/ Data Error Power 3 Press [ ] or [ ] to select [OK]. 5 When finished, press [Stop] to return to standby mode. NOTE - If you press [Stop] before pressing [OK - Canon imageCLASS MF6530 | imageCLASS MF6500 Series Basic Guide - Page 172
The menus described in this section are based on the model imageCLASS MF6580. Depending on the model of your machine, some settings may standby display appears after the Auto Clearing function is activated. Sets to return standby display that is selected in . Sets to return standby - Canon imageCLASS MF6530 | imageCLASS MF6500 Series Basic Guide - Page 173
JOB DONE TONE* 5. SCAN DONE TONE 6. PRINT DONE TONE 4. TONER SAVER MODE 5. PRINTER DENSITY Beeps when an error (e.g., paper jam) occurs. - ON (1-3) - OFF Beeps when fax is sent. - ERROR ONLY (1-3) - OFF - ON (1-3) Beeps when fax is received. - ERROR ONLY (1-3) - OFF - ON (1-3) Beeps when scanning - Canon imageCLASS MF6530 | imageCLASS MF6500 Series Basic Guide - Page 174
function when printing a report or list. - 1. CASSETTE 1 (ON/OFF) - 2. CASSETTE 2 (ON/OFF)** - 3. MP TRAY (OFF/ON). Sets the paper type for the paper cassette. (See "For the Paper Cassette," on p. 3-8.) Sets the paper type for paper cassette 1. Sets the paper type for paper cassette 2. Machine - Canon imageCLASS MF6530 | imageCLASS MF6500 Series Basic Guide - Page 175
IN SLEEP 10.MP TRAY STD SET OFF ON 1. PAPER SIZE 2. SELECT PAPER TYPE 11.PAPER FEED SWITCH 1. MP TRAY SPEED PRIORITY PRINT SIDE Sets the paper size for the paper cassette. (See "For the Paper Cassette," on p. 3-8.) Sets the paper size for paper cassette 1. Sets the paper size for paper cassette - Canon imageCLASS MF6530 | imageCLASS MF6500 Series Basic Guide - Page 176
Print speed has priority. PRINT SIDE The machine starts printing on the side of paper loaded facing down. Print speed becomes slower for one-sided print. 12.DISPLAY LANGUAGE Selects the language on the display. (See "Specifications," on p. 14-1.) 13.ADF DIRTY ERROR Sets whether the error - Canon imageCLASS MF6530 | imageCLASS MF6500 Series Basic Guide - Page 177
copying. - TEXT - PHOTO - TEXT/PHOTO Sets the density for copying. - AUTO - MANUAL (1-9) Sets the zoom ratio for copying. Selects the zoom from the preset ratios. (DIRECT 11x17, 122% A5→B5, 129% STMT→LTR, 141% A5→A4, 200% MAX., 50% MIN., 64%, 70% A4→A5, 73% 11x17→LGL, 78% LGL→LTR, 81% B5→A5, 86% A4 - Canon imageCLASS MF6530 | imageCLASS MF6500 Series Basic Guide - Page 178
- 1 > 2-SIDED - 2 > 2-SIDED - 2 > 1-SIDED 7. FRAME ERASE Sets the type of Frame Erase copying. - OFF - ORG. FRAME ERASE - BOOK FRAME ERASE - BINDING HOLE 8. PAPER SELECT Sets the paper source for copying. - AUTO - CASSETTE 1 - CASSETTE 2** 3. SHARPNESS Adjusts the sharpness of the copied image - Canon imageCLASS MF6530 | imageCLASS MF6500 Series Basic Guide - Page 179
name/company name. (See "Set the Machine for Sending Faxes," in the Starter Guide.) Sets the options for sender information. Selects where the sender information is printed in small type at the top of each page. - OUTSIDE IMAGE - INSIDE IMAGE Prefixes your number with the abbreviations FAX or TEL - Canon imageCLASS MF6530 | imageCLASS MF6500 Series Basic Guide - Page 180
(MF6550/MF6560/MF6580 Only) 5. TEL LINE TYPE Selects the telephone line type. (See "Set the Machine for Sending Faxes," in the Starter Guide.) - TOUCH TONE - ROTARY PULSE 6. VOLUME CONTROL Adjusts the monitor volume and the calling volume. 1. MONITOR VOL. CTRL Sets the volume for monitor - Canon imageCLASS MF6530 | imageCLASS MF6500 Series Basic Guide - Page 181
(MF6550/MF6560/MF6580 Only) 9. INIT. FAX STD SET 3. TX SETTINGS 1. ECM TX 2. PAUSE TIME 3. AUTO REDIAL ON 1. REDIAL TIMES 2. REDIAL INTERVAL 3. TX ERROR REDIAL OFF Sets whether to restore in to the default. - OFF - ON Sets the transmission functions. Sets whether - Canon imageCLASS MF6530 | imageCLASS MF6500 Series Basic Guide - Page 182
the numeric keys. - ON - OFF Sets whether to check the telephone line condition. - ON - OFF Sets the reception functions. Sets whether the ECM (Error Correction Mode) reception is activated. - ON - OFF Sets the optional items in mode. (See Chapter 1, "Advanced Fax Features," in the Advanced - Canon imageCLASS MF6530 | imageCLASS MF6500 Series Basic Guide - Page 183
ON RING COUNT 5. REMOTE RX ON REMOTE RX ID OFF 6. MANUAL/AUTO OFF a voice call if an external telephone is connected. Sets the number of incoming rings before the Fax Features," in the Advanced Guide.) The machine enables remote receiving. You can dial a code on remote extension to start receiving - Canon imageCLASS MF6530 | imageCLASS MF6500 Series Basic Guide - Page 184
machine responds when the message appears. RX TO MEMORY The machine stores all documents in memory. KEEP PRINTING The machine does not store documents in memory if the toner runs out. Reset to after replacing the toner cartridge. Machine Settings 13 - Canon imageCLASS MF6530 | imageCLASS MF6500 Series Basic Guide - Page 185
advanced functional settings for each one-touch speed dialing recipient registered in the machine. (See Chapter 1, "Advanced Fax Features," in the Advanced Guide. The optional setting is not set for this speed dialing. The optional setting is set for this speed dialing. Selects a mode for documents - Canon imageCLASS MF6530 | imageCLASS MF6500 Series Basic Guide - Page 186
16 characters, including spaces). Selects whether to use the advanced functional settings for each coded speed dialing recipient registered in the machine. (See Chapter 1, "Advanced Fax Features," in the Advanced Guide.) The optional setting is not set for this speed dialing. The optional setting is - Canon imageCLASS MF6530 | imageCLASS MF6500 Series Basic Guide - Page 187
speed dialing keys or coded speed dialing codes. Registers the group name (max. 16 characters, including spaces). PRINTER SETTINGS Setting Item 1. DEFAULT PAPERSIZE 2. DEFAULT PAPERTYPE 3. COPIES 4. 2-SIDED PRINTING Description Sets the default paper size when no paper source is specified. (LTR - Canon imageCLASS MF6530 | imageCLASS MF6500 Series Basic Guide - Page 188
QUALITY 1. IMAGE REFINEMENT 2. DENSITY 3. TONER SAVER 6. PAGE LAYOUT 1. BINDING 2. MARGIN 7. COLLATE 8. ERROR TIME OUT ON OFF 9. INIT. PRINTER SET Sets the image quality, density or toner saving mode for printing. Sets whether to print smoothly the jagged outlines of characters and graphics. - ON - Canon imageCLASS MF6530 | imageCLASS MF6500 Series Basic Guide - Page 189
-99.99) Sets the number of lines to be printed on a page. (5-128) Selects the symbol set most suited to the needs of the host computer. Sets whether to use a custom paper size. Disables you to specify a custom paper size. Enables you to specify a custom paper size. Selects the unit of measurement to - Canon imageCLASS MF6530 | imageCLASS MF6500 Series Basic Guide - Page 190
when line feed code is received. Sets whether to expand the printable area of A4 size paper to that of Letter size in width. * This setting is applicable for A4 paper and portrait orientation for the PCL5 printing only. The PCL6 printing is not supported. All the area on a page 1/6 inch (4.23 mm - Canon imageCLASS MF6530 | imageCLASS MF6500 Series Basic Guide - Page 191
TIME Description Sets the current date and time. (See "Set Up the Machine," in the Starter Guide.) Sets the date format. - MM/DD/YYYY - DD/MM YYYY - YYYY MM/DD Sets time. (1MIN.-9MIN.) The machine returns to standby mode. (See "Setting Auto Clear Time," on p. 1-12.) - ON - OFF Machine Settings 13 - Canon imageCLASS MF6530 | imageCLASS MF6500 Series Basic Guide - Page 192
TIMER SETTINGS 5. DAYLIGHT SV.TIME OFF ON 1. START DATE/ TIME 2. END DATE/TIME Sets daylight saving time mode. (See "Setting Daylight Saving Time," on p. 1-14.) Deactivates daylight saving time mode. Activates daylight saving time mode. Sets the start date. - 1. MONTH - 2. WEEK - 3. DAY Sets the - Canon imageCLASS MF6530 | imageCLASS MF6500 Series Basic Guide - Page 193
humidity. Selects to compensate for poor quality that occurs when using heavyweight paper. When the two-sided printing function is used, paper may curl severely or become jammed. Enable this setting to prevent paper curling or jamming. - OFF - ON This setting is not functional in this model. Sets to - Canon imageCLASS MF6530 | imageCLASS MF6500 Series Basic Guide - Page 194
ADJUST./CLEANING 9. SPECIAL MODE R 10.SPECIAL MODE S OFF SPEED PRIORITY 11.CONT. PRINT MODE 12.BACK EDGE MODE 13.LARGE PAPER MODE 14.AUTO ADF DRTY ADJ 15.MAINTENANCE CODE Sets whether to prevent white streaks from appearing on the printed image. When you print the halftone image or photograph after - Canon imageCLASS MF6530 | imageCLASS MF6500 Series Basic Guide - Page 195
.) Sets whether the fax transmission report prints out. Prints a report only when a transmission error occurs. Sets whether to print the first page of the fax under the report. - OFF - ON Prints a report every time you send a document. Sets whether to print the first page of the fax under the report - Canon imageCLASS MF6530 | imageCLASS MF6500 Series Basic Guide - Page 196
transaction report (max. last 40 transactions) manually. Prints the list of fax numbers registered for speed dialing. - 1. 1-TOUCH LIST - 2. CODED DIAL LIST - 3. GROUP DIAL LIST Prints the details of speed dialing. - 1. 1-TOUCH(DETAILS) - 2. CODED (DETAILS) Prints the setting list registered in the - Canon imageCLASS MF6530 | imageCLASS MF6500 Series Basic Guide - Page 197
Advanced Guide.) 1. TCP/IP SETTINGS Sets TCP/IP network. 1. IP ADDRESS AUTO. Sets whether to automatically set an IP address. ON Enables an IP address to the machine automatically. - 1. DHCP (ON/OFF) - 2. BOOTP (OFF/ON) - 3. RARP (OFF/ON) OFF Allocate an IP address to the machine manually - Canon imageCLASS MF6530 | imageCLASS MF6500 Series Basic Guide - Page 198
"Installing/Uninstalling Software," in the Starter Guide.) Registers a fixed subnet mask to the machine. Registers a fixed gateway address to the machine. Sets whether to use LPD as the print application. - ON (PORT NO.) - OFF Sets whether to use RAW as the print - Canon imageCLASS MF6530 | imageCLASS MF6500 Series Basic Guide - Page 199
RANGE OFF ON 1. PERMIT/REJECT 2. SET IP ADDRESS 9. RX MAC ADD SET. OFF ON Sets whether to restrict the range of IP addresses. Disables restriction of IP address of computers. Enables restriction of IP address of computers from which data (print/fax jobs) can be sent to the machine. Selects whether - Canon imageCLASS MF6530 | imageCLASS MF6500 Series Basic Guide - Page 200
name 2. Enables computers on the network to access the machine and modify its settings. - ON - OFF Enables computers on the network to access the machine and modify its settings. - OFF - ON Sets or browses detailed information on the machine with a Canon printer driver or utility. - ON - OFF - Canon imageCLASS MF6530 | imageCLASS MF6500 Series Basic Guide - Page 201
SYSTEM SETTINGS 4. ETHERNET DRIVER 1. AUTO DETECT AUTO MANUAL 1. DUPLEX 2. ETHERNET TYPE 5. VIEW IP ADDRESS 1. IP ADDRESS 2. SUBNET MASK 3. GATEWAY ADDRESS 6. STARTUP TIME SET. Specifies the type of network connection. Selects the detection method of Ethernet driver. Sets the machine to determine - Canon imageCLASS MF6530 | imageCLASS MF6500 Series Basic Guide - Page 202
, 9600 bps, 14400 bps) Sets whether to receive and store all documents in memory and not to print automatically. (See Chapter 1, "Advanced Fax Features," in the Advanced Guide.) Disables memory reception. Enables memory reception. Registers the password that protects the authority for accessing to - Canon imageCLASS MF6530 | imageCLASS MF6500 Series Basic Guide - Page 203
settings. - ON - OFF 5. ACCESS TO DEST.* Sets restriction of the access to destinations. 1. RESTRICT NEW ADD. Sets whether to restrict registering or changing destinations for one-touch and coded speed dialing. Sets whether to restrict making calls to the destinations not registered for the - Canon imageCLASS MF6530 | imageCLASS MF6500 Series Basic Guide - Page 204
● Dimensions ● Installation Space ● Environmental the product.) Approx. 780 W (max.) MF6530/MF6531/MF6550: less than 13.5 sec.* MF6560 standby display appears) * Warm-up time may differ depending on the condition and environment of the machine. Approx. 52.2 lb (23.7kg) (including toner cartridge - Canon imageCLASS MF6530 | imageCLASS MF6500 Series Basic Guide - Page 205
Stock ● Printable Area ● Scanning Area » p. 3-1. » p. 3-3. » p. 2-3. Copier ● Scanning Resolution ● Printing Resolution ● Magnification ● First Copy Time ● Copy Speed ● No. of Copies 600 dpi x 600 dpi 1200 dpi enhanced x 600 dpi 1:1 ± 1.0%, 1:2.000, 1:1.290, 1:0.780, 1:0.640, 1:0.500 Zoom 0. - Canon imageCLASS MF6530 | imageCLASS MF6500 Series Basic Guide - Page 206
● Paper Handling ● Paper Delivery ● Print Speed ● Printing Resolution ● Number of Tones ● Printing Cartridge Indirect electrostatic method (On-demand fixing) - Paper cassette: 500 sheets x 1 cassette (22 lb (80 g/m2)) - Multi-purpose tray: 100 sheets (22 lb (80 g/m2)) 100 sheets (18 to 22 lb (64 to - Canon imageCLASS MF6530 | imageCLASS MF6500 Series Basic Guide - Page 207
) ● Dialing - Speed dialing One-touch speed dialing (23 destinations) Coded speed dialing (100 destinations) Group dialing (122 destinations) Address Book dialing Regular dialing (with numeric keys) - Automatic redialing - Manual redialing (with Redial key) - Sequential broadcast (124 destinations - Canon imageCLASS MF6530 | imageCLASS MF6500 Series Basic Guide - Page 208
Telephone (MF6550/MF6560/MF6580 Only) ● Connection External telephone/answering machine (CNG detecting signal)/data modem *1 The Public Switched Telephone Network (PSTN) currently supports 28.8 Kbps modem speed or lower, depending on telephone line conditions. *2 Based on ITU-T Standard Chart No. - Canon imageCLASS MF6530 | imageCLASS MF6500 Series Basic Guide - Page 209
11-8 Clear key 1-4 Clearing Jams 12-1 Coded Dial key 1-5, 4-33 Coded speed dialing 4-6 Deleting 4-21 Editing 4-18 Registering 4-15 Using 4-33 Collate key 1-4 COMMON SETTINGS 13-5 Components 1-1 COPY key 1-3 COPY SETTINGS 13-10 Copying 6-1 Customer support Canada xvi U.S.A xvi D Daylight - Canon imageCLASS MF6530 | imageCLASS MF6500 Series Basic Guide - Page 210
dialing 4-6 Deleting 4-13 Editing 4-10 Registering 4-7 Using 4-32 Operation panel 1-1, 1-3 P Paper Guidelines 3-4 Jams 12-3 Loading 3-5 Printable area 3-3 Requirements 3-1 Paper cassette 1-1 Paper delivery tray 1-1 PAPER JAM message 12-3 Paper Select indicator 1-3 Paper select key 1-4 Pause key - Canon imageCLASS MF6530 | imageCLASS MF6500 Series Basic Guide - Page 211
speed dialing 4-6 Remote UI 10-1 REPLACE TONER message 11-10 Replacing toner cartridge 11-10 REPORT SETTINGS 13-28 Reset key 1-3 RX SETTINGS 13-15 S Safety instructions xiii SCAN key 1-3 Scan settings Copying 6-3 Faxes 4-3 Scanning 8-1 Scanning area 1-2 Sending faxes 4-1 Setting paper type and size - Canon imageCLASS MF6530 | imageCLASS MF6500 Series Basic Guide - Page 212
Z Zoom ratio 6-6 Preset zoom 6-6 Zoom designation 6-7 14-9 Appendix - Canon imageCLASS MF6530 | imageCLASS MF6500 Series Basic Guide - Page 213
Appendix 14-10 - Canon imageCLASS MF6530 | imageCLASS MF6500 Series Basic Guide - Page 214
, Sydney, N.S.W. 2113, Australia CANON CHINA CO.,LTD 15F, North Tower, Beijing Kerry Centre, 1 Guang Hua Road, Chao Yang District, 100020, Beijing, China CANON SINGAPORE PTE. LTD. 1 HarbourFront Avenue #04-01 Keppel Bay Tower, Singapore 098632 FA7-8174 (020) © CANON INC. 2006 PRINTED IN JAPAN OR
-
 1
1 -
 2
2 -
 3
3 -
 4
4 -
 5
5 -
 6
6 -
 7
7 -
8
-
9
-
10
-
11
-
12
-
13
-
14
-
15
-
16
-
17
-
18
-
19
-
20
-
21
-
22
-
23
-
24
-
25
-
26
-
27
-
28
-
29
-
30
-
31
-
32
-
33
-
34
-
35
-
36
-
37
-
38
-
39
-
40
-
41
-
42
-
43
-
44
-
45
-
46
-
47
-
48
-
49
-
50
-
51
-
52
-
53
-
54
-
55
-
56
-
57
-
58
-
59
-
60
-
61
-
62
-
63
-
64
-
65
-
66
-
67
-
68
-
69
-
70
-
71
-
72
-
73
-
74
-
75
-
76
-
77
-
78
-
79
-
80
-
81
-
82
-
83
-
84
-
85
-
86
-
87
-
88
-
89
-
90
-
91
-
92
-
93
-
94
-
95
-
96
-
97
-
98
-
99
-
100
-
101
-
102
-
103
-
104
-
105
-
106
-
107
-
108
-
109
-
110
-
111
-
112
-
113
-
114
-
115
-
116
-
117
-
118
-
119
-
120
-
121
-
122
-
123
-
124
-
125
-
126
-
127
-
128
-
129
-
130
-
131
-
132
-
133
-
134
-
135
-
136
-
137
-
138
-
139
-
140
-
141
-
142
-
143
-
144
-
145
-
146
-
147
-
148
-
149
-
150
-
151
-
152
-
153
-
154
-
155
-
156
-
157
-
158
-
159
-
160
-
161
-
162
-
163
-
164
-
165
-
166
-
167
-
168
-
169
-
170
-
171
-
172
-
173
-
174
-
175
-
176
-
177
-
178
-
179
-
180
-
181
-
182
-
183
-
184
-
185
-
186
-
187
-
188
-
189
-
190
-
191
-
192
-
193
-
194
-
195
-
196
-
197
-
198
-
199
-
200
-
201
-
202
-
203
-
204
-
205
-
206
-
207
-
208
-
209
-
210
-
211
-
212
-
213
-
214
 |
 |
ENG
Basic Guide
Please read this guide before operating this equipment.
After you finish reading this guide, store it in a safe place for future reference.
Appendix
Before Using the Machine
Document Handling
Print Media
Sending Faxes (MF6550/MF6560/
MF6580 Only)
Receiving Faxes (MF6550/MF6560/
MF6580 Only)
Copying
Printing
Scanning
PC Faxing (MF6550/MF6560/
MF6580 Only)
Maintenance
Troubleshooting
Machine Settings
Remote UI (MF6580 Only)
Series
What Can I Do with This Machine?