Canon imageCLASS MF6530 imageCLASS MF6500 Series Basic Guide - Page 103
Using Speed Dialing, Press [FAX].
 |
View all Canon imageCLASS MF6530 manuals
Add to My Manuals
Save this manual to your list of manuals |
Page 103 highlights
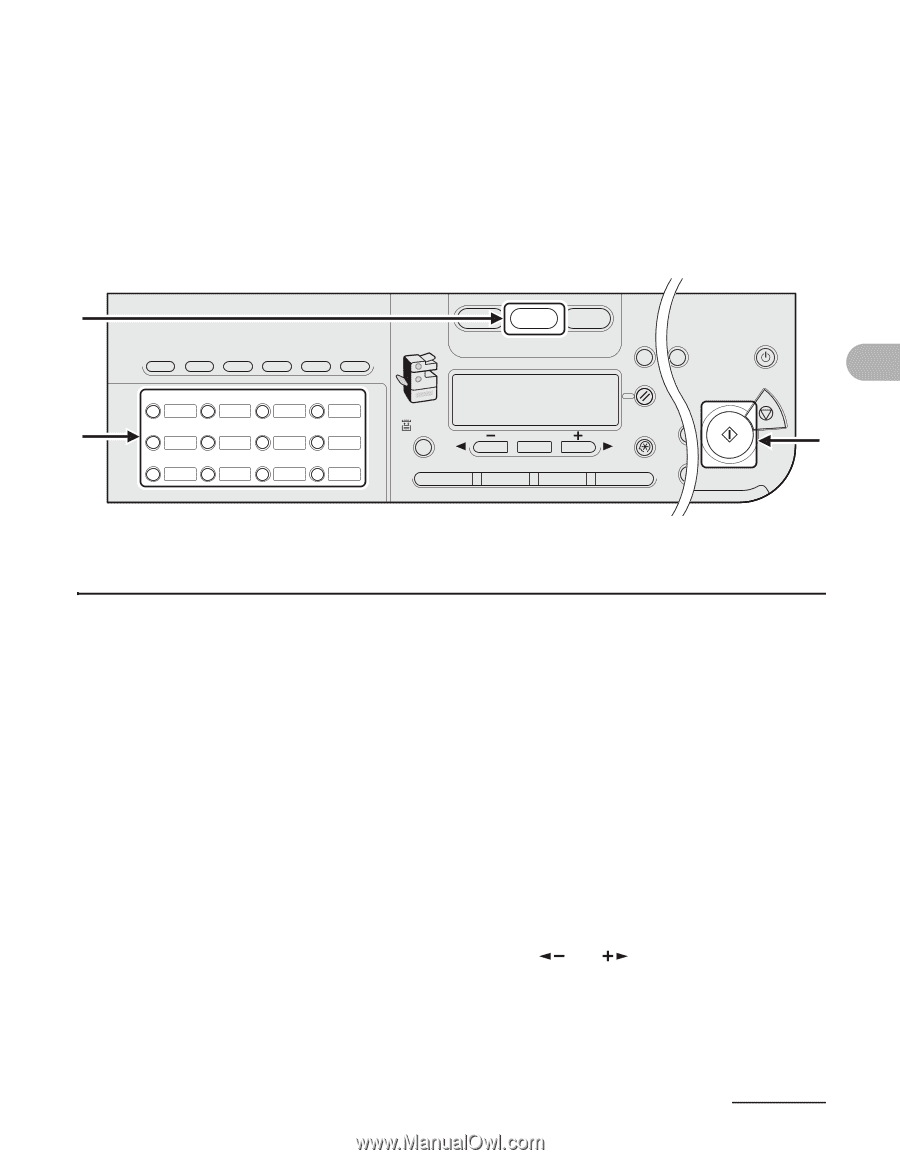
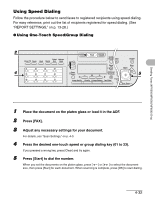
Using Speed Dialing Follow the procedure below to send faxes to registered recipients using speed dialing. For easy reference, print out the list of recipients registered for speed dialing. (See "REPORT SETTINGS," on p. 13-28.) ● Using One-Touch Speed/Group Dialing 2 Coded Address Direct TX Pause Hook Redial Dial Book COPY FAX SCAN System View Monitor ClSeeatrtin C ON/OFF 01 02 03 04 4 05 06 07 08 Paper Select Reset Colla Stop Start Additional 2 on Functions 5 OK 09 10 11 12 Image Quality Density Enlarge/Reduce Two-Sided Frame E rocessing/ Data Error Power Sending Faxes (MF6550/MF6560/MF6580 Only) 1 Place the document on the platen glass or load it in the ADF. 2 Press [FAX]. 3 Adjust any necessary settings for your document. For details, see "Scan Settings," on p. 4-3. 4 Press the desired one-touch speed or group dialing key (01 to 23). If you pressed a wrong key, press [Clear] and try again. 5 Press [Start] to dial the number. When you set the documents on the platen glass, press [ ] or [ ] to select the document size, then press [Start] for each document. When scanning is complete, press [OK] to start dialing. 4-32
-
 1
1 -
2
-
3
-
4
-
5
-
6
-
7
-
8
-
9
-
10
-
11
-
12
-
13
-
14
-
15
-
16
-
17
-
18
-
19
-
20
-
21
-
22
-
23
-
24
-
25
-
26
-
27
-
28
-
29
-
30
-
31
-
32
-
33
-
34
-
35
-
36
-
37
-
38
-
39
-
40
-
41
-
42
-
43
-
44
-
45
-
46
-
47
-
48
-
49
-
50
-
51
-
52
-
53
-
54
-
55
-
56
-
57
-
58
-
59
-
60
-
61
-
62
-
63
-
64
-
65
-
66
-
67
-
68
-
69
-
70
-
71
-
72
-
73
-
74
-
75
-
76
-
77
-
78
-
79
-
80
-
81
-
82
-
83
-
84
-
85
-
86
-
87
-
88
-
89
-
90
-
91
-
92
-
93
-
94
-
95
-
96
-
97
-
 98
98 -
 99
99 -
 100
100 -
 101
101 -
 102
102 -
 103
103 -
 104
104 -
 105
105 -
 106
106 -
 107
107 -
 108
108 -
109
-
110
-
111
-
112
-
113
-
114
-
115
-
116
-
117
-
118
-
119
-
120
-
121
-
122
-
123
-
124
-
125
-
126
-
127
-
128
-
129
-
130
-
131
-
132
-
133
-
134
-
135
-
136
-
137
-
138
-
139
-
140
-
141
-
142
-
143
-
144
-
145
-
146
-
147
-
148
-
149
-
150
-
151
-
152
-
153
-
154
-
155
-
156
-
157
-
158
-
159
-
160
-
161
-
162
-
163
-
164
-
165
-
166
-
167
-
168
-
169
-
170
-
171
-
172
-
173
-
174
-
175
-
176
-
177
-
178
-
179
-
180
-
181
-
182
-
183
-
184
-
185
-
186
-
187
-
188
-
189
-
190
-
191
-
192
-
193
-
194
-
195
-
196
-
197
-
198
-
199
-
200
-
201
-
202
-
203
-
204
-
205
-
206
-
207
-
208
-
209
-
210
-
211
-
212
-
213
-
214
 |
 |