Canon imageRUNNER ADVANCE C5250 imageRUNNER ADVANCE C5200 Srs Basic Operation - Page 147
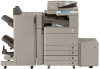
Inner 2 Way Tray-F1 Optional, Open the lower right and upper right covers of the machine.
 |
View all Canon imageRUNNER ADVANCE C5250 manuals
Add to My Manuals
Save this manual to your list of manuals |
Page 147 highlights
Troubleshooting Inner 2 Way Tray-F1 (Optional) Check the location of the paper jam, and follow the procedure described below, while referring to the directions that appear on the touch panel display, to remove the jammed paper. • The Inner 2 Way Tray-F1 is an optional product. • If the Paper Deck Unit-B2 is attached, move the paper deck away from the main unit before proceeding with this procedure. • If the Copy Tray-J1 is attached to the main unit, remove all output paper from the tray. 1 Open the lower right and upper right covers of the machine. 1. Grip the handle, and open 2 the lower right cover of the machine. 2. Open the upper right cover of the machine. 1 2 Remove any jammed paper. 3 Close the upper right cover and then close the lower right cover. When closing the upper and lower right covers of the main unit, be careful not to get your fingers caught, as this may result in personal injury. • Gently close the covers until they click into place in the closed position. • If the Paper Deck Unit-B2 was moved away from the main unit, reconnect it to the main unit. 147
-
 1
1 -
2
-
3
-
4
-
5
-
6
-
7
-
8
-
9
-
10
-
11
-
12
-
13
-
14
-
15
-
16
-
17
-
18
-
19
-
20
-
21
-
22
-
23
-
24
-
25
-
26
-
27
-
28
-
29
-
30
-
31
-
32
-
33
-
34
-
35
-
36
-
37
-
38
-
39
-
40
-
41
-
42
-
43
-
44
-
45
-
46
-
47
-
48
-
49
-
50
-
51
-
52
-
53
-
54
-
55
-
56
-
57
-
58
-
59
-
60
-
61
-
62
-
63
-
64
-
65
-
66
-
67
-
68
-
69
-
70
-
71
-
72
-
73
-
74
-
75
-
76
-
77
-
78
-
79
-
80
-
81
-
82
-
83
-
84
-
85
-
86
-
87
-
88
-
89
-
90
-
91
-
92
-
93
-
94
-
95
-
96
-
97
-
98
-
99
-
100
-
101
-
102
-
103
-
104
-
105
-
106
-
107
-
108
-
109
-
110
-
111
-
112
-
113
-
114
-
115
-
116
-
117
-
118
-
119
-
120
-
121
-
122
-
123
-
124
-
125
-
126
-
127
-
128
-
129
-
130
-
131
-
132
-
133
-
134
-
135
-
136
-
137
-
138
-
139
-
140
-
141
-
 142
142 -
 143
143 -
 144
144 -
 145
145 -
 146
146 -
 147
147 -
 148
148 -
 149
149 -
 150
150 -
 151
151 -
 152
152 -
153
-
154
-
155
-
156
-
157
-
158
-
159
-
160
-
161
-
162
-
163
-
164
-
165
-
166
-
167
-
168
-
169
-
170
-
171
-
172
-
173
-
174
-
175
-
176
-
177
-
178
-
179
-
180
-
181
-
182
-
183
-
184
-
185
-
186
-
187
-
188
-
189
-
190
-
191
-
192
-
193
-
194
-
195
-
196
-
197
-
198
-
199
-
200
-
201
-
202
-
203
-
204
 |
 |
