Casio EX-S2 Owners Manual - Page 34
BASIC IMAGE RECORDING, Recording an Image
 |
UPC - 079767682644
View all Casio EX-S2 manuals
Add to My Manuals
Save this manual to your list of manuals |
Page 34 highlights
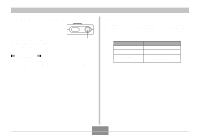
BASIC IMAGE RECORDING BASIC IMAGE RECORDING This section describes the basic procedure for recording an image. Recording an Image Your camera automatically adjusts shutter speed in accordance with the brightness of the subject. Images you record are stored in the camera's flash memory. • You can also use optionally available SD memory cards and MultiMedia Cards (MMC) to store images (page 76). 1. Press the power button to turn on the camera. • This causes an image or a message to appear on the monitor screen. 2. Align the mode selector with "REC". • This enters the REC mode for image recording. Power button Mode selector 3. Compose the image on the monitor screen. 12 1600 1200 NORMAL • The focusing range of the camera is approximately 1 meter to infinity (∞). 02/12/24 12:58 • When performing this step, take care so your fingers do not block the lens or any of the sensors. • You can compose images using either the monitor screen or the optical viewfinder. • When using the optical viewfinder, you can turn off the monitor screen to save power (page 51). 4. Press the shutter release button to record the image. • The number of images that can be stored in memory depends on the resolution setting you are using (pages 40, 114). 34
-
 1
1 -
2
-
3
-
4
-
5
-
6
-
7
-
8
-
9
-
10
-
11
-
12
-
13
-
14
-
15
-
16
-
17
-
18
-
19
-
20
-
21
-
22
-
23
-
24
-
25
-
26
-
27
-
28
-
 29
29 -
 30
30 -
 31
31 -
 32
32 -
 33
33 -
 34
34 -
 35
35 -
 36
36 -
 37
37 -
 38
38 -
 39
39 -
40
-
41
-
42
-
43
-
44
-
45
-
46
-
47
-
48
-
49
-
50
-
51
-
52
-
53
-
54
-
55
-
56
-
57
-
58
-
59
-
60
-
61
-
62
-
63
 |
 |
