Casio EX-TR100WE User Guide - Page 55
Using the LED Light (LED), Changing the Image Size (Image Size), Enter the REC Mode, Image Size
 |
View all Casio EX-TR100WE manuals
Add to My Manuals
Save this manual to your list of manuals |
Page 55 highlights
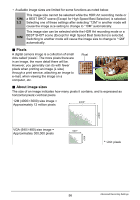
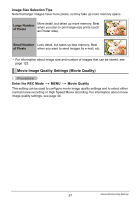
Using the LED Light (LED) Procedure Enter the REC Mode * MENU * LED Use the LED light when shooting where lighting is dim. The effectiveness of the LED light is reduced the further you are from the subject. Auto On Off LED lights automatically under dark shooting conditions. LED always lights. LED never lights. IMPORTANT! • Do not turn on the LED light near a person's eyes and do not allow anyone to look directly into the light. • You should compose the image so the main subject is in the center of the image when using the LED light. • Since the camera is equipped with a wide-angle lens, the center tends to be brighter while the periphery tends to be darker. Changing the Image Size (Image Size) Procedure Enter the REC Mode * MENU * Image Size This setting can be used to configure snapshot image size. Image Size (Pixels) Suggested Print Size and Application 12M (4000x3000) Poster Print 3:2 (4000x2656) Poster Print 10M (3648x2736) Poster Print 5M (2560x1920) A4 Print VGA (640x480) E Mail Description Good detail for better clarity even for images cropped from the original on a computer, etc. Good detail Image files are smaller, which is better when attaching images to e-mail. However, images are relatively coarser. • The initial factory default image size setting is 12M (12 million pixels). • Selecting "3:2" records images with an aspect ratio of 3:2, which matches the standard aspect ratio of print paper. • You should regard the print paper sizes suggested here as guidelines only (200 dpi print resolution). B 55 Advanced Recording Settings
-
 1
1 -
2
-
3
-
4
-
5
-
6
-
7
-
8
-
9
-
10
-
11
-
12
-
13
-
14
-
15
-
16
-
17
-
18
-
19
-
20
-
21
-
22
-
23
-
24
-
25
-
26
-
27
-
28
-
29
-
30
-
31
-
32
-
33
-
34
-
35
-
36
-
37
-
38
-
39
-
40
-
41
-
42
-
43
-
44
-
45
-
46
-
47
-
48
-
49
-
 50
50 -
 51
51 -
 52
52 -
 53
53 -
 54
54 -
 55
55 -
 56
56 -
 57
57 -
 58
58 -
 59
59 -
 60
60 -
61
-
62
-
63
-
64
-
65
-
66
-
67
-
68
-
69
-
70
-
71
-
72
-
73
-
74
-
75
-
76
-
77
-
78
-
79
-
80
-
81
-
82
-
83
-
84
-
85
-
86
-
87
-
88
-
89
-
90
-
91
-
92
-
93
-
94
-
95
-
96
-
97
-
98
-
99
-
100
-
101
-
102
-
103
-
104
-
105
-
106
-
107
-
108
-
109
-
110
-
111
-
112
-
113
-
114
-
115
-
116
-
117
-
118
-
119
-
120
-
121
-
122
-
123
-
124
-
125
-
126
-
127
-
128
-
129
 |
 |
