Casio WK 3000 User Guide - Page 100
Saving Files
 |
UPC - 079767312749
View all Casio WK 3000 manuals
Add to My Manuals
Save this manual to your list of manuals |
Page 100 highlights
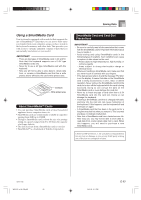
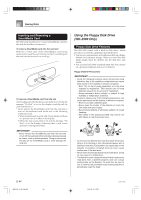
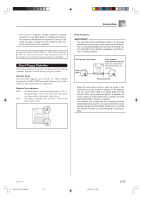
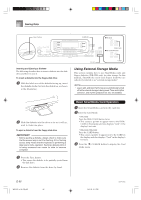
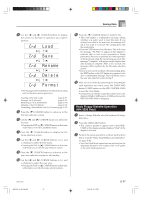
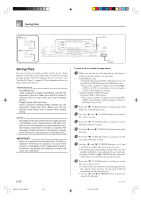
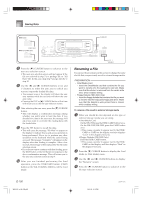
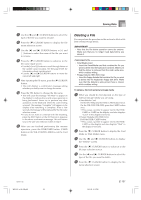
Saving Data GWK-3500 CURSOR DISK/CARD GWK-3100/WK-3000 CARD Saving Files You can use the procedures in this section to save Song Memory, Synthesizer, and other data you create to external storage media for later loading when you need it. See "Savable File Types" on page E-92 for information about the type of data you can save. PREPARATION • SmartMedia Card Insert a properly formatted SmartMedia card into the keyboard's card slot. Make sure that the sticker is removed from the card's write area, which enables writing. • Floppy Diskette (WK-3500 Only) Insert a properly formatted floppy diskette into the keyboard's floppy disk drive. Make sure that the diskette's write protect hole is closed, which enables writing. NOTE • Depending on the type and the amount of data involved, a SmartMedia card or floppy diskette (WK-3500 only) data save or load operation can take anywhere from a few minutes to more than 10 minutes to complete. The message "Pls Wait" will remain on the display to indicate that a data save or load operation is being performed. IMPORTANT! • Never try to perform any operation while "Pls Wait" is displayed. Performing any operation can cause Flash memory or SmartMedia card or floppy diskette data to be deleted, and damage the keyboard's memory and cause it to malfunction. E-98 WK3100_e_89-105.p65 98 [+]/[-] YES/NO To save a file to external storage media 1 What you should do first depends on the type of external storage media you are using. • SmartMedia Card: On the WK-3500 press the DISK/CARD button twice. On the WK-3100/WK-3000, press the CARD button once. • This causes a pointer to appear next to the DISK/ CARD or CARD on the display, and also displays "Card" in the display's text area. • Floppy Diskette (WK-3500 Only): Press the DISK/CARD button. • This causes a pointer to appear next to the DISK/ CARD on the display, and also displays "Disk" in the display's text area. 2 Press the [̄] CURSOR button to display the Card Mode (or Disk Mode) menu. 3 Use the [̇] and [̈] CURSOR buttons to display the "Save" screen. 4 Press the [̄] CURSOR button to advance to the file type selection screen. 5 Use the [̇] and [̈] CURSOR buttons to select the file type. 6 Press the [̄] CURSOR button to advance to the user area selection screen. 7 Use the [̇] and [̈] CURSOR buttons or [+] and [-] buttons to select the user area you want. • The numeric area of the display will show the user area number, while the text area will show the user area name. • Pressing the EXIT or [̆] CURSOR button at this time will return you to the file type selection screen. 8 Press the [̄] CURSOR button to advance to the file name input screen. • Use the [+] and [-] buttons to scroll through letters at the current cursor location. See the page E-103 for information about inputting text. • Use the [̇] and [̈] CURSOR buttons to move the cursor left and right. 735A-E-100C 04.3.26, 0:12 PM
-
 1
1 -
2
-
3
-
4
-
5
-
6
-
7
-
8
-
9
-
10
-
11
-
12
-
13
-
14
-
15
-
16
-
17
-
18
-
19
-
20
-
21
-
22
-
23
-
24
-
25
-
26
-
27
-
28
-
29
-
30
-
31
-
32
-
33
-
34
-
35
-
36
-
37
-
38
-
39
-
40
-
41
-
42
-
43
-
44
-
45
-
46
-
47
-
48
-
49
-
50
-
51
-
52
-
53
-
54
-
55
-
56
-
57
-
58
-
59
-
60
-
61
-
62
-
63
-
64
-
65
-
66
-
67
-
68
-
69
-
70
-
71
-
72
-
73
-
74
-
75
-
76
-
77
-
78
-
79
-
80
-
81
-
82
-
83
-
84
-
85
-
86
-
87
-
88
-
89
-
90
-
91
-
92
-
93
-
94
-
 95
95 -
 96
96 -
 97
97 -
 98
98 -
 99
99 -
 100
100 -
 101
101 -
 102
102 -
 103
103 -
 104
104 -
 105
105 -
106
-
107
-
108
-
109
-
110
-
111
-
112
-
113
-
114
-
115
-
116
-
117
-
118
-
119
-
120
-
121
-
122
-
123
-
124
-
125
-
126
-
127
-
128
-
129
-
130
-
131
-
132
-
133
-
134
-
135
-
136
-
137
-
138
-
139
-
140
-
141
-
142
-
143
-
144
-
145
-
146
-
147
-
148
 |
 |
