Casio WK-6500 User Guide - Page 32
C-13 MENU button. - replacement
 |
View all Casio WK-6500 manuals
Add to My Manuals
Save this manual to your list of manuals |
Page 32 highlights
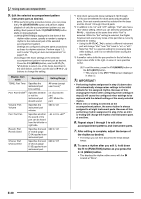
Using Auto Accompaniment 5. Edit the selected accompaniment pattern instrument part as desired. • While performing the procedure below, you can press the L-17 (START/STOP) button and perform repeat playback of only the accompaniment pattern you are editing. Each press of the L-17 (START/STOP) button starts or stops playback. (1) While [RHYTHM] is displayed in line three of the rhythm editor screen, specify a number to assign a rhythm to the instrument part of the selected accompaniment pattern. Settings are configured using the same procedures as those for rhythm selection. Perform steps 1, 2, and 3 under "Playing an Auto Accompaniment" on page E-24. (2) Configure the mixer settings of the selected accompaniment pattern instrument part as desired. Press the C-5 (MIXER) button, use the R-17 (t, y) buttons to select one of the items described in the table below, and then use the dial or R-14 (-, +) buttons to change the setting. Display: Item name Description Setting Range TONE: Part Tone Specifies the instrument part tone setting. All tones (except user tones)*1 Part: Part On/Off*2 Specifies whether or not the instrument part should sound. on: Sounds the part. oFF: Mutes the part. Volume: Part Volume Pan: Part Pan Specifies the instrument part volume. 000 to 127 Specifies whether the sound of the part can be heard from the left side or right side. -64 to 0 to +63*3 Reverb: Part Reverb Send Specifies the level of reverb (page E-34) applied to an instrument part. 000 to 127 Chorus: Part Chorus Send Specifies the level of chorus (page E-35) applied to an instrument part. 000 to 127 *1 Only drum set sounds (tone numbers K:129 through K:145) can be selected for drum parts and percussion parts. Drum set sounds cannot be selected for the bass and the Chord 1 through Chord 5 parts. *2 In addition to its "on" and "oFF" settings, "Part" also has a "Sol" (Solo) setting, which you can select by pressing the R-14 (-, +) buttons at the same time while "Part" is selected. While the "Sol" setting is selected, the Digital Keyboard will sound only notes of the part that is currently selected for editing. • Using the R-17 (u, i) to select a different instrument part will change "Part" from "Sol" back to "on" or "oFF". • Note that "Sol" is a special setting for previewing data while editing it, and it is not reflected when saving the user rhythm. *3 A smaller value shifts the pan position to the left while a larger value shifts to the right. A value of zero specifies center. (3) To exit the mixer, press the C-5 (MIXER) button or the R-15 (EXIT) button. • This returns to the [RHYTHM] screen displayed in step (1). • Performing rhythm assignment in step (1) above also will automatically change mixer settings to the initial defaults for the assigned rhythm. Because of this, changing the rhythm after configuring mixer settings in step (2) will cause the configured mixer settings to be replaced with the default settings of the newly selected rhythm. • When intro or ending is selected as the accompaniment pattern, the same rhythm is always assigned to all eight instrument parts. Because of this, performing rhythm assignment in step (1) for an intro or ending will change the rhythm of all instrument parts at one time. 6. Repeat steps 3 through 5 to edit other accompaniment patterns and instrument parts. 7. After editing is complete, adjust the tempo of the rhythm as desired. • The tempo you set here becomes the initial default tempo. 8. To save a rhythm after you edit it, hold down the R-13 (FUNCTION) button as you press the C-13 (MENU) button. • This displays the rhythm editor menu with the 0 located at "Store". E-30
-
 1
1 -
2
-
3
-
4
-
5
-
6
-
7
-
8
-
9
-
10
-
11
-
12
-
13
-
14
-
15
-
16
-
17
-
18
-
19
-
20
-
21
-
22
-
23
-
24
-
25
-
26
-
 27
27 -
 28
28 -
 29
29 -
 30
30 -
 31
31 -
 32
32 -
 33
33 -
 34
34 -
 35
35 -
 36
36 -
 37
37 -
38
-
39
-
40
-
41
-
42
-
43
-
44
-
45
-
46
-
47
-
48
-
49
-
50
-
51
-
52
-
53
-
54
-
55
-
56
-
57
-
58
-
59
-
60
-
61
-
62
-
63
-
64
-
65
-
66
-
67
-
68
-
69
-
70
-
71
-
72
-
73
-
74
-
75
-
76
-
77
-
78
-
79
-
80
-
81
-
82
-
83
-
84
-
85
-
86
-
87
-
88
-
89
-
90
-
91
-
92
-
93
-
94
-
95
-
96
-
97
-
98
-
99
-
100
-
101
-
102
-
103
-
104
-
105
-
106
-
107
-
108
-
109
-
110
-
111
-
112
-
113
-
114
-
115
-
116
-
117
-
118
-
119
-
120
-
121
-
122
-
123
-
124
-
125
-
126
-
127
-
128
-
129
-
130
-
131
-
132
 |
 |
