Casio WK-6500 User Guide - Page 42
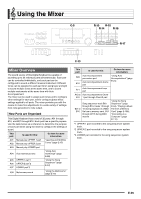
Mixer Operation
 |
View all Casio WK-6500 manuals
Add to My Manuals
Save this manual to your list of manuals |
Page 42 highlights
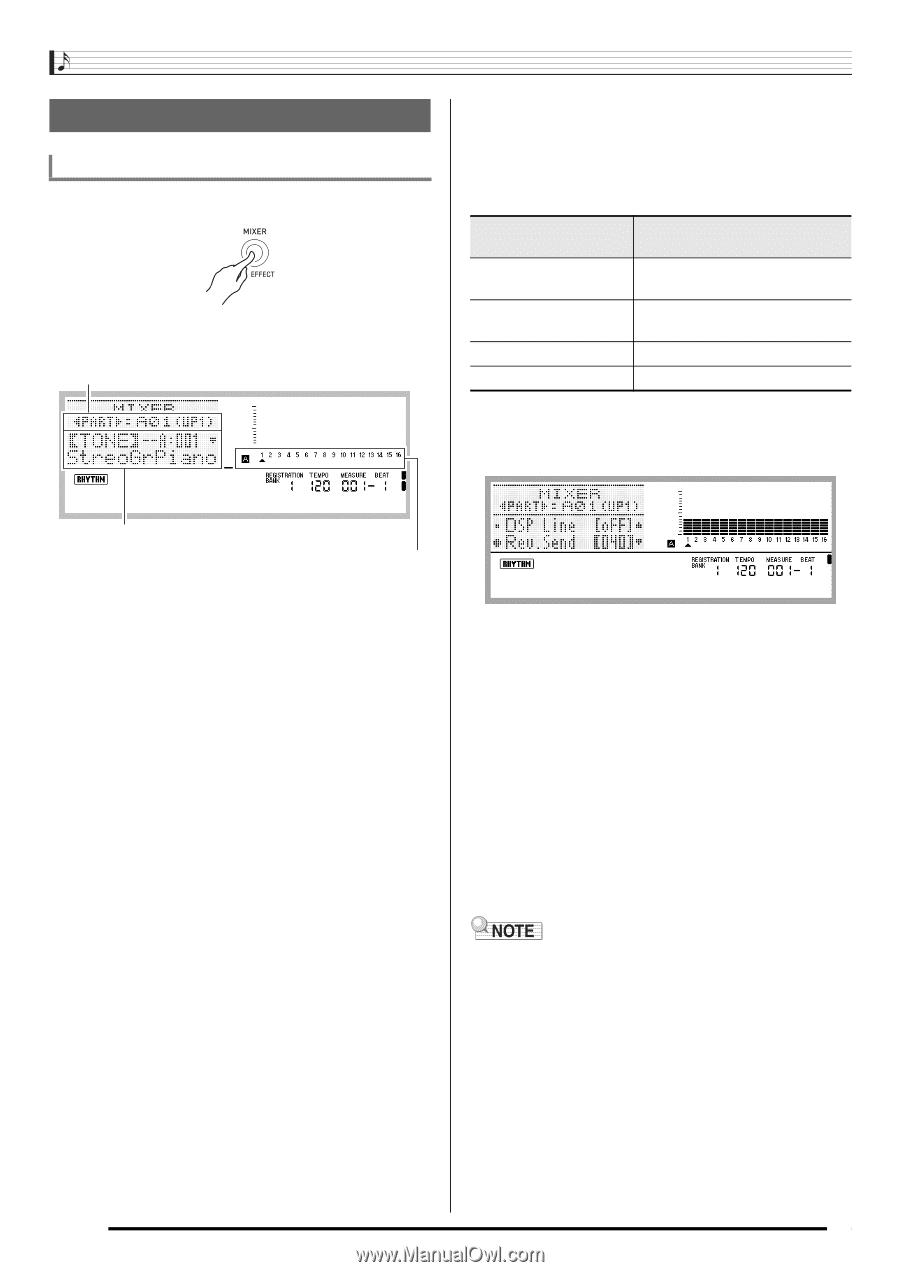
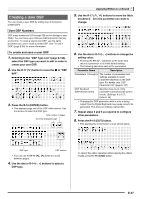
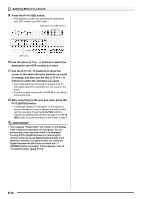
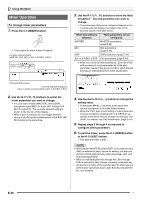
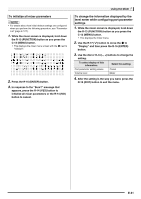
Using the Mixer Mixer Operation To change mixer parameters 1. Press the C-5 (MIXER) button. • This causes the mixer screen to appear. Currently selected setting (MASTER, DSP, MIC, or A01 to A16/B01 to B16) 3. Use the R-17 (t, y) buttons to move the thick brackets (%) to the parameter you want to change. • The parameters that can be configured depend on the currently selected setting. For details, refer to the sections shown in the table below. When this setting is selected: These parameters can be configured: MASTER MASTER parameters (page E-42) MIC MIC parameters (page E-43) DSP DSP parameters (page E-42) A01 to A16/B01 to B16 Part parameters (page E-44) • When you move the thick brackets (%) to one of the setting values of a part parameter, all of the part parameter values of the group (A or B) to which the part belongs are indicated by level meter black boxes. Parameter/Setting value Currently selected setting part (when currently selected setting is A01 to A16/B01 to B16) 2. Use the R-17 (u, i) buttons to select the mixer parameter you want to change. • You can select master (MASTER), effect (DSP), microphone input (MIC), or a part (A01 through A16, B01 through B16). The currently selected setting is shown in the line two of the display. • While a part is selected, you can toggle between Group A and Group B by pressing both of the R-17 (u, i) buttons at the same time. 4. Use the dial or R-14 (-, +) buttons to change the setting value. • Pressing the R-14 (-, +) buttons at the same time returns a parameter to its initial default setting. • While the "Part" (part on/off) setting of a part parameter is being configured, pressing both of the R-14 (-, +) buttons at the same time will change the setting to "Sol" (Solo). For details, see "Part Parameters" (page E-44). 5. Repeat steps 2 through 4 as required to configure other parameters. 6. To exit the mixer, press the C-5 (MIXER) button or the R-15 (EXIT) button. • This exits the mixer screen. • While master (MASTER), effect (DSP) or microphone input (MIC) is selected in step 2 above for setting, you also can perform normal keyboard play (play using layer, split, and Auto Accompaniment). • While an individual part (A01 through A16, B01 through B16) is selected in step 2 above, pressing a keyboard key will sound only notes of the selected part. All other types of performance operations (layer, split, Auto Accompaniment, etc.) are disabled. E-40 B
-
 1
1 -
2
-
3
-
4
-
5
-
6
-
7
-
8
-
9
-
10
-
11
-
12
-
13
-
14
-
15
-
16
-
17
-
18
-
19
-
20
-
21
-
22
-
23
-
24
-
25
-
26
-
27
-
28
-
29
-
30
-
31
-
32
-
33
-
34
-
35
-
36
-
 37
37 -
 38
38 -
 39
39 -
 40
40 -
 41
41 -
 42
42 -
 43
43 -
 44
44 -
 45
45 -
 46
46 -
 47
47 -
48
-
49
-
50
-
51
-
52
-
53
-
54
-
55
-
56
-
57
-
58
-
59
-
60
-
61
-
62
-
63
-
64
-
65
-
66
-
67
-
68
-
69
-
70
-
71
-
72
-
73
-
74
-
75
-
76
-
77
-
78
-
79
-
80
-
81
-
82
-
83
-
84
-
85
-
86
-
87
-
88
-
89
-
90
-
91
-
92
-
93
-
94
-
95
-
96
-
97
-
98
-
99
-
100
-
101
-
102
-
103
-
104
-
105
-
106
-
107
-
108
-
109
-
110
-
111
-
112
-
113
-
114
-
115
-
116
-
117
-
118
-
119
-
120
-
121
-
122
-
123
-
124
-
125
-
126
-
127
-
128
-
129
-
130
-
131
-
132
 |
 |