Casio XJ-S41 Owners Manual - Page 8
Displaying a Pointer in the Projected Image, To display a pointer in the image - specifications
 |
UPC - 079767178826
View all Casio XJ-S41 manuals
Add to My Manuals
Save this manual to your list of manuals |
Page 8 highlights
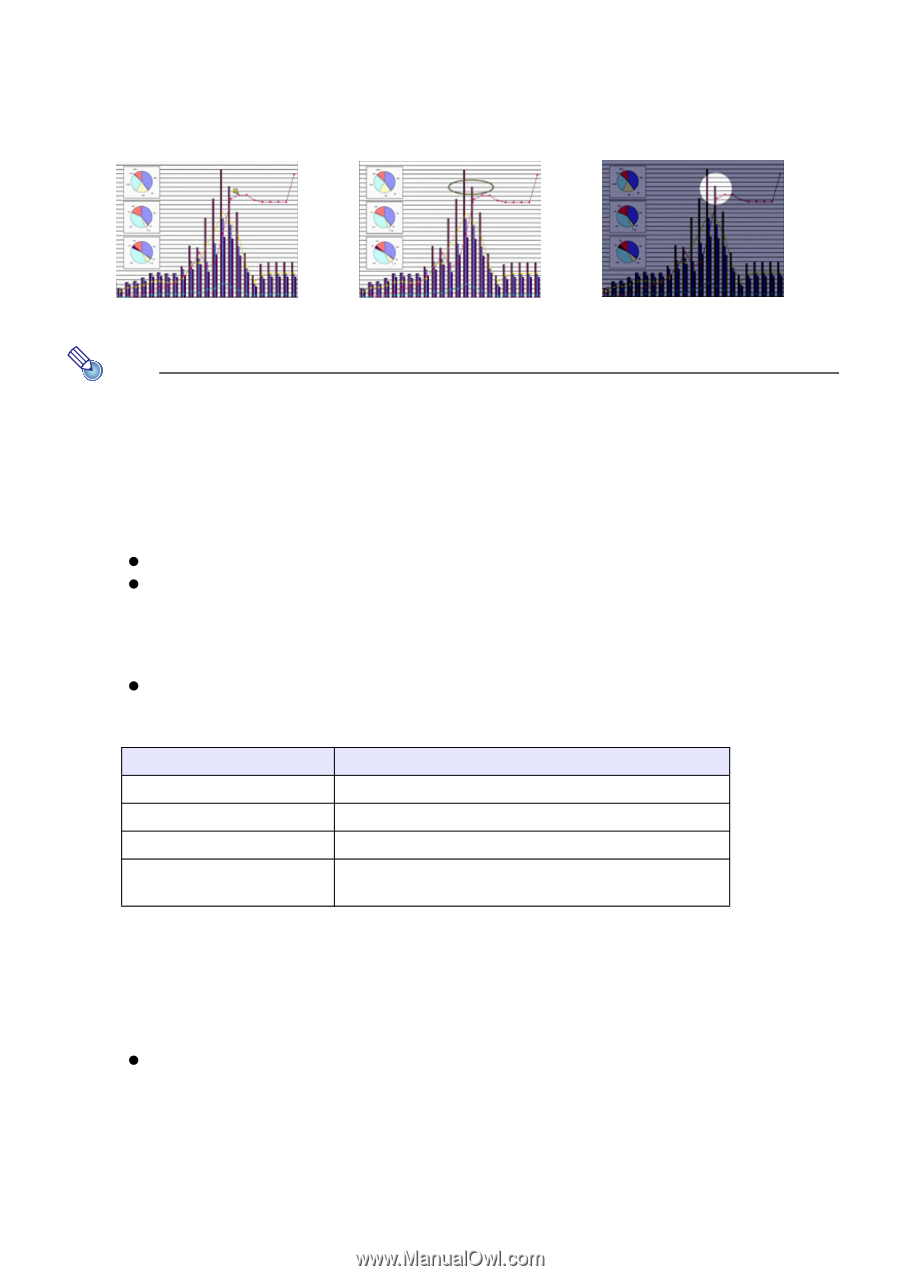
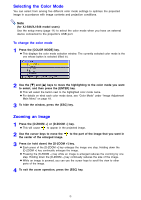
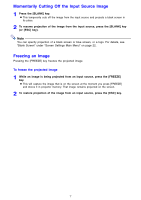
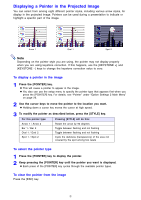
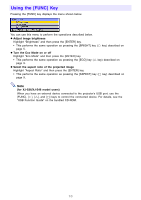
Displaying a Pointer in the Projected Image You can select from among eight different pointer styles, including various arrow styles, for display in the projected image. Pointers can be used during a presentation to indicate or highlight a specific part of the image. Arrow 1 Oval 1 Spot 2 Note Depending on the pointer style you are using, the pointer may not display properly when you are using keystone correction. If this happens, use the [KEYSTONE +] and [KEYSTONE -] keys to change the keystone correction value to zero. To display a pointer in the image 1 Press the [POINTER] key. z This will cause a pointer to appear in the image. z You also can use the setup menu to specify the pointer type that appears first when you press the [POINTER] key. For details, see "Pointer" under "Option Settings 2 Main Menu" on page 26. 2 Use the cursor keys to move the pointer to the location you want. z Holding down a cursor key moves the cursor at high speed. 3 To modify the pointer as described below, press the [STYLE] key. For this pointer type: Pressing [STYLE] will do this: Arrow 1 / Arrow 2 Rotate the arrow by 90 degrees Bar 1 / Bar 2 Toggle between flashing and not flashing Oval 1 / Oval 2 Toggle between flashing and not flashing Spot 1 / Spot 2 Cycle the darkness (transparency) of the area not covered by the spot among two levels To select the pointer type 1 Press the [POINTER] key to display the pointer. 2 Keep pressing the [POINTER] key until the pointer you want is displayed. z Each press of the [POINTER] key cycles through the available pointer types. To clear the pointer from the image Press the [ESC] key. 8
-
 1
1 -
2
-
 3
3 -
 4
4 -
 5
5 -
 6
6 -
 7
7 -
 8
8 -
 9
9 -
 10
10 -
 11
11 -
 12
12 -
 13
13 -
14
-
15
-
16
-
17
-
18
-
19
-
20
-
21
-
22
-
23
-
24
-
25
-
26
-
27
-
28
-
29
-
30
-
31
-
32
-
33
-
34
 |
 |