Cisco SPA525G2 User Manual - Page 98
Logging in to the Web Interface, Configuring Your Address Book
 |
View all Cisco SPA525G2 manuals
Add to My Manuals
Save this manual to your list of manuals |
Page 98 highlights
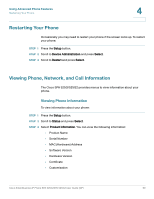
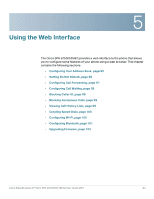
Using the Web Interface Logging in to the Web Interface 5 Logging in to the Web Interface STEP 1 Obtain the IP address of your phone by pressing the Setup button and selecting Status. STEP 2 Scroll to Network Status and press Select. Note the IP address. STEP 3 On your PC, open Internet Explorer. STEP 4 Enter the IP address in the browser's toolbar. STEP 5 The Info page of the IP Phone Web Interface displays. The web interface has several different tabs. The tabs that allow you to configure options on your phone are the Phone and User tabs. Click the tab names to switch between these tabs. Configuring Your Address Book The Cisco SPA 525G/525G2 phone provides an address book for you to store and view frequently dialed numbers. The address book appears on your phone, and you can dial numbers from the directory. To view and edit your address book: STEP 1 Log in to the web interface. STEP 2 Choose the Personal Address Book tab. A window appears with the listings for your address book. To enter a new contact into the address book: STEP 1 In the Personal Address Book tab, click Add Personal Address Entry. STEP 2 Enter the name, office number, home number, or mobile number, and ring tone for the new contact. STEP 3 Click Submit All Changes. The contact is added to your address book. Cisco Small Business IP Phone SPA 525G/SPA 525G2 User Guide (SIP) 95
-
 1
1 -
2
-
3
-
4
-
5
-
6
-
7
-
8
-
9
-
10
-
11
-
12
-
13
-
14
-
15
-
16
-
17
-
18
-
19
-
20
-
21
-
22
-
23
-
24
-
25
-
26
-
27
-
28
-
29
-
30
-
31
-
32
-
33
-
34
-
35
-
36
-
37
-
38
-
39
-
40
-
41
-
42
-
43
-
44
-
45
-
46
-
47
-
48
-
49
-
50
-
51
-
52
-
53
-
54
-
55
-
56
-
57
-
58
-
59
-
60
-
61
-
62
-
63
-
64
-
65
-
66
-
67
-
68
-
69
-
70
-
71
-
72
-
73
-
74
-
75
-
76
-
77
-
78
-
79
-
80
-
81
-
82
-
83
-
84
-
85
-
86
-
87
-
88
-
89
-
90
-
91
-
92
-
 93
93 -
 94
94 -
 95
95 -
 96
96 -
 97
97 -
 98
98 -
 99
99 -
 100
100 -
 101
101 -
 102
102 -
 103
103 -
104
-
105
-
106
-
107
-
108
-
109
-
110
-
111
-
112
-
113
-
114
-
115
-
116
-
117
 |
 |