Cisco X2000 User Manual - Page 14
How to use the browser-based utility, Setup > Basic Setup - user guide
 |
View all Cisco X2000 manuals
Add to My Manuals
Save this manual to your list of manuals |
Page 14 highlights
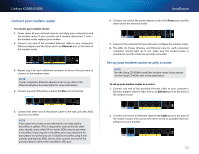
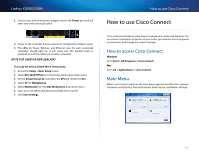
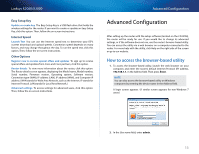
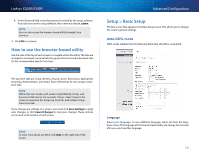
Linksys X2000/X3000 3. In the Password field, enter the password created by the setup software. If you did not run the setup software, then enter the default, admin. Note You can also access the browser‑based utility through Cisco Connect. 4. Click OK to continue. How to use the browser-based utility Use the tabs at the top of each screen to navigate within the utility. The tabs are arranged in two levels, top-level tabs for general functions and lower-level tabs for the corresponding specific functions. Advanced Configuration Setup > Basic Setup The first screen that appears is the Basic Setup screen. This allows you to change the router's general settings. Auto/ADSL mode ADSL mode (default) has the following fields that should be completed: The top-level tabs are: Setup, Wireless, Security, Access Restrictions, Applications & Gaming, Administration, and Status. Each of these has its own unique, lowerlevel tabs. Note Within this User Guide, each screen is identified by its top- and lower-level tab names. For example, "Setup > Basic Setup" is the screen accessed via the Setup top-level tab, and its Basic Setup lower-level tab. If you change any settings on a screen, you must click Save Settings to apply your changes, or click Cancel Changes to clear your changes. These controls are located at the bottom of each screen. Note To learn more about any field, click Help on the right side of the screen. Language Select your language To use a different language, select one from the dropdown menu. The language of the browser-based utility will change five seconds after you select another language. 14
-
 1
1 -
2
-
3
-
4
-
5
-
6
-
7
-
8
-
 9
9 -
 10
10 -
 11
11 -
 12
12 -
 13
13 -
 14
14 -
 15
15 -
 16
16 -
 17
17 -
 18
18 -
 19
19 -
20
-
21
-
22
-
23
-
24
-
25
-
26
-
27
-
28
-
29
-
30
-
31
-
32
-
33
-
34
-
35
-
36
-
37
-
38
-
39
-
40
-
41
-
42
-
43
-
44
-
45
-
46
-
47
-
48
-
49
-
50
-
51
-
52
-
53
-
54
-
55
-
56
-
57
-
58
-
59
-
60
-
61
-
62
-
63
-
64
-
65
-
66
-
67
-
68
-
69
-
70
-
71
-
72
-
73
-
74
-
75
-
76
-
77
-
78
-
79
-
80
-
81
-
82
-
83
-
84
-
85
-
86
-
87
-
88
-
89
-
90
-
91
-
92
-
93
-
94
-
95
-
96
-
97
-
98
-
99
-
100
-
101
-
102
-
103
-
104
-
105
-
106
-
107
-
108
-
109
-
110
-
111
-
112
-
113
-
114
-
115
-
116
-
117
-
118
-
119
-
120
-
121
-
122
-
123
-
124
-
125
-
126
-
127
-
128
-
129
-
130
-
131
-
132
-
133
-
134
-
135
-
136
-
137
-
138
-
139
-
140
-
141
-
142
-
143
-
144
-
145
-
146
-
147
-
148
-
149
-
150
-
151
-
152
-
153
-
154
-
155
-
156
-
157
-
158
-
159
-
160
-
161
-
162
-
163
-
164
-
165
-
166
-
167
-
168
-
169
-
170
-
171
-
172
-
173
-
174
-
175
-
176
-
177
-
178
-
179
-
180
-
181
-
182
-
183
-
184
-
185
-
186
-
187
-
188
-
189
-
190
-
191
-
192
-
193
-
194
-
195
-
196
-
197
-
198
-
199
-
200
-
201
-
202
-
203
-
204
-
205
-
206
-
207
-
208
-
209
-
210
-
211
-
212
-
213
-
214
-
215
-
216
-
217
-
218
-
219
-
220
-
221
-
222
-
223
-
224
-
225
-
226
-
227
-
228
-
229
-
230
-
231
-
232
-
233
-
234
-
235
-
236
-
237
-
238
-
239
-
240
-
241
-
242
-
243
-
244
-
245
-
246
-
247
-
248
-
249
-
250
-
251
-
252
-
253
-
254
-
255
-
256
-
257
-
258
-
259
-
260
-
261
-
262
-
263
-
264
-
265
-
266
-
267
-
268
-
269
-
270
-
271
-
272
-
273
-
274
-
275
-
276
-
277
-
278
-
279
-
280
-
281
-
282
-
283
-
284
-
285
-
286
-
287
-
288
-
289
-
290
-
291
 |
 |
