Compaq D51s Hardware Guide - Page 14
Drawer Installation Method, Computer, Setup F10 Utility Guide - power supply
 |
UPC - 890552632367
View all Compaq D51s manuals
Add to My Manuals
Save this manual to your list of manuals |
Page 14 highlights
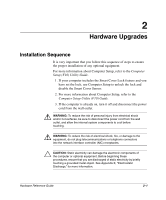
Hardware Upgrades 4. Open the computer by removing its outside cover. See the procedures for removing the computer cover later in this chapter. 5. Install any optional equipment. See the applicable sections of this guide or refer to the documentation provided with the optional equipment for instructions. 6. Replace the computer cover. 7. Turn on the monitor, computer, and any devices you want to test. 8. Reconfigure the computer, if necessary. Refer to the Computer Setup (F10) Utility Guide for instructions about using Computer Setup. Drawer Installation Method When installing the computer chassis in a drawer, the following conditions must be met to ensure proper air flow: I At least 3 inches (7.6 cm) of clear space between the back of the drawer and anything behind it, such as a wall or the back panel of a desk. I At least two 2-inch (5.1-cm) diameter holes in the back of the drawer. One hole must be immediately behind the power supply for exhaust air, and the other should be used for routing the cables. Ä CAUTION: Cables should not be run through the exhaust air hole. I At least nine holes in the front drawer panel or in the bottom of the drawer in front of the chassis for fresh air intake. The diameter of the holes must be between 0.38 and 0.5 inch (1.0 and 1.3 cm). I At least 1 inch (2.54 cm) of clear space below the drawer to ensure proper air flow, if vent holes are located in the bottom of the mounting drawer. I At least 1 inch (2.54 cm) of clear space above the top of the chassis. 2-2 Hardware Reference Guide
-
 1
1 -
2
-
3
-
4
-
5
-
6
-
7
-
8
-
 9
9 -
 10
10 -
 11
11 -
 12
12 -
 13
13 -
 14
14 -
 15
15 -
 16
16 -
 17
17 -
 18
18 -
 19
19 -
20
-
21
-
22
-
23
-
24
-
25
-
26
-
27
-
28
-
29
-
30
-
31
-
32
-
33
-
34
-
35
-
36
-
37
-
38
-
39
-
40
-
41
-
42
-
43
-
44
-
45
-
46
-
47
-
48
-
49
-
50
-
51
-
52
-
53
-
54
-
55
-
56
-
57
-
58
-
59
-
60
-
61
-
62
-
63
 |
 |
