Craftsman 21419 Operation Manual - Page 5
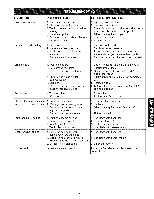
Specifications
 |
View all Craftsman 21419 manuals
Add to My Manuals
Save this manual to your list of manuals |
Page 5 highlights
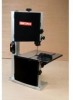
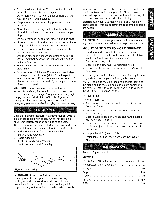
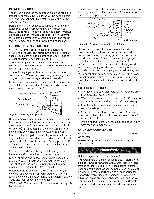
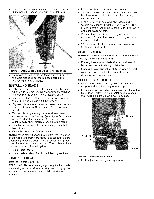
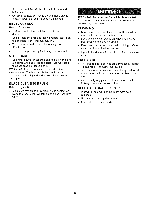
SPECIFICATIONS Depth of throat at 90 Maximum depth of cut at 90 Maximum depth of cut at 45 Table size Table tilt Wheel diameter 9" 3%" 2" 113/4x 113/+. 0° to 45 ° 9.4" Blade length Blade width 62" _/+_ 3/8,, Blade speed Overall dimensions 2460 FPM 20 x 13 x 29" Shipping weight 49 Ibs Dust collection port 2.086" CAUTION: Always observe the following safety precautions: + Make sure that blade guides and thrust bearings are positioned and adjusted correctly to prevent sideways and rearward movement of the blade. Adjust upper guide to just clear workpiece. + Check to make sure blade is tensioned and tracking properly. Do not over tension the blade in order to prevent premature blade wear and breakage. Avoid under tensioning to eliminate back and forth, side to side blade movement as it cuts. + Use proper blade for the cutting operation. + After turning saw on, allow blade to come to full speed before attempting any cutting operation. + Support workpiece firmly against table and use a smooth steady feed to guide work through the cut. Use push sticks or push blocks when required. + Keep hands away and out of line with moving parts. + Always wear eye protection. + Do not remove jammed cutoff pieces until blade has stopped. ON/OFF SWITCH Refer to Figure 4. The ON/OFF switch is located on the left front of the saw column. To turn saw ON, pull the switch to the up position. To turn saw OFF, push the switch to the down position. The saw can be locked from unauthorized use by locking the switch. To lock the switch: + Turn the switch to OFF position and disconnect saw from power source. + Pull the key out. The switch cannot be turned on with the key removed. NOTE: Should the key be removed from the switch at the ON position, the switch can be turned off but cannot be turned on again. + To replace key, slide key into the slot on switch until it snaps. Figure 4- Locking Switch in OFF Position REMOVING BLADE WARNING: Disconnect band saw from power source when changing or adjusting blades. Wear leather gloves when handling band saw blades. Never wear gloves when operating saw. + Turn blade tension lever on the back of the tool counterclockwise all the way until it locks in position to release blade tension (see Figure 5). Tension Knob_ Blade Tension Lever Tracking Window Upper Guide Adjusting Knob Figure 5 = Blade Tensioning Lever + Release two latches on the side of the tool and open upper and lower doors. NOTE: When opening doors, make sure latches are completely free from tabs on frame. 5
-
 1
1 -
 2
2 -
 3
3 -
 4
4 -
 5
5 -
 6
6 -
 7
7 -
 8
8 -
 9
9 -
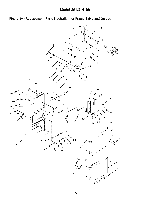 10
10 -
 11
11 -
12
-
13
-
14
-
15
-
16
-
17
-
18
-
19
-
20
-
21
-
22
-
23
-
24
 |
 |
