Craftsman 21419 Operation Manual - Page 7
Lower, Guides, Thickness, Pitch
 |
View all Craftsman 21419 manuals
Add to My Manuals
Save this manual to your list of manuals |
Page 7 highlights
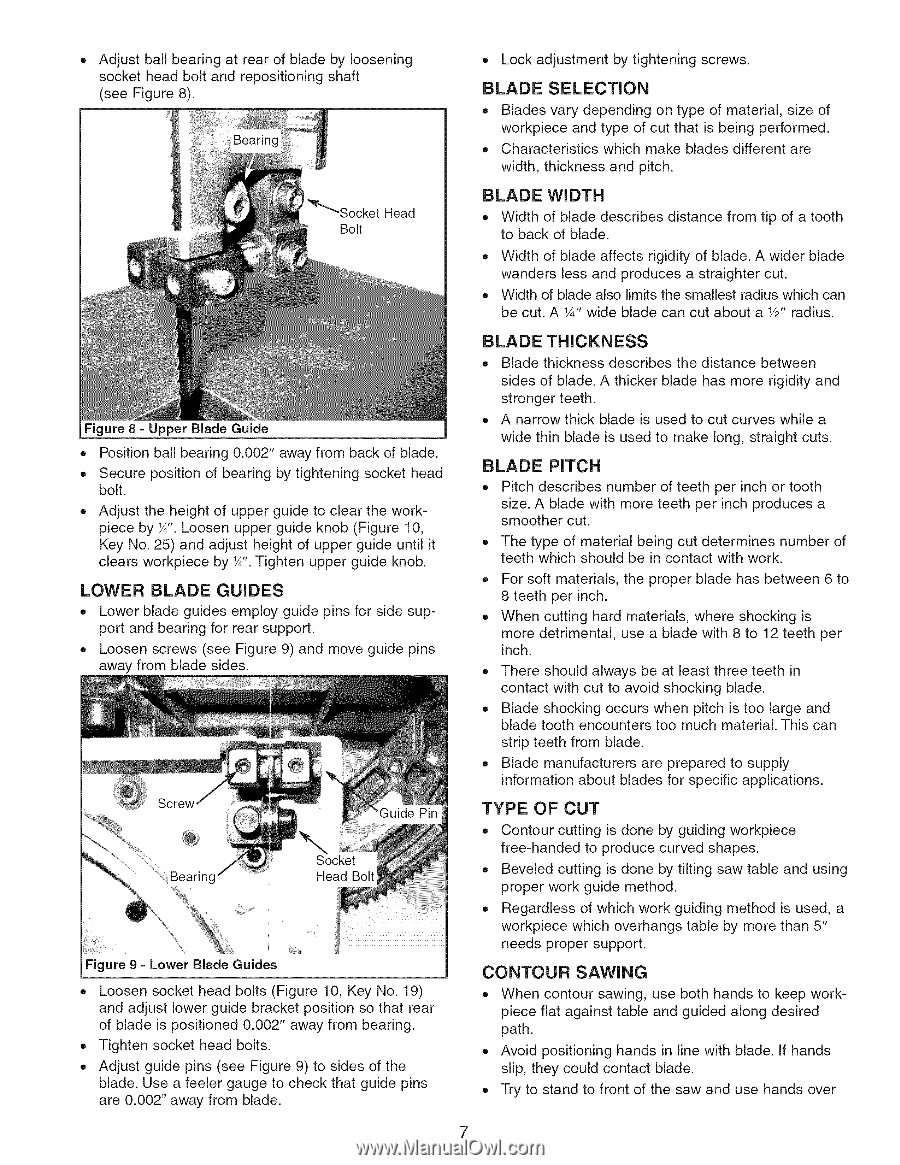
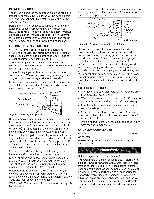
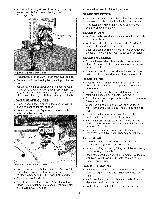
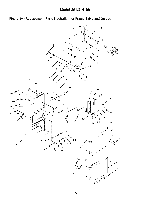
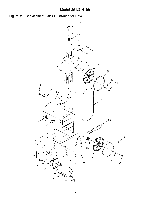
• Adjust ball bearing at rear of blade by loosening socket head bolt and repositioning shaft (see Figure 8). Head Lock adjustment by tightening screws. BLADE SELECTION • Blades vary depending on type of material, size of workpiece and type of cut that is being performed. Characteristics which make blades different are width, thickness and pitch. BLADE WIDTH Width of blade describes distance from tip of a tooth to back of blade. Width of blade affects rigidity of blade. A wider blade wanders less and produces a straighter cut. Width of blade also limits the smallest radius which can be cut. A 1A"wide blade can cut about a Y2"radius. Figure 8 =Upper Blade Guide o Position ball bearing 0.002" away from back of blade. o Secure position of bearing by tightening socket head bolt. Adjust the height of upper guide to clear the workpiece by ¼". Loosen upper guide knob (Figure 10, Key No. 25) and adjust height of upper guide until it clears workpiece by ¼".Tighten upper guide knob. LOWER BLADE GUIDES • Lower blade guides employ guide pins for side support and bearing for rear support. • Loosen screws (see Figure 9) and move guide pins away from blade sides. Loosen socket head bolts (Figure 10, Key No. 19) and adjust lower guide bracket position so that rear of blade is positioned 0.002" away from bearing. Tighten socket head bolts. Adjust guide pins (see Figure 9) to sides of the blade. Use a feeler gauge to check that guide pins are 0.002" away from blade. BLADE THICKNESS • Blade thickness describes the distance between sides of blade. A thicker blade has more rigidity and stronger teeth. A narrow thick blade is used to cut curves while a wide thin blade is used to make long, straight cuts. BLADE PITCH Pitch describes number of teeth per inch or tooth size. A blade with more teeth per inch produces a smoother cut. The type of material being cut determines number of teeth which should be in contact with work. ® For soft materials, the proper blade has between 6 to 8 teeth per inch. When cutting hard materials, where shocking is more detrimental, use a blade with 8 to 12 teeth per inch. • There should always be at least three teeth in contact with cut to avoid shocking blade. Blade shocking occurs when pitch is too large and blade tooth encounters too much material. This can strip teeth from blade. • Blade manufacturers are prepared to supply information about blades for specific applications. TYPE OF CUT • Contour cutting is done by guiding workpiece free-handed to produce curved shapes. • Beveled cutting is done by tilting saw table and using proper work guide method. Regardless of which work guiding method is used, a workpiece which overhangs table by more than 5" needs proper support. CONTOUR SAWING When contour sawing, use both hands to keep workpiece flat against table and guided along desired path. Avoid positioning hands in line with blade. If hands slip, they could contact blade. • Try to stand to front of the saw and use hands over 7
-
 1
1 -
 2
2 -
 3
3 -
 4
4 -
 5
5 -
 6
6 -
 7
7 -
 8
8 -
 9
9 -
 10
10 -
 11
11 -
 12
12 -
13
-
14
-
15
-
16
-
17
-
18
-
19
-
20
-
21
-
22
-
23
-
24
 |
 |