Cub Cadet ZTX4 54 Operation Manual - Page 17
Post-Operation Tractor Care, Cleaning the Tractor, Maintenance
 |
View all Cub Cadet ZTX4 54 manuals
Add to My Manuals
Save this manual to your list of manuals |
Page 17 highlights
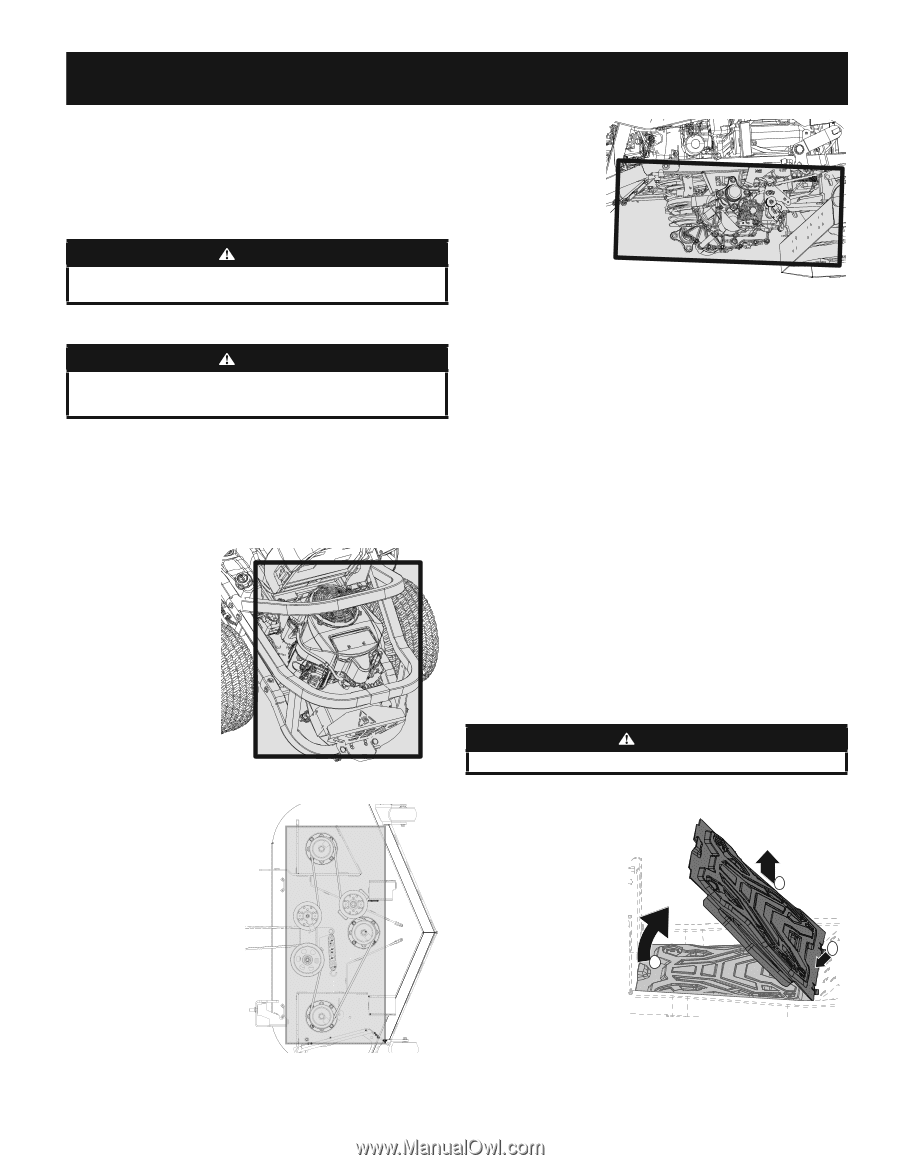
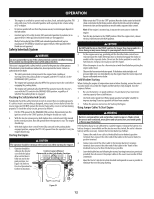
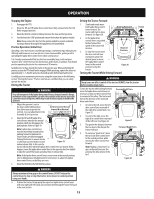
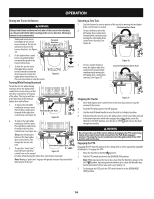
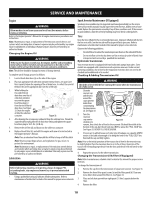
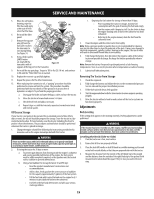
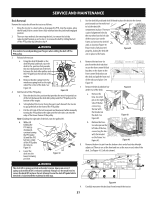
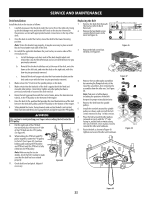
SERVICE AND MAINTENANCE Note: This Operator's Manual covers several models. Tractor features may vary by model. Not all features in this manual are applicable to all tractor models and the tractor depicted may differ from yours. Post-Operation Tractor Care After each operation of the tractor, to ensure safe operating conditions refer to Maintenance Schedule chart in this manual for proper tractor care. WARNING Failure to follow these recommendations may result in serious injury to yourself or others and may cause damage to the tractor. Cleaning the Tractor WARNING If the tractor has been recently run, the engine, muffler and surrounding metal surfaces will be very hot and can cause burns to the skin. Let the engine cool for at least five minutes. Exercise caution to avoid burns. Your tractor should be cleaned after each use and under certain conditions, i.e. dry conditions and/or mulching situations, additional cleaning may be necessary. One of the best ways to keep your tractor running efficiently and to reduce fire risk is to regularly remove debris buildup from the tractor. Follow the recommendations below and contact your authorized dealer with any questions. • Allow the machine to cool for at least five minutes in an open area before cleaning. Note: Using a pressure washer or garden hose is not recommended for cleaning your tractor other than to clean the underside of the deck. It may cause damage to electrical components, spindles, pulleys, bearings or the engine. The use of water will result in shortened life and reduce serviceability. • Keep both sides of transmission cooling slots, exhaust manifold, around fuses, all wiring and harnesses, muffler pipe, muffler shield, engine intake screens and cooling fins, etc clear of grass clippings and leaves. See Figure 28. Figure 28 • Clean the top of the mower deck, under the spindle covers and belt area. See Figure 29. Figure 29 • Clean around and near the transmission, axle and the fan area. See 30. • Debris can accumulate anywhere on the tractor, especially on horizontal surfaces. Additional cleaning may be necessary when mowing in dry conditions or when mulching. Wheel Not Shown For Clarity Figure 30 • Fuel leaks/spills, oil leaks/spills and excess lubrication can also become collections sites for debris. Immediate repair and cleaning up oil or fuel spills can help reduce fire hazards. • In addition to cleaning the tractor before operating and storing, do not attempt to mow unusually tall grass (10" (25.4 cm) or higher), dry grass (e.g., pasture) or piles of dry leaves. Dry grass or leaves may contact the engine exhaust and/or build up on the mower deck presenting a potential fire hazard. Storing the Tractor • Allow the machine to cool in an open area for at least five minutes before storing. • Do not park the tractor near any flammable materials (wood, cloth or chemicals) or any open flames or other potential source of ignition (furnace, water heater or any other type of heater). • Remove all combustible materials from the tractor before storing. Empty cargo boxes, grass catchers or containers. • Always shut off fuel flow when storing or transporting if tractor is equipped with a fuel shutoff. • Check the fuel system (lines, tank, cap and fittings) per the maintenance schedule for cracks or leaks. Repair and clean as necessary. Maintenance Removing the Floor Panel WARNING Do not operate tractor with floor panel removed. On some models, the floor panel can be removed for maintenance, service and cleaning. To remove the floor panel: 1. Carefully lift the rear of the floor panel. See 1 in Figure 31. 2. Slide the floor panel rearward to free the 3 front of the floor panel. See 2 in Figure 31. 3. Lift it off the tractor. See 3 in Figure 31. 2 4. To place the floor panel 1 back on the tractor, carefully fit the front tabs at the front of the floor panel into place and lower the rear of the Figure 31 panel down into place. 17
-
 1
1 -
2
-
3
-
4
-
5
-
6
-
7
-
8
-
9
-
10
-
11
-
 12
12 -
 13
13 -
 14
14 -
 15
15 -
 16
16 -
 17
17 -
 18
18 -
 19
19 -
 20
20 -
 21
21 -
 22
22 -
23
-
24
-
25
-
26
-
27
-
28
-
29
-
30
-
31
-
32
-
33
-
34
-
35
-
36
-
37
-
38
-
39
-
40
-
41
-
42
-
43
-
44
-
45
-
46
-
47
-
48
 |
 |