D-Link DCS-2230 Product Manual
D-Link DCS-2230 Manual
 |
View all D-Link DCS-2230 manuals
Add to My Manuals
Save this manual to your list of manuals |
D-Link DCS-2230 manual content summary:
- D-Link DCS-2230 | Product Manual - Page 1
- D-Link DCS-2230 | Product Manual - Page 2
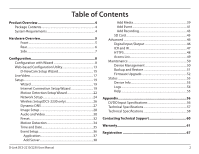
50 Backup and Restore 51 Firmware Upgrade 52 Status 53 Device Info 53 Logs 54 Help 55 Appendix 56 DI/DO Input Specifications 56 Technical Specifications 57 Technical Specifications 58 Contacting Technical Support 60 Warranty 61 Registration 67 D-Link DCS-2210/2230 User Manual 2 - D-Link DCS-2230 | Product Manual - Page 3
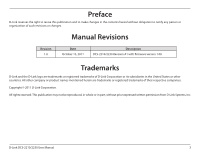
are trademarks or registered trademarks of their respective companies. Copyright © 2011 D-Link Corporation. All rights reserved. This publication may not be reproduced, in whole or in part, without prior expressed written permission from D-Link Systems, Inc. D-Link DCS-2210/2230 User Manual 3 - D-Link DCS-2230 | Product Manual - Page 4
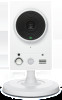
Product Overview Package Contents DCS-2210 or DCS-2230 Full HD PoE/Wireless N Cube Network Camera Camera stand CAT5 Ethernet cable Power adapter CD-ROM with User Manual and software Quick Installation Guide If any of the above items are missing, please contact your reseller. System - D-Link DCS-2230 | Product Manual - Page 5
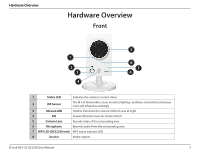
field of view at night 4 PIR Passive Infrared sensor for motion detect 5 Camera Lens Records video of the surrounding area 6 Microphone Records audio from the surrounding area 7 WPS LED (DCS2230 only) WPS status indicator LED 8 Speaker Audio output D-Link DCS-2210/2230 User Manual 5 - D-Link DCS-2230 | Product Manual - Page 6
the included DC 5 V power adapter 5 I/O Connector I/O connectors for external devices 6 Adjustment Ring Tighten or loosen the adjustment ring to adjust the camera's position 7 WPS LED (DCS2230 only) Can be used with cable ties to attach camera to a surface D-Link DCS-2210/2230 User Manual 6 - D-Link DCS-2230 | Product Manual - Page 7
Hardware Overview Side 1 1 Micro SD Card Slot Local storage for storing recorded image and video D-Link DCS-2210/2230 User Manual 7 - D-Link DCS-2230 | Product Manual - Page 8
start automatically, click Start > Run. Type D:\autorun.exe, where D: represents the drive letter of your CD-ROM drive. Click Installation Wizard to begin the installation. After clicking Setup Wizard, the window on the right will open. Click Next to continue. D-Link DCS-2210/2230 User Manual 8 - D-Link DCS-2230 | Product Manual - Page 9
Configuration Click Yes to accept the License Agreement. To start the installation process, click Next. Note: The installation may take several minutes to finish. D-Link DCS-2210/2230 User Manual 9 - D-Link DCS-2230 | Product Manual - Page 10
Configuration Click Finish to complete the installation. Click on the D-Link Setup Wizard SE icon that was created in your Windows Start menu. Start > D-Link > Setup Wizard SE D-Link DCS-2210/2230 User Manual 10 - D-Link DCS-2230 | Product Manual - Page 11
camera's default static IP address 192.168.0.20 will be displayed. Click the Wizard button to continue. Enter the Admin ID and password. When logging in for the first time, the default Admin ID is admin with the password left blank. Click Next, to proceed to the next page. D-Link DCS-2210/2230 User - D-Link DCS-2230 | Product Manual - Page 12
DHCP if your camera obtains an IP address automatically when it boots up. Select static IP if the camera will use the same IP address each time it is started. Click Next, to proceed to the next page. Take a moment to confirm your settings and click Restart. D-Link DCS-2210/2230 User Manual 12 - D-Link DCS-2230 | Product Manual - Page 13
and click the button labeled "Link" to access the web configuration. The Setup Wizard will automatically open your web browser to the IP address of the camera. Alternatively, you may manually open a browser and enter the IP address of the camera: 192.168.0.20 D-Link DCS-2210/2230 User Manual 13 - D-Link DCS-2230 | Product Manual - Page 14
OK to continue. This section shows your camera's live video. You can select your video profile and view or operate the camera. For additional information about web configuration, please refer to the user manual included on the CD-ROM or the D-Link website. D-Link DCS-2210/2230 User Manual 14 - D-Link DCS-2230 | Product Manual - Page 15
management tool for IP surveillance. Insert the CD-ROM into the CD-ROM drive. Click "Install D-ViewCam Software" from the menu, and select "D-ViewCam" to install the VMS software. Follow the Installation Wizard to install D-ViewCam. Click Next to continue. D-Link DCS-2210/2230 User Manual 15 - D-Link DCS-2230 | Product Manual - Page 16
Configuration Click Finish to complete the installation. To start the D-ViewCam, select Start > All Programs > D-Link D-ViewCam > Main Console. For more detail operation of using D-ViewCam software, please refer to D-ViewCam Manual. D-Link DCS-2210/2230 User Manual 16 - D-Link DCS-2230 | Product Manual - Page 17
when a trigger event occurs. Recording Indicator Note: The video motion feature for your camera must be enabled. When a recording is in progress, this indicator will change color tilt, and zoom within the camera's predefined view area, if one has been defined. D-Link DCS-2210/2230 User Manual 17 - D-Link DCS-2230 | Product Manual - Page 18
language using this menu. Auto Pan Stop Starts the automatic panning function. The ROI will pan from back and forth within the FOV Stops the camera ePTZ motion Preset Path Starts the camera's motion along the predefined path D-Link DCS-2210/2230 User Manual 18 - D-Link DCS-2230 | Product Manual - Page 19
Setup Wizard This wizard will guide you through a step-by-step process to configure your new D-Link Camera and connect the camera to the internet. Click Next to continue. Note: Select DHCP if you are unsure of which settings to choose. Click Next to continue. D-Link DCS-2210/2230 User Manual - D-Link DCS-2230 | Product Manual - Page 20
click Next to continue. If you have a Dynamic DNS account and would like the camera to update your IP address automatically, Select Enable DDNS and enter your host information. Click Next to continue. Enter a name for your camera and click Next to continue. D-Link DCS-2210/2230 User Manual 20 - D-Link DCS-2230 | Product Manual - Page 21
. Click Next to continue. If you have selected DHCP, you will see a summary of your settings, including the camera's IP address. Please write down all of this information as you will need it in order to access your camera. Click Apply to save your settings. D-Link DCS-2210/2230 User Manual 21 - D-Link DCS-2230 | Product Manual - Page 22
2 This step allows you to enable motion detection based on a customized schedule. Specify the day and hours. You may also choose to always record motion. D-Link DCS-2210/2230 User Manual 22 - D-Link DCS-2230 | Product Manual - Page 23
information for your e-mail or FTP account. Click Next to continue. Step 4 You have completed the Motion Detection Wizard. Please verify your settings and click Apply to save them. Please wait a few moments while the camera saves your settings and restarts. D-Link DCS-2210/2230 User Manual 23 - D-Link DCS-2230 | Product Manual - Page 24
subnet. Primary DNS: The primary domain name server translates names to IP addresses. Secondary DNS: The secondary DNS acts as a backup to the primary DNS. Enable UPnP: Enabling this setting allows your camera to be configured as a UPnP device on your network. D-Link DCS-2210/2230 User Manual 24 - D-Link DCS-2230 | Product Manual - Page 25
when connecting your device to a busy or heavily loaded network. Entering a value of '0' indicates that the camera should not monitor bandwidth. Specifying other values will limit the camera's transfer speed to the specified number of kilobytes per second. D-Link DCS-2210/2230 User Manual 25 - D-Link DCS-2230 | Product Manual - Page 26
your wireless network uses TKIP or AES encryption. If you use Open or Shared authentication, WEP encryption should be the setting. Key: If you use WEP, WPA-PSK, or WPA2-PSK authentication, enter the Key (also known as password) used for your wireless network. D-Link DCS-2210/2230 User Manual 26 - D-Link DCS-2230 | Product Manual - Page 27
mail used to connect to your DDNS account. Password: Enter the password used to connect to your DDNS server account. Timeout: Enter the DNS Timeout values you wish to use. Status: Indicates the connection status, which is automatically determined by the system. D-Link DCS-2210/2230 User Manual 27 - D-Link DCS-2230 | Product Manual - Page 28
over the camera image to draw a mask area.Right clicking on the camera image brings up the following menu options: Disable All: Disables all mask areas Enable All: Enables all mask areas Reset All: Clears : Adjust this setting to compensate for backlit subjects. D-Link DCS-2210/2230 User Manual 28 - D-Link DCS-2230 | Product Manual - Page 29
controls the amount of coloration, from grayscale to fully saturated. Sharpness: Specify a value from 0 to 8 to specify how much sharpening to apply to the image. Reset Default: Click this button to reset the image to factory default settings. D-Link DCS-2210/2230 User Manual 29 - D-Link DCS-2230 | Product Manual - Page 30
and mobile display. In addition, you may also configure the two-way audio settings for your camera. After making any changes, click the Save Settings button to save your changes. Number of active will result in stuttering motion, and requires less bandwidth. D-Link DCS-2210/2230 User Manual 30 - D-Link DCS-2230 | Product Manual - Page 31
the bit rate of the video recorded by the camera. Higher bit rates result in higher video quality. Fixed quality: Select the image quality level for the camera to try to maintain. High quality levels will gain applied to outgoing audio to increase its volume. D-Link DCS-2210/2230 User Manual 31 - D-Link DCS-2230 | Product Manual - Page 32
box to see a list of all the presets that have been created. You can select one, then click the GoTo button to change the displayed camera view to the preset. Clicking the Remove button will delete the currently selected preset. D-Link DCS-2210/2230 User Manual 32 - D-Link DCS-2230 | Product Manual - Page 33
the dropdown box at the bottom of this window, set the Dwell time to determine how long the camera view will stay at that preset, then click the Add button. The preset name will appear in the it from the list, enter a new dwell time, then click the Update button. D-Link DCS-2210/2230 User Manual 33 - D-Link DCS-2230 | Product Manual - Page 34
on the camera image brings up the following menu options: Select All: Draws a motion detection area over the entire screen. Clear All: Clears any motion detection areas that have been drawn. Restore: Restores the previously specified motion detection areas. D-Link DCS-2210/2230 User Manual 34 - D-Link DCS-2230 | Product Manual - Page 35
DCS-2230 with an Internet time server. Choose the one that is closest to your location. Set the Date and Time Manually: This option allows you to set the time and date manually. Copy Your Computer's Time This will synchronize the time information from Settings: your PC. D-Link DCS-2210/2230 User - D-Link DCS-2230 | Product Manual - Page 36
to update the fields accordingly. 2. To delete the selected item from the pull-down menu of event, server or media, click Delete. 3. Click on the item name to pop up a window for modifying. Note: You can add up to four events, five servers, and five media fields. D-Link DCS-2210/2230 User Manual - D-Link DCS-2230 | Product Manual - Page 37
to send) ex. Snapshot, Video Clips Server (where to send) ex. Email, FTP To start plotting an event, it is suggested to configure server and media columns first so that the Network Camera will know what action shall be performed when a trigger is activated. D-Link DCS-2210/2230 User Manual 37 - D-Link DCS-2230 | Product Manual - Page 38
for the target e-mail server account. FTP: Enter the configuration for the target FTP server account. Network Storage: Specify a network storage device. Only one network storage device is supported. SD Card: Use the camera's onboard SD card storage. D-Link DCS-2210/2230 User Manual 38 - D-Link DCS-2230 | Product Manual - Page 39
will be added on the file name. Add date and time suffix to file Check it to add timing information as file name suffix. name: D-Link DCS-2210/2230 User Manual 39 - D-Link DCS-2230 | Product Manual - Page 40
filename of saved video clips. System log: Select this option to set the media type to system logs. This will save the event to the camera system log, but will not record any snapshots or video. D-Link DCS-2210/2230 User Manual 40 - D-Link DCS-2230 | Product Manual - Page 41
to the camera. System Boot: Triggers an event when the system boots up. Network Lost: Triggers an event when the network connection is lost. Passive Infrared: Triggers an event when the PIR sensor is activated by moving infrared objects even in dark environment. D-Link DCS-2210/2230 User Manual 41 - D-Link DCS-2230 | Product Manual - Page 42
Configuration Time: Select Always or enter the time interval. Trigger D/O: Select to trigger the digital output for a specific number of seconds when an event occurs. Server: Specify the location where the event information should be saved to. D-Link DCS-2210/2230 User Manual 42 - D-Link DCS-2230 | Product Manual - Page 43
example, if each recording file is 6MB, and the total cyclic recording size is 600MB, then the camera will record 100 files in the specified location (folder) and then will delete the oldest file and create save other files in the same folder as recording files. D-Link DCS-2210/2230 User Manual 43 - D-Link DCS-2230 | Product Manual - Page 44
Configuration Size of each file for recording: File size for each recording file. You may input the value in the range of 200-5000. File Name Prefix: The prefix name will be added on the file name of the recording file(s). D-Link DCS-2210/2230 User Manual 44 - D-Link DCS-2230 | Product Manual - Page 45
and choose the picture file you would like to view. Playback Recorded Video: If video files are stored on the SD card, click on the video folder and choose the video file you would like to view. Refresh: Reloads the file and folder information from the SD card. D-Link DCS-2210/2230 User Manual 45 - D-Link DCS-2230 | Product Manual - Page 46
making any changes, click the Save Settings button to save your changes. Select D/I or D/O Mode: The camera will send a signal when an event is triggered, depending upon the type of device connected to the DI not to illuminate the LED on the side of the camera. D-Link DCS-2210/2230 User Manual 46 - D-Link DCS-2230 | Product Manual - Page 47
sensitivity in low light environments. Automatic: The Day/Night mode is set automatically. Generally, the camera uses Day mode and switches to Night mode when needed. Day Mode: Day mode enables the IR or off according to the schedule that you specify below. D-Link DCS-2210/2230 User Manual 47 - D-Link DCS-2230 | Product Manual - Page 48
certificate manually Create a certificate request and install Status: Displays the status of the certificate. Note: The certificate cannot be removed while the HTTPS is still enabled. To remove the certificate, you must first uncheck Enable HTTPS secure connection. D-Link DCS-2210/2230 User Manual - D-Link DCS-2230 | Product Manual - Page 49
List is set from 1.1.1.0 to 192.255.255.255 and the range of the Denied List is set from 1.1.1.0 to 170.255.255.255. Only users with IPs located between 171.0.0.0 and 192.255.255.255 can access the Network Camera. Alowed List Denied List D-Link DCS-2210/2230 User Manual 49 - D-Link DCS-2230 | Product Manual - Page 50
name prefix when creating a snapshot or a video clip. Enable OSD: Select this option to enable the On-Screen Display feature for your camera. Label: Enter a label for the camera. Show Time: Select this option to enable the time-stamp display on the video screen. D-Link DCS-2210/2230 User Manual 50 - D-Link DCS-2230 | Product Manual - Page 51
and then restore the pre-defined settings to your camera by clicking Load Configuration. Restore to Factory Default: You may reset your camera and restore the factory settings by clicking Restore Factory Defaults. Reboot Device: This will restart your camera. D-Link DCS-2210/2230 User Manual 51 - D-Link DCS-2230 | Product Manual - Page 52
The camera's current firmware version will be displayed on this screen. You may visit the D-Link Support Website to check for the latest available firmware version. To upgrade the firmware on your DCS-2210/2230, please download and save the latest firmware version from the D-Link Support Page - D-Link DCS-2230 | Product Manual - Page 53
Configuration Status Device Info This page displays detailed information about your device and network connection. D-Link DCS-2210/2230 User Manual 53 - D-Link DCS-2230 | Product Manual - Page 54
Configuration Logs This page displays the log information of your camera. You may download the information by clicking Download. You may also click Clear to delete the saved log information. D-Link DCS-2210/2230 User Manual 54 - D-Link DCS-2230 | Product Manual - Page 55
Configuration Help This page provides helpful information regarding camera operation. D-Link DCS-2210/2230 User Manual 55 - D-Link DCS-2230 | Product Manual - Page 56
DI to DC 5 V, activated by setting NO. or NC. DC 5 V Output / Max. 100 mA GND Internal 5V Power DND 5V DI 100 mA DO Reed switch R Diode DC Power 5V N.C / N.O External 3~12V Power DND 5V DC Power 3V~12V DI 100 mA DO Reed switch R Diode ALARM D-Link DCS-2210/2230 User Manual ALARM 56 - D-Link DCS-2230 | Product Manual - Page 57
(D-Link), SMTP Client, FTP Client, HTTP / HTTPS, Samba Client, PPPoE, UPnP Port Forwarding, RTP / RTSP/ RTCP, IP filtering, 3GPP, IGMP, ONVIF Compliant ƒƒ Administrator and user group protection ƒƒ Password authentication ƒƒ HTTP and RTSP digest encryption D-Link DCS-2210/2230 User Manual 57 - D-Link DCS-2230 | Product Manual - Page 58
of up to 32 cameras on one screen ƒƒ Supports all management functions provided in web interface ƒƒ Scheduled motion triggered, or manual recording options General Power Input 5 V DC 1.2 A, 50/60 Hz, PoE ( DCS-2210 only ) Max. Power Consumption DCS-2210: 3.5 watts DCS-2230: 4 watts Operating - D-Link DCS-2230 | Product Manual - Page 59
Appendix Dimensions 82.3 128.6 95 97 38.7 DCS-2210/2230 58 82 D-Link DCS-2210/2230 User Manual 59 - D-Link DCS-2230 | Product Manual - Page 60
questions and answers to technical issues. For customers within the United States: Phone Support: (877) 354-6555 Internet Support: http://support.dlink.com For customers within Canada: Phone Support: (800) 354-6560 Internet Support: http://support.dlink.ca D-Link DCS-2210/2230 User Manual 60 - D-Link DCS-2230 | Product Manual - Page 61
defective Hardware will be refunded by D-Link upon return to D-Link of the defective Hardware. All Hardware or part thereof that is replaced by D-Link, or for which the purchase price is refunded, shall become the property of D-Link upon replacement or refund. D-Link DCS-2210/2230 User Manual 61 - D-Link DCS-2230 | Product Manual - Page 62
considered defective, the customer must obtain a Return Material Authorization ("RMA") number by completing the RMA form. Enter the assigned Case ID Number at https://rma.dlink.com/ (USA only) or https://rma.dlink.ca (Canada only). D-Link DCS-2210/2230 User Manual 62 - D-Link DCS-2230 | Product Manual - Page 63
surge, and cosmetic damage; Any hardware, software, firmware or other products or services provided by anyone other than D-Link; and Products that have been purchased from inventory clearance or liquidation sales or other sales in which D-Link, the sellers, D-Link DCS-2210/2230 User Manual 63 - D-Link DCS-2230 | Product Manual - Page 64
an Authorized D-Link Service Office. Improper or LINK UNDER THIS WARRANTY IS LIMITED TO THE PURCHASE PRICE Link is a registered trademark of D-Link Corporation/D-Link Systems, Inc. Other trademarks or registered trademarks are the property of their respective owners. D-Link DCS-2210/2230 User Manual - D-Link DCS-2230 | Product Manual - Page 65
residential installation. This equipment generates, uses, and can radiate radio frequency energy and, if not installed and used in accordance with the instructions, may accept any interference received, including interference that may cause undesired operation. D-Link DCS-2210/2230 User Manual 65 - D-Link DCS-2230 | Product Manual - Page 66
limits set forth for an uncontrolled environment. This equipment should be installed and operated with minimum distance 20cm between the radiator & your body is strictly prohibited per regulations of Industry Canada. The required antenna impedance is 50 ohms. D-Link DCS-2210/2230 User Manual 66 - D-Link DCS-2230 | Product Manual - Page 67
Registration Registration Product registration is entirely voluntary and failure to complete or return this form will not diminish your warranty rights. Version 1.0 October 13, 2011 D-Link DCS-2210/2230 User Manual 67
-
 1
1 -
 2
2 -
 3
3 -
 4
4 -
 5
5 -
 6
6 -
 7
7 -
8
-
9
-
10
-
11
-
12
-
13
-
14
-
15
-
16
-
17
-
18
-
19
-
20
-
21
-
22
-
23
-
24
-
25
-
26
-
27
-
28
-
29
-
30
-
31
-
32
-
33
-
34
-
35
-
36
-
37
-
38
-
39
-
40
-
41
-
42
-
43
-
44
-
45
-
46
-
47
-
48
-
49
-
50
-
51
-
52
-
53
-
54
-
55
-
56
-
57
-
58
-
59
-
60
-
61
-
62
-
63
-
64
-
65
-
66
-
67
 |
 |