D-Link DCS-942L Product Manual - Page 32
D-Link DCS-942L Manual
 |
View all D-Link DCS-942L manuals
Add to My Manuals
Save this manual to your list of manuals |
Page 32 highlights
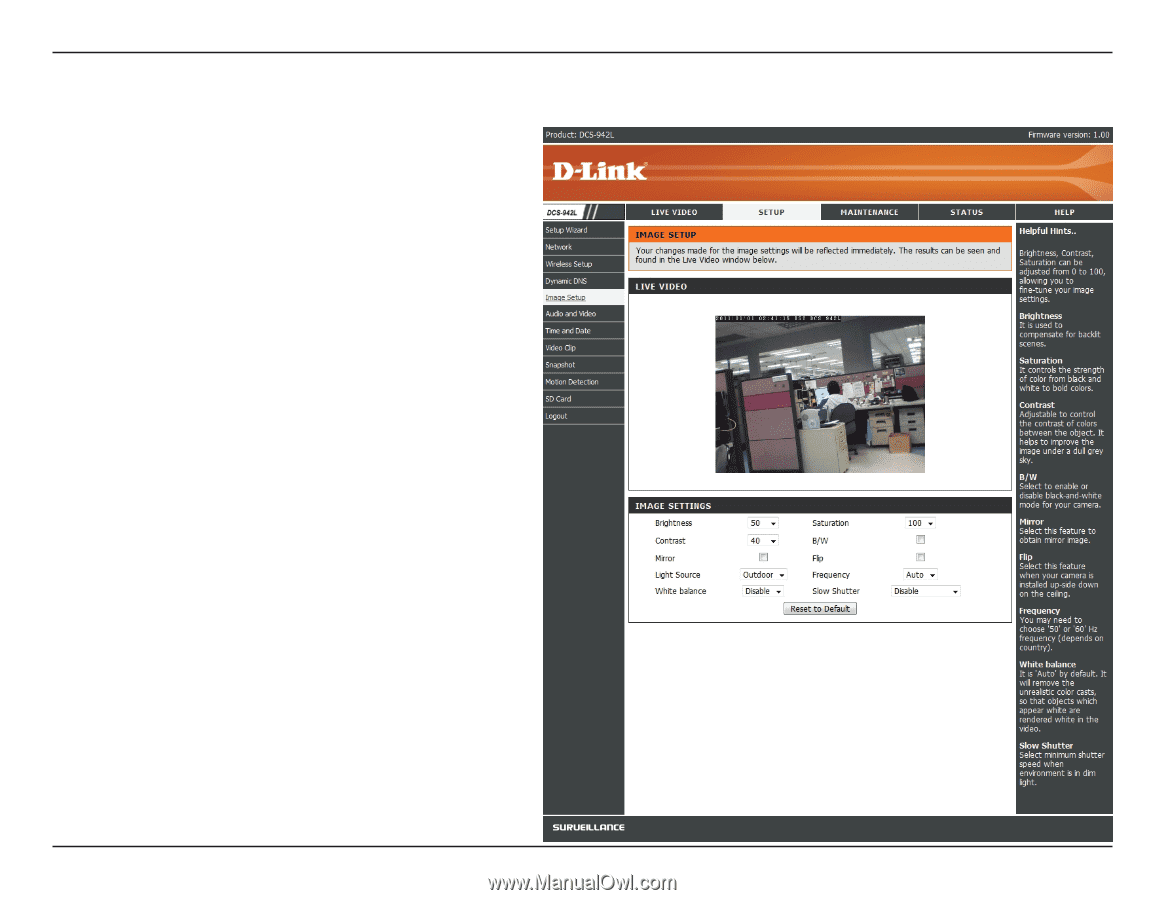
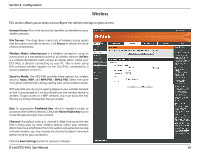
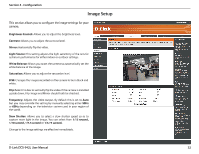
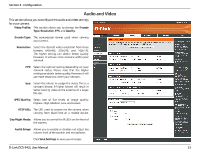
Section 4 - Configuration Image Setup This section allows you to configure the image settings for your camera. Brightness Control: Allows you to adjust the brightness level. Contrast: Allows you to adjust the contrast level. Mirror: Horizontally flip the video. Light Source: This setting adjusts the light sensitivity of the lens for optimum performance for either indoor or outdoor settings. White Balance: Allows you to set the camera to automatically set the white balance of the image. Saturation: Allows you to adjust the saturation level. B/W: Changes the images recorded on the camera to be in black and white. Flip: Select this box to vertically flip the video. If the camera is installed upside down, Flip Image and Mirror should both be checked. Frequency: Adjusts the video output. By default this is set to Auto but you may override the setting by manually selecting either 50Hz or 60Hz depending on the television system used in your region of the world. Slow Shutter: Allows you to select a slow shutter speed so as to capture more light in the image. You can select from 1/15 second, 1/10 second, 1/7.5 second or 1/3.75 second. Change to the image settings are effective immediately. D-Link DCS-942L User Manual 32
-
 1
1 -
2
-
3
-
4
-
5
-
6
-
7
-
8
-
9
-
10
-
11
-
12
-
13
-
14
-
15
-
16
-
17
-
18
-
19
-
20
-
21
-
22
-
23
-
24
-
25
-
26
-
 27
27 -
 28
28 -
 29
29 -
 30
30 -
 31
31 -
 32
32 -
 33
33 -
 34
34 -
 35
35 -
 36
36 -
 37
37 -
38
-
39
-
40
-
41
-
42
-
43
-
44
-
45
-
46
-
47
-
48
-
49
-
50
-
51
-
52
-
53
-
54
-
55
-
56
-
57
-
58
-
59
-
60
-
61
-
62
-
63
-
64
-
65
-
66
-
67
-
68
-
69
-
70
-
71
-
72
 |
 |