D-Link DGS-1510-28P User Manual - Page 20
Attaching Brackets to a Switch for Rack Mounting, Installing the Switch in a Standard 19\ - 20 review
 |
View all D-Link DGS-1510-28P manuals
Add to My Manuals
Save this manual to your list of manuals |
Page 20 highlights
DGS-1510 Series Gigabit Ethernet SmartPro Switch Hardware Installation Guide Attaching Brackets to a Switch for Rack Mounting The Switch is mounted to a standard 19" rack using mounting brackets. Use the following diagrams as a guide. Figure 2-2 Attach mounting brackets to the Switch Fasten the mounting brackets to the Switch using the screws provided. With the brackets attached securely, the Switch can be mounted in a standard rack, as shown below. NOTE: Please review the Installation Guidelines above before installing the Switch in a rack. Make sure there is adequate space around the Switch to allow for proper air flow, ventilation and cooling. Installing the Switch in a Standard 19" Rack Figure 2-3 Mount the Switch in a rack 20
-
 1
1 -
2
-
3
-
4
-
5
-
6
-
7
-
8
-
9
-
10
-
11
-
12
-
13
-
14
-
 15
15 -
 16
16 -
 17
17 -
 18
18 -
 19
19 -
 20
20 -
 21
21 -
 22
22 -
 23
23 -
 24
24 -
 25
25 -
26
-
27
-
28
-
29
-
30
-
31
-
32
-
33
-
34
-
35
-
36
-
37
-
38
-
39
-
40
-
41
-
42
-
43
-
44
-
45
-
46
-
47
-
48
-
49
-
50
-
51
-
52
-
53
-
54
-
55
-
56
-
57
-
58
-
59
-
60
-
61
-
62
-
63
-
64
 |
 |
DGS-1510 Series Gigabit Ethernet SmartPro Switch Hardware Installation Guide
20
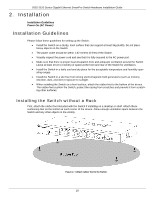
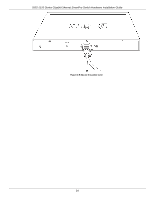
Attaching Brackets to a Switch for Rack Mounting
The Switch is mounted to a standard 19" rack using mounting brackets. Use the following diagrams as a
guide.
Figure 2–2 Attach mounting brackets to the Switch
Fasten the mounting brackets to the Switch using the screws provided. With the brackets attached
securely, the Switch can be mounted in a standard rack, as shown below.
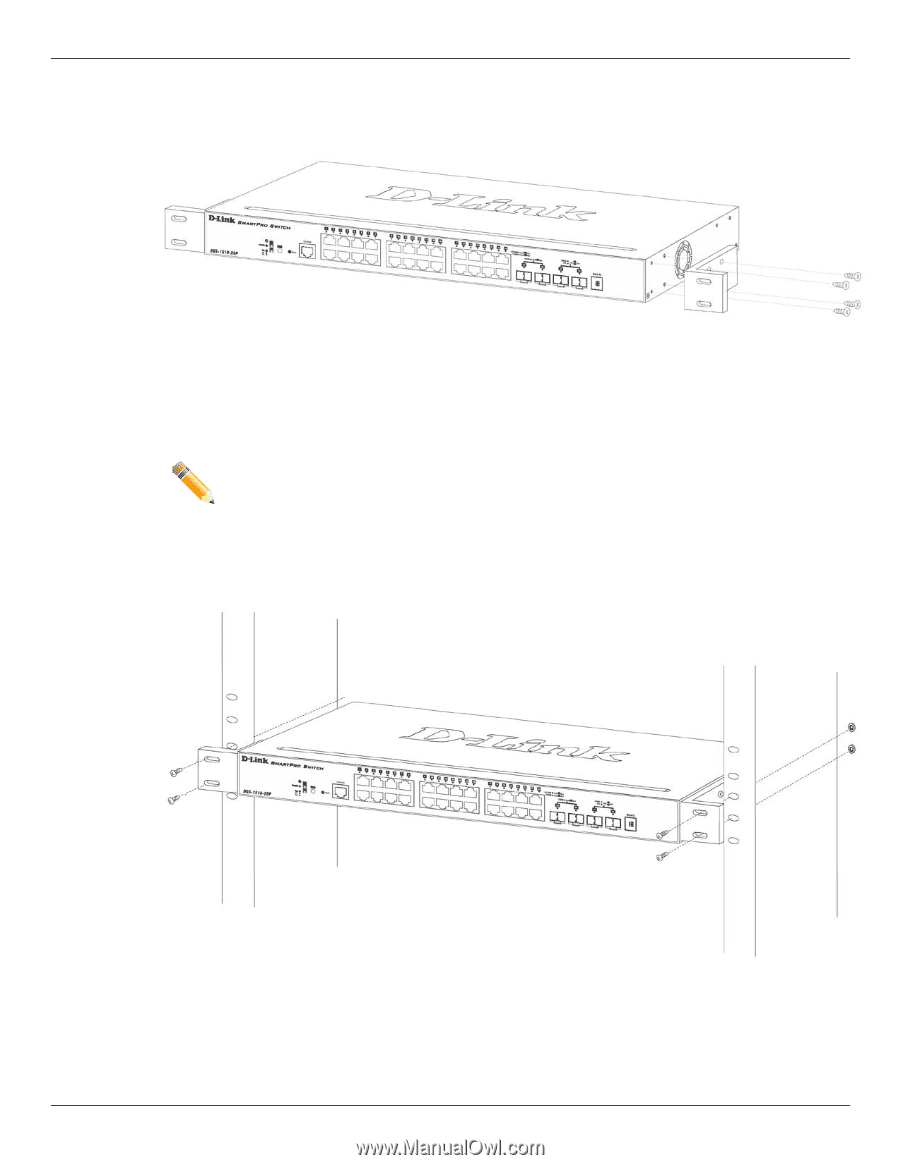
NOTE
: Please review the Installation Guidelines above before installing the Switch in a
rack. Make sure there is adequate space around the Switch to allow for proper air flow,
ventilation and cooling.
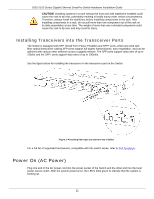
Installing the Switch in a Standard 19" Rack
Figure 2–3 Mount the Switch in a rack