Dacor ER30D Installation Instructions - Page 13
Installing a Raised Vent Optional, Level and Adjust the Range Height, Install the Anti-Tip Bracket
 |
View all Dacor ER30D manuals
Add to My Manuals
Save this manual to your list of manuals |
Page 13 highlights
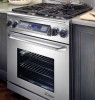
Installation Instructions 9. With the door closed, reattach the kick panel to the range by snapping the ball studs on the back of the panel into the holes on the front panel of the range. Level and Adjust the Range Height Raise or lower the range to prepare for final installation: • For model ER30D and ER30D-C, adjust the height until the top edge of the trim around the edge of the of the cooktop is slightly higher than the countertop. • For model ER30DSR, raise the range until the bottom edge of the trim around the edge of the of the cooktop is 1/8" higher than the countertop. 10. Open the door and reattach the kick panel top screws removed in step 1. Rear leg Back of range 2 1/8" * up down * Distance to floor: 2 7/16" to 4 9/16" Install the Anti-Tip Bracket and Foot 1. Locate the anti-tip foot and lower it until it is 1/16" (2 mm) off the floor. Back of range Space between door and oven opening Anti-tip foot 2. Locate the anti-tip bracket included in the parts box. Bracket Top view Reattach kick panel with existing screws A B Installing a Raised Vent (Optional) Install the ERV30 or PRV30 raised vent before final installation of the range. See the raised vent installation instructions, part no. 65335. IMPORTANT: The ERV30 or PRV30 raised vent attaches to the narrow back portion of the raised vent/range cutout. It is selfsupporting in the cutout and does not actually attach to the range itself. Back of range Right side of range 3. Install the anti-tip bracket on the floor using the four (4) included screws. See the diagram above for location. ANTI-TIP BRACKET PLACEMENT A 6 5/8" (168 mm) B 6 3/8" (162 mm) 11
-
 1
1 -
2
-
3
-
4
-
5
-
6
-
7
-
 8
8 -
 9
9 -
 10
10 -
 11
11 -
 12
12 -
 13
13 -
 14
14 -
 15
15 -
 16
16 -
 17
17 -
 18
18 -
19
-
20
-
21
-
22
-
23
-
24
 |
 |
