DeLonghi ESAM6700 Owner Manual - Page 11
Preliminary Checks - coffee makers
 |
View all DeLonghi ESAM6700 manuals
Add to My Manuals
Save this manual to your list of manuals |
Page 11 highlights
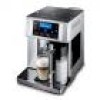
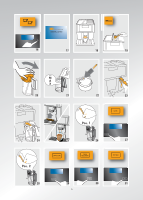
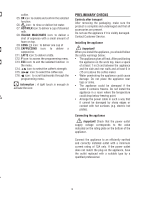
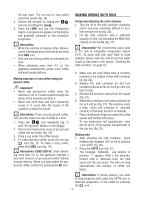
coffee. C5. OK icon: to enable and confirm the selected function. C6. icon: to rinse or deliver hot water. C7. HOT MILK icon: to deliver a cup of steamed milk. C8. italian MACCHIATO icon: to deliver a shot of espresso with a small amount of foam on top. C9. long icon: to deliver one cup of C10. CAPPUCCINO icon: to deliver a cappuccino. C11. LATTE icon: to deliver a latte. C12. P icon: to access the programming menu. C13. ESC icon: to exit the selected function in the menu. C14. icon: to select the coffee's strength. C15. icon: to select the coffee size. C16. icon: to scroll backwards through the programming menu. Information : A light touch is enough to activate the icon. PRELIMINARY CHECKS Controls after transport After removing the packaging, make sure the product is complete and undamaged and that all accessories are present. Do not use the appliance if it is visibly damaged. Contact Customer Service. Installing the appliance Important! When you install the appliance, you should follow the safety warnings below: • The appliance gives off heat. After positioning the appliance on the work top, leave a space of at least 1 in (3 cm) between the appliance and the side and rear walls and at least 6 in (15 cm) above the coffee maker. • Water penetrating the appliance could cause damage. Do not place the appliance near taps or sinks. • The appliance could be damaged if the water it contains freezes. Do not install the appliance in a room where the temperature could drop below freezing point. • Arrange the power cable in such a way that it cannot be damaged by sharp edges or contact with hot surfaces (e.g. electric hot plates). Connecting the appliance Important! Check that the power outlet supply voltage corresponds to the value indicated on the rating plate on the bottom of the appliance. Connect the appliance to an efficiently earthed and correctly installed outlet with a minimum current rating of 12A only. If the power outlet does not match the plug on the appliance, have the outlet replaced with a suitable type by a qualified professional. 10
-
 1
1 -
2
-
3
-
4
-
5
-
 6
6 -
 7
7 -
 8
8 -
 9
9 -
 10
10 -
 11
11 -
 12
12 -
 13
13 -
 14
14 -
 15
15 -
 16
16 -
17
-
18
-
19
-
20
-
21
-
22
-
23
-
24
-
25
 |
 |