DeLonghi ESAM6700 Owner Manual - Page 12
Turning The Appliance On, Turning The Appliance Off - 11
 |
View all DeLonghi ESAM6700 manuals
Add to My Manuals
Save this manual to your list of manuals |
Page 12 highlights
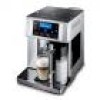
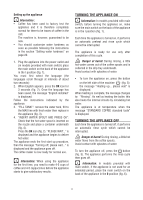
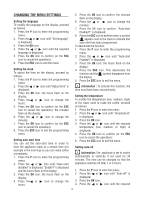
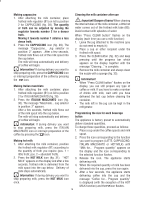
Setting up the appliance Information : • Coffee has been used to factory test the appliance and it is therefore completely normal for there to be traces of coffee in the mill. The machine is, however, guaranteed to be new. • You should customize water hardness as soon as possible following the instructions in the section "Setting water hardness" on page 20. 1. Plug the appliance into the power outlet and (in models provided with main switch) place the main switch on the back of the appliance in the I position (fig. 1). You must first select the language (the languages scroll through at intervals of about two seconds): 2. When English appears, press the OK icon for 3 seconds (fig. 2). Once the language has been saved, the message "English installed" is displayed. Follow the instructions indicated by the appliance: 3. "FILL TANK!": remove the water tank, fill to the MAX line with fresh water then replace in the appliance (fig. 3). 4. "INSERT WATER SPOUT AND PRESS OK": Check that the hot water spout is inserted on the nozzle and place a container underneath (fig. 4). Press the OK icon (fig. 2). "PLEASE WAIT..." is displayed and the appliance begins to deliver hot water. The appliance ends the first start up procedure, then the message "Turning off, please wait..." is displayed and the appliance goes off. The coffee maker is now ready for normal use. Information: When using the appliance for the first time, you need to make 4-5 cups of coffee and 4-5 cappuccinos before the appliance starts to give satisfactory results. TURNING THE APPLIANCE ON Information: In models provided with main switch, before turning the appliance on, make sure the main switch on the back of the appliance is in the I position (fig. 1). Each time the appliance is turned on, it performs an automatic preheat and rinse cycle which cannot be interrupted. The appliance is ready for use only after completion of this cycle. Danger of burns! During rinsing, a little hot water comes out of the coffee spouts and is collected in the drip tray underneath. Avoid contact with splashes of water. • To turn the appliance on, press the button on the left side of the machine (fig. 5): the message "Heating up... please wait" is displayed. When heating is complete, the message changes to: "Rinsing". As well as heating the boiler, this also heats the internal circuits by circulating hot water. The appliance is at temperature when the message "STANDARD COFFEE standard taste" is displayed. TURNING THE APPLIANCE OFF Each time the appliance is turned off, it performs an automatic rinse cycle which cannot be interrupted. Danger of burns! During rinsing, a little hot water flows from the coffee spouts. Avoid contact with splashes of water. To turn the appliance off, press the button (fig. 5). The appliance performs the rinse cycle then goes off. Information: In models provided with main switch, if the appliance is not used for an extended period, place the main switch on the back of the appliance in the 0 position (fig. 6). 11
-
 1
1 -
2
-
3
-
4
-
5
-
6
-
 7
7 -
 8
8 -
 9
9 -
 10
10 -
 11
11 -
 12
12 -
 13
13 -
 14
14 -
 15
15 -
 16
16 -
 17
17 -
18
-
19
-
20
-
21
-
22
-
23
-
24
-
25
 |
 |