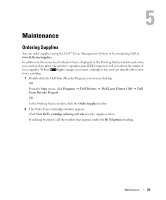
Dell 1100 Owner's Manual - Page 34
Sharing Your Printer Locally
 |
UPC - 708562765657
View all Dell 1100 manuals
Add to My Manuals
Save this manual to your list of manuals |
Page 34 highlights
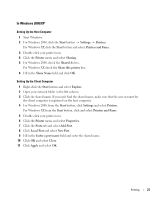
www.dell.com | support.dell.com Sharing Your Printer Locally You can connect the printer directly to a selected computer, called the "host computer," on a network using a USB cable. Your printer can be shared by other users on the network through a Windows 98, Me, 2000, or XP network printer connection. Before you can share your printer, you must first setup a Microsoft Windows network. In Windows 98/Me Setting Up the Host Computer 1 Start Windows. 2 Click the Start button, select Control Panel, and double-click the Network icon. 3 Click the File and Print Sharing box, check the box next to I want to be able to allow others to print to my printer, and click OK. 4 Click Start and select Printers from Settings. Double-click your printer name. 5 Click Properties in the Printer menu. 6 Click the Sharing tab and check the Shared As box. Fill in the Share Name field and then click OK. Setting Up the Client Computer 1 Right-click the Start button and select Explore. 2 Open your network folder in the left column. 3 Right-click the shared name and click Capture Printer Port. 4 Select the port you want, check the Reconnect at log on box, and then click OK. 5 Click the Start button and select Settings and then Printers. 6 Double-click your printer icon. 7 Click the Printer menu and point to Properties. 8 Click the Details tab, select the printer port, and then click OK. 26 Printing
-
 1
1 -
2
-
3
-
4
-
5
-
6
-
7
-
8
-
9
-
10
-
11
-
12
-
13
-
14
-
15
-
16
-
17
-
18
-
19
-
20
-
21
-
22
-
23
-
24
-
25
-
26
-
27
-
28
-
 29
29 -
 30
30 -
 31
31 -
 32
32 -
 33
33 -
 34
34 -
 35
35 -
 36
36 -
 37
37 -
 38
38 -
 39
39 -
40
-
41
-
42
-
43
-
44
-
45
-
46
-
47
-
48
-
49
-
50
-
51
-
52
-
53
-
54
-
55
-
56
-
57
-
58
-
59
-
60
-
61
-
62
-
63
-
64
-
65
-
66
-
67
-
68
-
69
-
70
-
71
-
72
-
73
-
74
-
75
-
76
-
77
-
78
-
79
-
80
-
81
-
82
-
83
-
84
-
85
-
86
-
87
-
88
-
89
-
90
-
91
-
92
-
93
-
94
-
95
 |
 |
