Dell 1110 Laser Mono Printer User's Guide - Page 27
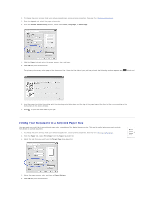
Fitting Your Document to a Selected Paper Size
 |
View all Dell 1110 Laser Mono Printer manuals
Add to My Manuals
Save this manual to your list of manuals |
Page 27 highlights
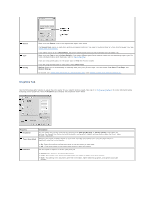
1. To change the print settings from your software application, access printer properties. See step 3 in "Printing a Document". 2. From the Layout tab, select the paper orientation. 3. From the Double-sided Printing section, select either None, Long Edge, or Short Edge. 4. Click the Paper tab and select the paper source, size, and type. 5. Click OK and print the document. The printer prints every other page of the document first. Once the first side of your job has printed, the following window appears and blinks red. 6. Load the paper back into the printer with the already-printed side down and the top of the page toward the front of the tray according to the instructions in the above window. 7. Press to print the other side of your job. Fitting Your Document to a Selected Paper Size You can scale your print job to any selected paper size, regardless of the digital document size. This can be useful when you want to check fine details on a small document. 1. To change the print settings from your software application, access printer properties. See step 3 in "Printing a Document". 2. From the Paper tab, select Fit to Page from the Type drop-down list. 3. Select the size that you want from the Target Page drop-down list. 4. Select the paper source, size, and type in Paper Options. 5. Click OK and print the document.
-
 1
1 -
2
-
3
-
4
-
5
-
6
-
7
-
8
-
9
-
10
-
11
-
12
-
13
-
14
-
15
-
16
-
17
-
18
-
19
-
20
-
21
-
 22
22 -
 23
23 -
 24
24 -
 25
25 -
 26
26 -
 27
27 -
 28
28 -
 29
29 -
 30
30 -
 31
31 -
 32
32 -
33
-
34
-
35
-
36
-
37
-
38
-
39
-
40
-
41
-
42
-
43
-
44
-
45
-
46
-
47
 |
 |
