Dell 1110 Laser Mono Printer User's Guide - Page 31
Setting Up a Locally Shared Printer
 |
View all Dell 1110 Laser Mono Printer manuals
Add to My Manuals
Save this manual to your list of manuals |
Page 31 highlights
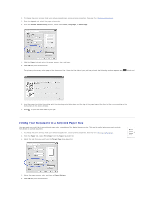
If you have stored the overlay file you want to use on an external source, such as a CD or floppy disk, you can also load the file from that source when you access this Load Overlay window. After you select the file, click Open. The file is now shown in the Overlay List box and is available for printing. Select the overlay from the Overlay List box. 6. If necessary, select Confirm Page Overlay When Printing checkbox. When this box is checked, a message window appears each time you submit a document for printing, asking you to confirm that you want to print an overlay on your document. Answering Yes to the window means that the selected overlay will be printed with your document. Answering No to the window cancels the use of the overlay page. If this box is empty and an overlay has been selected, the overlay will be printed automatically with your document. 7. Click OK or Yes until printing starts. The overlay is downloaded with your print job and printed on your document. Deleting a Page Overlay You can delete page overlays that are no longer used. 1. In the printer properties window, click the Extras tab. 2. Click Edit in the Overlay section. 3. Select the overlay you want to delete from the Overlay List box. 4. Click Delete Overlay. 5. When a confirmation message window appears, click Yes. 6. Click OK until you exit the Print window. Setting Up a Locally Shared Printer You can connect the printer directly to a selected computer, called the "host computer," on a network using a USB cable. Your printer can be shared by other users on the network through a Windows 98, Me, 2000, or XP network printer connection. Before you can share your printer, you must first set up a Microsoft Windows network. In Windows 98/Me Setting Up the Host Computer 1. Start Windows. 2. Click the Start button, select Control Panel, and double-click the Network icon. 3. Click the File and Print Sharing box, check the box next to I want to be able to allow others to print to my printer, and click OK. 4. Click Start and select Printers from Settings. Double-click your printer name.
-
 1
1 -
2
-
3
-
4
-
5
-
6
-
7
-
8
-
9
-
10
-
11
-
12
-
13
-
14
-
15
-
16
-
17
-
18
-
19
-
20
-
21
-
22
-
23
-
24
-
25
-
 26
26 -
 27
27 -
 28
28 -
 29
29 -
 30
30 -
 31
31 -
 32
32 -
 33
33 -
 34
34 -
 35
35 -
 36
36 -
37
-
38
-
39
-
40
-
41
-
42
-
43
-
44
-
45
-
46
-
47
 |
 |
