Dell 1125 Mono Laser User's Guide - Page 28
Cleaning the Drum, Replacing the Drum Cartridge
 |
View all Dell 1125 Mono Laser manuals
Add to My Manuals
Save this manual to your list of manuals |
Page 28 highlights
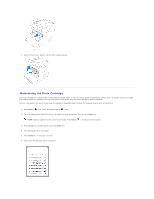
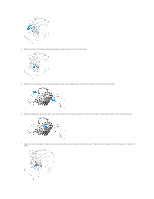
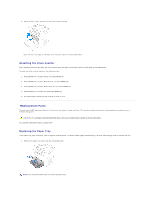
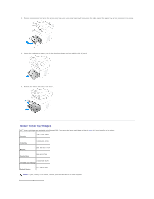
If the test pattern produced appears similar to the images below, the drum may need replacing. 7. If the test is acceptable, press Select (P) to return to the diagnosed menu. OR If the test is unacceptable, press Scroll () to select NG and press Select to return to diagnostic mode and follow the steps to clean or replace the drum cartridge (see Maintaining the Drum Cartridge). 8. Press Scroll () to select Return and press Select (P) to return to standard menu mode. Cleaning the Drum If streaks or spots appear on printed output, the Organic Photo Conductor (OPC) drum of the toner cartridge may require cleaning. NOTICE: Before beginning the cleaning procedure, make sure that paper is loaded in the paper tray. To clean the drum from the operator panel, perform the following steps. 1. Press Scroll () to select Setup and press Select (P). 2. Press Scroll () to select Maintenance and press Select (P). 3. Press Scroll () to select Clear Drum and press Select (P). 4. When the message, Clear Drum? is displayed. Press Scroll () to select Yes and press Select (P). 5. The LDC shows Cleaning Drum. Toner particles on the drum surface are affixed to the paper. 6. If the problem persists, repeat steps 1 through 4 until toner particles are not affixed to the paper. Replacing the Drum Cartridge When the drum passes 20,000 pages use, the life of the unit is exceeded and the LCD displays Drum Life Exceeded. Cleaning the drum may no longer have any affect on print quality, and the unit must be replaced. To replace the drum cartridge, perform the following steps. 1. Open the front panel.
-
 1
1 -
2
-
3
-
4
-
5
-
6
-
7
-
8
-
9
-
10
-
11
-
12
-
13
-
14
-
15
-
16
-
17
-
18
-
19
-
20
-
21
-
22
-
 23
23 -
 24
24 -
 25
25 -
 26
26 -
 27
27 -
 28
28 -
 29
29 -
 30
30 -
 31
31 -
 32
32 -
 33
33 -
34
-
35
-
36
-
37
-
38
-
39
-
40
-
41
-
42
-
43
-
44
-
45
-
46
-
47
-
48
-
49
-
50
-
51
-
52
-
53
-
54
-
55
-
56
-
57
-
58
-
59
-
60
-
61
-
62
-
63
-
64
-
65
-
66
-
67
-
68
-
69
-
70
-
71
-
72
-
73
-
74
-
75
-
76
-
77
-
78
-
79
-
80
-
81
-
82
-
83
-
84
-
85
-
86
-
87
-
88
-
89
-
90
-
91
-
92
-
93
-
94
-
95
-
96
-
97
-
98
-
99
-
100
-
101
-
102
-
103
-
104
-
105
-
106
-
107
-
108
-
109
-
110
-
111
 |
 |
