Dell 1125 Mono Laser User's Guide - Page 48
Graphics Tab, Watermarks Tab
 |
View all Dell 1125 Mono Laser manuals
Add to My Manuals
Save this manual to your list of manuals |
Page 48 highlights
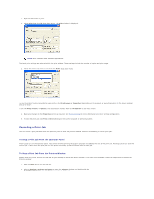
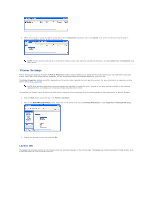
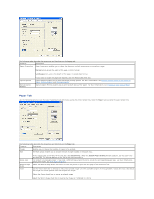
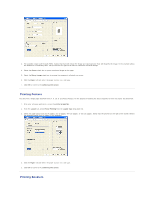
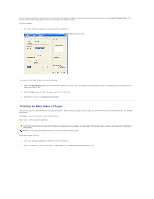
Graphics Tab Use the following graphic options to adjust the print quality for your specific printing needs. Click the Graphics tab to display the properties shown below. The following table describes the properties and functions on the Graphics tab. Property Description Resolution Only Default Resolution is available. Print Text Black Select the Print Text Black check box to cause all text in your document to print solid black, regardless of the color it appears on the screen. When not checked, colored text is allowed to print in shades of gray. Contrast Adjust Contrast to highlight the differences between light and dark areas of an image or text. Select a value between -50 (pronounced contrast) and 50 (lessened contrast). Brightness Adjust Brightness to alter the overall lightness or darkness of printer output. Select a value between -50 (darkest) and 50 (lightest). Toner Save Mode Click the On radio button to allow the printer to use less toner on each page. Click the Off radio button when you do not need to save toner to print a document. Watermarks Tab The Watermarks tab provides options for you to add a watermark to the selected document. The following table describes the properties and functions on the Watermarks tab. Property Description Watermark Select Select the watermark to use on the selected document. New Button Click to create a new water mark, see Creating a Watermark. Edit button Click to edit an existing water mark, see Editing a Watermark. Delete Button Click to delete an existing water mark, see Deleting a Watermark. Usage Specify where the selected watermark appears, on All pages or on the First Page Only. NOTE: The Usage panel can not be used until a watermark is selected.
-
 1
1 -
2
-
3
-
4
-
5
-
6
-
7
-
8
-
9
-
10
-
11
-
12
-
13
-
14
-
15
-
16
-
17
-
18
-
19
-
20
-
21
-
22
-
23
-
24
-
25
-
26
-
27
-
28
-
29
-
30
-
31
-
32
-
33
-
34
-
35
-
36
-
37
-
38
-
39
-
40
-
41
-
42
-
 43
43 -
 44
44 -
 45
45 -
 46
46 -
 47
47 -
 48
48 -
 49
49 -
 50
50 -
 51
51 -
 52
52 -
 53
53 -
54
-
55
-
56
-
57
-
58
-
59
-
60
-
61
-
62
-
63
-
64
-
65
-
66
-
67
-
68
-
69
-
70
-
71
-
72
-
73
-
74
-
75
-
76
-
77
-
78
-
79
-
80
-
81
-
82
-
83
-
84
-
85
-
86
-
87
-
88
-
89
-
90
-
91
-
92
-
93
-
94
-
95
-
96
-
97
-
98
-
99
-
100
-
101
-
102
-
103
-
104
-
105
-
106
-
107
-
108
-
109
-
110
-
111
 |
 |
