Dell 1133 Mono Laser User's Guide (HTML) - Page 6
Understanding display messages
 |
View all Dell 1133 Mono Laser manuals
Add to My Manuals
Save this manual to your list of manuals |
Page 6 highlights
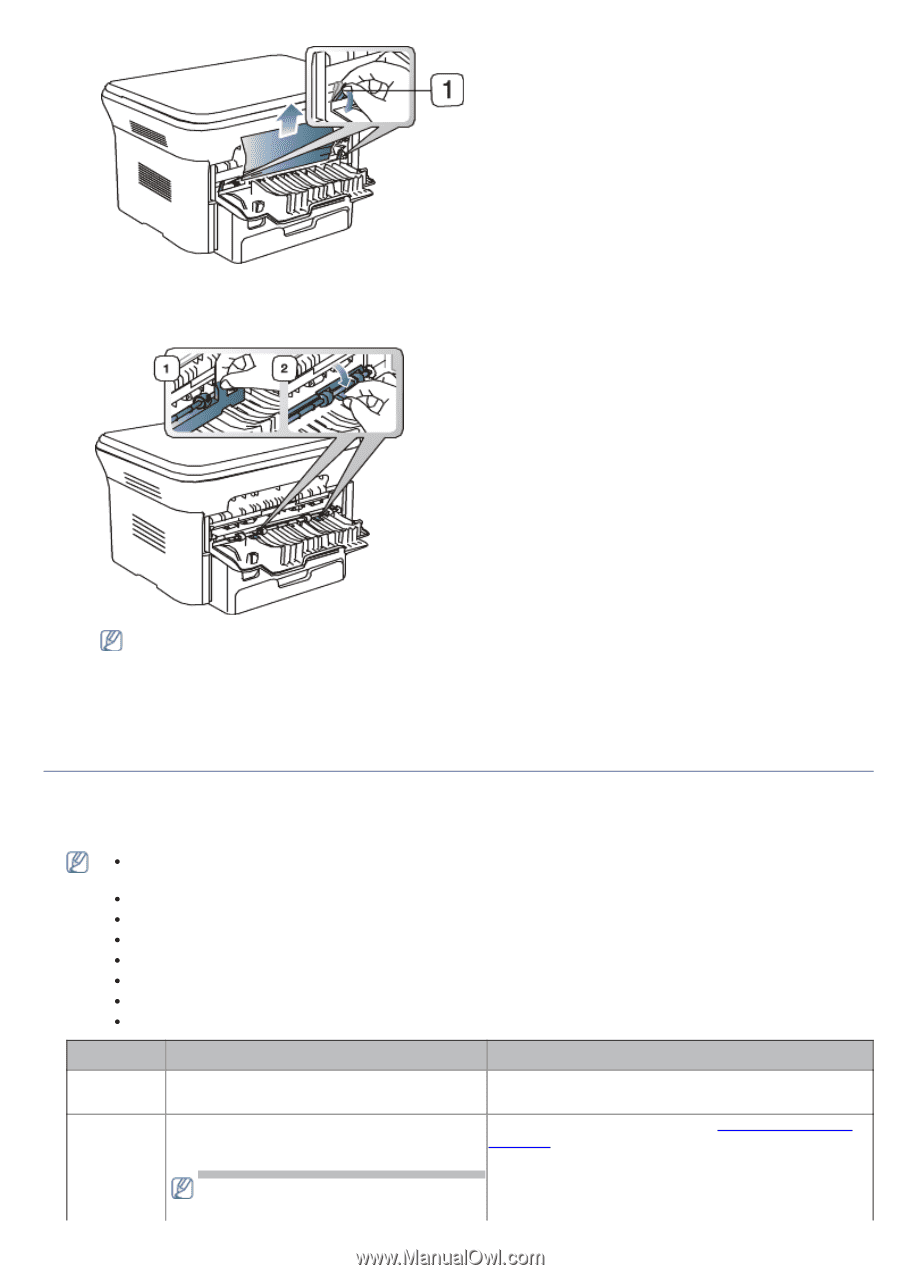
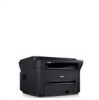
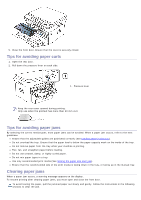
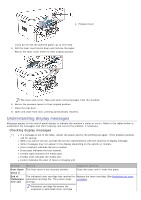
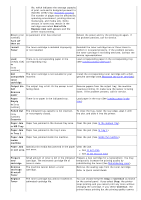
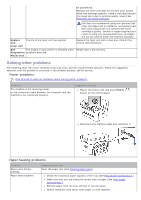
1. Pressure lever If you do not see the jammed paper, go to next step. 5. Pull the fuser cover levers down and remove the paper. Return the fuser cover levers to their original position. The fuser area is hot. Take care when removing paper from the machine. 6. Return the pressure levers to their original position. 7. Close the rear door. 8. Open and close front door, printing automatically resumes. Understanding display messages Messages appear on the control panel display to indicate the machine's status or errors. Refer to the tables below to understand the messages' and their meaning, and correct the problem, if necessary. Checking display messages If a message is not in the table, reboot the power and try the printing job again. If the problem persists, call for service. When you call for service, provide the service representative with the contents of display message. Some messages may not appear in the display depending on the options or models. [error number] indicates the error number. [tray type] indicates the tray number. [media type] indicates the media type. [media size] indicates the media size. [color] indicates the color of toner or imaging unit. Message Meaning Suggested solutions Door Open. The front cover is not securely latched. Close it Close the cover until it locks into place. End of The indicated toner cartridge has reached its Replace the toner cartridge (See Replacing the toner lifeReplace estimated cartridge life. The printer stops cartridge). new cart printing. Estimated cartridge life means the expected or estimated toner cartridge
-
 1
1 -
 2
2 -
 3
3 -
 4
4 -
 5
5 -
 6
6 -
 7
7 -
 8
8 -
 9
9 -
 10
10 -
 11
11 -
 12
12 -
13
-
14
-
15
-
16
-
17
-
18
-
19
-
20
-
21
-
22
-
23
-
24
-
25
-
26
-
27
-
28
-
29
-
30
-
31
-
32
-
33
-
34
-
35
-
36
-
37
-
38
-
39
-
40
-
41
-
42
-
43
-
44
-
45
-
46
-
47
-
48
-
49
-
50
-
51
-
52
-
53
-
54
-
55
-
56
-
57
-
58
-
59
-
60
-
61
-
62
-
63
-
64
-
65
-
66
-
67
-
68
-
69
-
70
-
71
-
72
-
73
-
74
-
75
-
76
-
77
-
78
-
79
-
80
-
81
-
82
-
83
-
84
-
85
-
86
-
87
-
88
 |
 |