Dell 3115cn Color Laser Printer Dell 3115cn User's Guide - Page 424

When wireless ad-hoc mode is set to the multifunction printer
Page 424 highlights

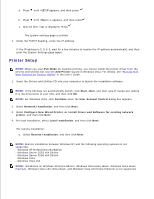
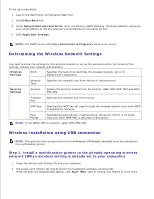
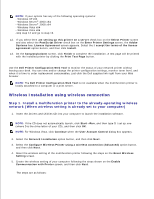
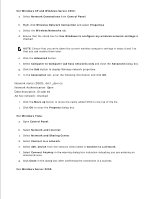
1. Insert the Drivers and Utilities CD into your computer. 2. The Drivers and Utilities CD should launch the installation software automatically. If the CD does not automatically launch, click Start Run, type D:\Setup.exe (where D is the drive letter of your CD), and then click OK. NOTE: For Windows Vista, click Continue when the User Account Control dialog box appears. 3. Select the Network Installation option button, and then click Next. 4. Select the Configure Wireless Printer using a USB connection (Recommended) option button, and then click Next. 5. Reset the wireless setting of the multifunction printer following the steps on the Reset Wireless Setting screen. 6. In the list on the Select Printer screen, check the check box of the target printer that you are making wireless setting for, and then click Next. NOTE: When you enter a fixed IP address, avoid the "169.254.xxx.xxx" address used by AutoIP. 7. On the Enter Wireless Network Settings screen, set each wireless setting item, and then click Next. When you select the Fixed IP option button for IP Address assignment, click Change... and enter the IP address and subnet mask on the screen. 8. Set each item on the Enter Printer Settings screen, and then click Next. 9. On the Printer Software screen, specify the software that you want to install and installation path, and then click Next. At this point, the wireless setting specified on the Enter Wireless Network Settings screen is sent to the multifunction printer. 10. On the Wireless configuration is now complete screen, create the wireless setting sent to the multifunction printer on your computer following the steps below, and then click Next. For Windows XP and Windows Server 2003: a. Select Network Connections from Control Panel. b. Right-click Wireless Network Connection and select Properties. c. Select the Wireless Network tab. d. Ensure that the check box for Use Windows to configure my wireless network settings is checked. e. Click Advanced. f. Do either of the following: When wireless ad-hoc mode is set to the multifunction printer:

  • 1
  • 2
  • 3
  • 4
  • 5
  • 6
  • 7
  • 8
  • 9
  • 10
  • 11
  • 12
  • 13
  • 14
  • 15
  • 16
  • 17
  • 18
  • 19
  • 20
  • 21
  • 22
  • 23
  • 24
  • 25
  • 26
  • 27
  • 28
  • 29
  • 30
  • 31
  • 32
  • 33
  • 34
  • 35
  • 36
  • 37
  • 38
  • 39
  • 40
  • 41
  • 42
  • 43
  • 44
  • 45
  • 46
  • 47
  • 48
  • 49
  • 50
  • 51
  • 52
  • 53
  • 54
  • 55
  • 56
  • 57
  • 58
  • 59
  • 60
  • 61
  • 62
  • 63
  • 64
  • 65
  • 66
  • 67
  • 68
  • 69
  • 70
  • 71
  • 72
  • 73
  • 74
  • 75
  • 76
  • 77
  • 78
  • 79
  • 80
  • 81
  • 82
  • 83
  • 84
  • 85
  • 86
  • 87
  • 88
  • 89
  • 90
  • 91
  • 92
  • 93
  • 94
  • 95
  • 96
  • 97
  • 98
  • 99
  • 100
  • 101
  • 102
  • 103
  • 104
  • 105
  • 106
  • 107
  • 108
  • 109
  • 110
  • 111
  • 112
  • 113
  • 114
  • 115
  • 116
  • 117
  • 118
  • 119
  • 120
  • 121
  • 122
  • 123
  • 124
  • 125
  • 126
  • 127
  • 128
  • 129
  • 130
  • 131
  • 132
  • 133
  • 134
  • 135
  • 136
  • 137
  • 138
  • 139
  • 140
  • 141
  • 142
  • 143
  • 144
  • 145
  • 146
  • 147
  • 148
  • 149
  • 150
  • 151
  • 152
  • 153
  • 154
  • 155
  • 156
  • 157
  • 158
  • 159
  • 160
  • 161
  • 162
  • 163
  • 164
  • 165
  • 166
  • 167
  • 168
  • 169
  • 170
  • 171
  • 172
  • 173
  • 174
  • 175
  • 176
  • 177
  • 178
  • 179
  • 180
  • 181
  • 182
  • 183
  • 184
  • 185
  • 186
  • 187
  • 188
  • 189
  • 190
  • 191
  • 192
  • 193
  • 194
  • 195
  • 196
  • 197
  • 198
  • 199
  • 200
  • 201
  • 202
  • 203
  • 204
  • 205
  • 206
  • 207
  • 208
  • 209
  • 210
  • 211
  • 212
  • 213
  • 214
  • 215
  • 216
  • 217
  • 218
  • 219
  • 220
  • 221
  • 222
  • 223
  • 224
  • 225
  • 226
  • 227
  • 228
  • 229
  • 230
  • 231
  • 232
  • 233
  • 234
  • 235
  • 236
  • 237
  • 238
  • 239
  • 240
  • 241
  • 242
  • 243
  • 244
  • 245
  • 246
  • 247
  • 248
  • 249
  • 250
  • 251
  • 252
  • 253
  • 254
  • 255
  • 256
  • 257
  • 258
  • 259
  • 260
  • 261
  • 262
  • 263
  • 264
  • 265
  • 266
  • 267
  • 268
  • 269
  • 270
  • 271
  • 272
  • 273
  • 274
  • 275
  • 276
  • 277
  • 278
  • 279
  • 280
  • 281
  • 282
  • 283
  • 284
  • 285
  • 286
  • 287
  • 288
  • 289
  • 290
  • 291
  • 292
  • 293
  • 294
  • 295
  • 296
  • 297
  • 298
  • 299
  • 300
  • 301
  • 302
  • 303
  • 304
  • 305
  • 306
  • 307
  • 308
  • 309
  • 310
  • 311
  • 312
  • 313
  • 314
  • 315
  • 316
  • 317
  • 318
  • 319
  • 320
  • 321
  • 322
  • 323
  • 324
  • 325
  • 326
  • 327
  • 328
  • 329
  • 330
  • 331
  • 332
  • 333
  • 334
  • 335
  • 336
  • 337
  • 338
  • 339
  • 340
  • 341
  • 342
  • 343
  • 344
  • 345
  • 346
  • 347
  • 348
  • 349
  • 350
  • 351
  • 352
  • 353
  • 354
  • 355
  • 356
  • 357
  • 358
  • 359
  • 360
  • 361
  • 362
  • 363
  • 364
  • 365
  • 366
  • 367
  • 368
  • 369
  • 370
  • 371
  • 372
  • 373
  • 374
  • 375
  • 376
  • 377
  • 378
  • 379
  • 380
  • 381
  • 382
  • 383
  • 384
  • 385
  • 386
  • 387
  • 388
  • 389
  • 390
  • 391
  • 392
  • 393
  • 394
  • 395
  • 396
  • 397
  • 398
  • 399
  • 400
  • 401
  • 402
  • 403
  • 404
  • 405
  • 406
  • 407
  • 408
  • 409
  • 410
  • 411
  • 412
  • 413
  • 414
  • 415
  • 416
  • 417
  • 418
  • 419
  • 420
  • 421
  • 422
  • 423
  • 424
  • 425
  • 426
  • 427
  • 428
  • 429
  • 430
  • 431
  • 432
  • 433
  • 434
  • 435
  • 436
  • 437
  • 438
  • 439
  • 440
  • 441
  • 442
  • 443
  • 444
  • 445
  • 446
  • 447
  • 448
  • 449
  • 450
  • 451
  • 452
  • 453
  • 454
  • 455
  • 456
  • 457
  • 458
  • 459
  • 460
  • 461
  • 462
  • 463
  • 464
  • 465
  • 466
  • 467
  • 468
  • 469
  • 470
  • 471
  • 472
  • 473
  • 474
  • 475
  • 476
  • 477
  • 478
  • 479
  • 480
  • 481
  • 482
  • 483
  • 484
  • 485
  • 486
  • 487
  • 488
  • 489
  • 490
  • 491
  • 492
  • 493
  • 494
  • 495
  • 496
  • 497
  • 498
  • 499
  • 500
  • 501
  • 502
  • 503
  • 504
  • 505
  • 506
  • 507
  • 508
  • 509
  • 510
  • 511
  • 512
  • 513
  • 514
  • 515
  • 516
  • 517
  • 518
  • 519
  • 520
  • 521
  • 522
  • 523
  • 524
  • 525
  • 526
  • 527
  • 528
  • 529
  • 530
  • 531
  • 532
  • 533
  • 534
  • 535
  • 536
  • 537
  • 538
  • 539
  • 540
  • 541
  • 542
  • 543
  • 544
  • 545
  • 546
  • 547
  • 548
  • 549
  • 550
  • 551
  • 552
  • 553
  • 554
  • 555
  • 556
  • 557
  • 558
  • 559
  • 560
  • 561
  • 562
  • 563
  • 564
  • 565
  • 566
  • 567
  • 568
  • 569
  • 570
  • 571
  • 572
  • 573
  • 574
  • 575
  • 576
  • 577
  • 578
  • 579
  • 580
  • 581
  • 582
  • 583
  • 584
  • 585
  • 586
  • 587
  • 588
  • 589
  • 590
  • 591
  • 592
  • 593
  • 594
  • 595
  • 596
  • 597
  • 598
  • 599
  • 600
  • 601
  • 602
  • 603
  • 604
  • 605
  • 606
  • 607
  • 608
  • 609
  • 610
  • 611
  • 612
  • 613
  • 614
  • 615
  • 616
  • 617
  • 618
  • 619
  • 620
  • 621
  • 622
  • 623
  • 624
  • 625
  • 626
  • 627
  • 628
  • 629
  • 630
  • 631
  • 632
  • 633
  • 634

Insert the
Drivers and Utilities
CD into your computer.
1.
The
Drivers and Utilities
CD should launch the installation software automatically.
If the CD does not automatically launch, click
Start
Run
, type
D:\Setup.exe
(where
D
is the drive
letter of your CD), and then click
OK
.
2.
NOTE:
For Windows Vista, click
Continue
when the
User Account Control
dialog box appears.
Select the
Network Installation
option button, and then click
Next
.
3.
Select the
Configure Wireless Printer using a USB connection (Recommended)
option button,
and then click
Next
.
4.
Reset the wireless setting of the multifunction printer following the steps on the
Reset Wireless
Setting
screen.
5.
In the list on the
Select Printer
screen, check the check box of the target printer that you are making
wireless setting for, and then click
Next
.
6.
NOTE:
When you enter a fixed IP address, avoid the "169.254.
xxx.xxx
" address used by AutoIP.
On the
Enter Wireless Network Settings
screen, set each wireless setting item, and then click
Next
. When you select the
Fixed IP
option button for
IP Address assignment
, click
Change...
and
enter the IP address and subnet mask on the screen.
7.
Set each item on the
Enter Printer Settings
screen, and then click
Next
.
8.
On the
Printer Software
screen, specify the software that you want to install and installation path,
and then click
Next
. At this point, the wireless setting specified on the
Enter Wireless Network
Settings
screen is sent to the multifunction printer.
9.
On the
Wireless configuration is now complete
screen, create the wireless setting sent to the
multifunction printer on your computer following the steps below, and then click
Next
.
10.
For Windows XP and Windows Server 2003:
Select
Network Connections
from
Control Panel
.
a.
Right-click
Wireless Network Connection
and select
Properties
.
b.
Select the
Wireless Network
tab.
c.
Ensure that the check box for
Use Windows to configure my wireless network settings
is
checked.
d.
Click
Advanced
.
e.
Do either of the following:
f.
When wireless ad-hoc mode is set to the multifunction printer: