Dell 5200n Mono Laser Printer Dell™ Workgroup Laser Printer M5200 Us - Page 159
Paper Jam, Check Duplex, To resolve the message
 |
View all Dell 5200n Mono Laser Printer manuals
Add to My Manuals
Save this manual to your list of manuals |
Page 159 highlights
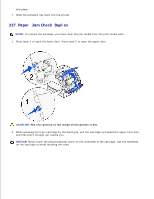
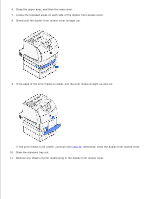
If the print media is not visible, continue with step 8. Otherwise, close the duplex front access cover. 8. Remove any sheets of print media lying in the duplex front access cover. 9. Hold the duplex front access cover level while you slide it back into the duplex unit. Make sure it snaps into place. 10. Slide the standard tray back into the printer. 236 Paper Jam Check Duplex NOTE: To resolve the message, you must clear all print media from the print media path. 1. Locate the recessed areas on each side of the duplex front access cover. 2. Slowly pull the duplex front access cover straight out.
-
 1
1 -
2
-
3
-
4
-
5
-
6
-
7
-
8
-
9
-
10
-
11
-
12
-
13
-
14
-
15
-
16
-
17
-
18
-
19
-
20
-
21
-
22
-
23
-
24
-
25
-
26
-
27
-
28
-
29
-
30
-
31
-
32
-
33
-
34
-
35
-
36
-
37
-
38
-
39
-
40
-
41
-
42
-
43
-
44
-
45
-
46
-
47
-
48
-
49
-
50
-
51
-
52
-
53
-
54
-
55
-
56
-
57
-
58
-
59
-
60
-
61
-
62
-
63
-
64
-
65
-
66
-
67
-
68
-
69
-
70
-
71
-
72
-
73
-
74
-
75
-
76
-
77
-
78
-
79
-
80
-
81
-
82
-
83
-
84
-
85
-
86
-
87
-
88
-
89
-
90
-
91
-
92
-
93
-
94
-
95
-
96
-
97
-
98
-
99
-
100
-
101
-
102
-
103
-
104
-
105
-
106
-
107
-
108
-
109
-
110
-
111
-
112
-
113
-
114
-
115
-
116
-
117
-
118
-
119
-
120
-
121
-
122
-
123
-
124
-
125
-
126
-
127
-
128
-
129
-
130
-
131
-
132
-
133
-
134
-
135
-
136
-
137
-
138
-
139
-
140
-
141
-
142
-
143
-
144
-
145
-
146
-
147
-
148
-
149
-
150
-
151
-
152
-
153
-
 154
154 -
 155
155 -
 156
156 -
 157
157 -
 158
158 -
 159
159 -
 160
160 -
 161
161 -
 162
162 -
 163
163 -
 164
164 -
165
-
166
-
167
-
168
-
169
-
170
-
171
-
172
-
173
-
174
-
175
-
176
-
177
-
178
-
179
-
180
-
181
-
182
-
183
-
184
-
185
-
186
-
187
-
188
-
189
-
190
-
191
-
192
-
193
-
194
-
195
-
196
-
197
-
198
-
199
-
200
-
201
-
202
-
203
-
204
-
205
-
206
-
207
-
208
-
209
-
210
-
211
-
212
-
213
-
214
-
215
-
216
-
217
-
218
-
219
-
220
-
221
-
222
-
223
-
224
-
225
-
226
-
227
-
228
 |
 |
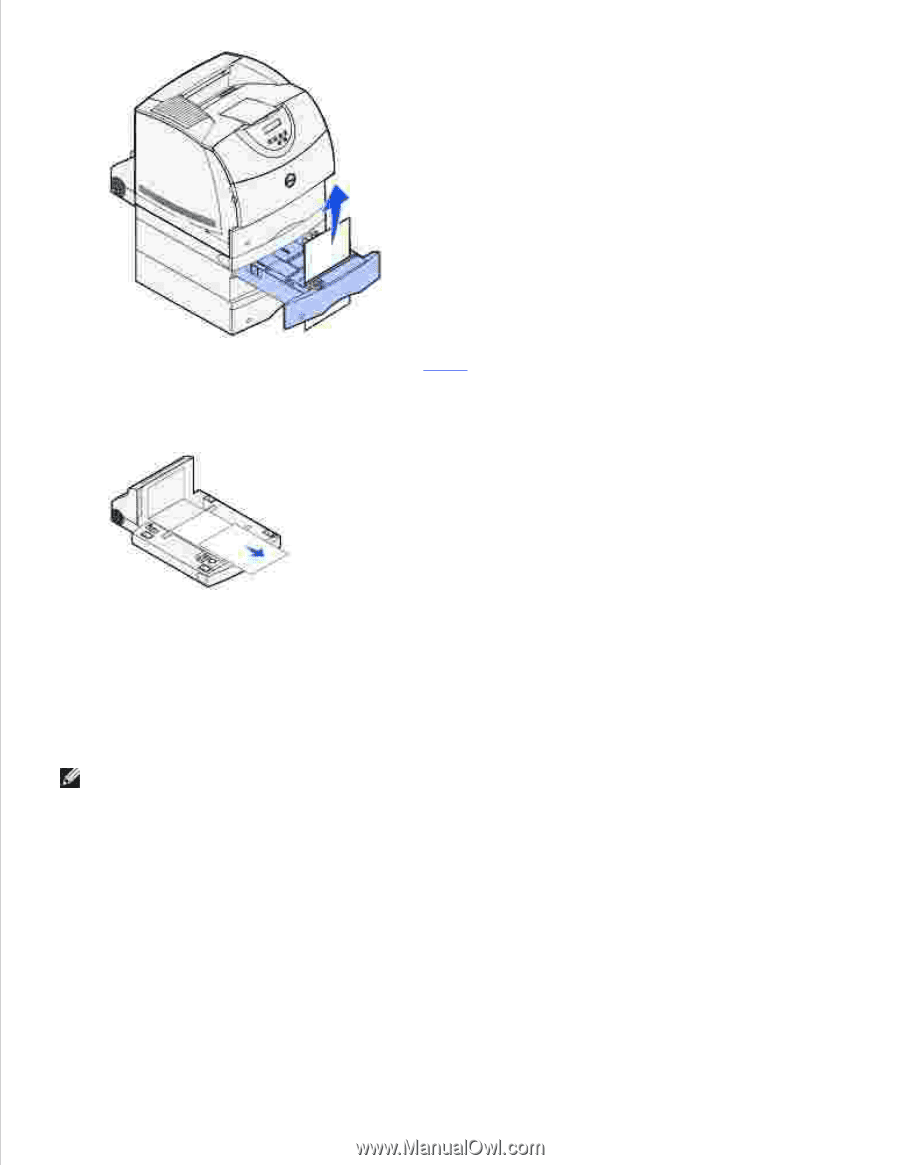
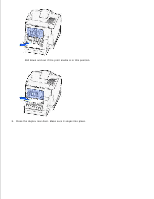
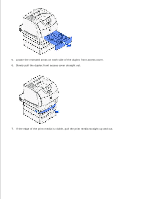
If the print media is not visible, continue with
step 8
. Otherwise, close the duplex front access cover.
Remove any sheets of print media lying in the duplex front access cover.
8.
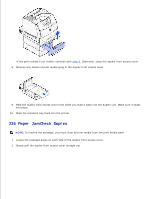
Hold the duplex front access cover level while you slide it back into the duplex unit. Make sure it
snaps
into place.
9.
Slide the standard tray back into the printer.
10.
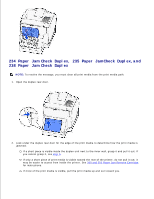
236 Paper Jam
Check Duplex
NOTE:
To resolve the message, you must clear all print media from the print media path.
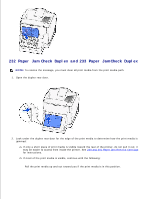
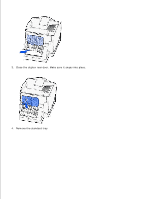
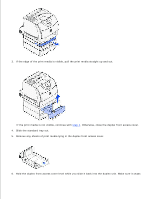
Locate the recessed areas on each side of the duplex front access cover.
1.
Slowly pull the duplex front access cover straight out.
2.