Dell 5200n Mono Laser Printer Dell™ Workgroup Laser Printer M5200 Us - Page 195
Installing the new toner cartridge, NOTICE, CAUTION
 |
View all Dell 5200n Mono Laser Printer manuals
Add to My Manuals
Save this manual to your list of manuals |
Page 195 highlights
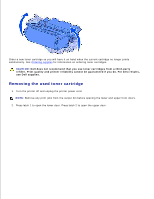
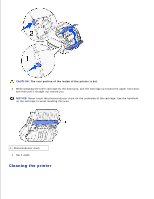
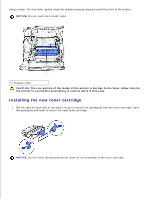
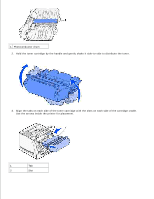
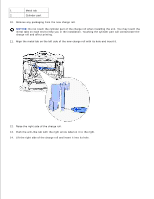
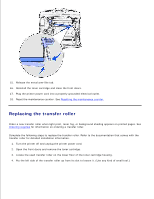
Using a clean, lint-free cloth, gently clean the shaded areas by wiping toward the front of the printer. NOTICE: Do not touch the transfer roller. 1 Transfer roller CAUTION: The rear portion of the inside of the printer is hot due to the fuser. Allow time for the printer to cool before attempting to remove parts in this area. Installing the new toner cartridge 1. Pull the tabs on each side of the plastic strap to remove the packaging from the toner cartridge. Save the packaging and foam to return the used toner cartridge. NOTICE: Do not touch the photoconductor drum on the underside of the toner cartridge.
-
 1
1 -
2
-
3
-
4
-
5
-
6
-
7
-
8
-
9
-
10
-
11
-
12
-
13
-
14
-
15
-
16
-
17
-
18
-
19
-
20
-
21
-
22
-
23
-
24
-
25
-
26
-
27
-
28
-
29
-
30
-
31
-
32
-
33
-
34
-
35
-
36
-
37
-
38
-
39
-
40
-
41
-
42
-
43
-
44
-
45
-
46
-
47
-
48
-
49
-
50
-
51
-
52
-
53
-
54
-
55
-
56
-
57
-
58
-
59
-
60
-
61
-
62
-
63
-
64
-
65
-
66
-
67
-
68
-
69
-
70
-
71
-
72
-
73
-
74
-
75
-
76
-
77
-
78
-
79
-
80
-
81
-
82
-
83
-
84
-
85
-
86
-
87
-
88
-
89
-
90
-
91
-
92
-
93
-
94
-
95
-
96
-
97
-
98
-
99
-
100
-
101
-
102
-
103
-
104
-
105
-
106
-
107
-
108
-
109
-
110
-
111
-
112
-
113
-
114
-
115
-
116
-
117
-
118
-
119
-
120
-
121
-
122
-
123
-
124
-
125
-
126
-
127
-
128
-
129
-
130
-
131
-
132
-
133
-
134
-
135
-
136
-
137
-
138
-
139
-
140
-
141
-
142
-
143
-
144
-
145
-
146
-
147
-
148
-
149
-
150
-
151
-
152
-
153
-
154
-
155
-
156
-
157
-
158
-
159
-
160
-
161
-
162
-
163
-
164
-
165
-
166
-
167
-
168
-
169
-
170
-
171
-
172
-
173
-
174
-
175
-
176
-
177
-
178
-
179
-
180
-
181
-
182
-
183
-
184
-
185
-
186
-
187
-
188
-
189
-
 190
190 -
 191
191 -
 192
192 -
 193
193 -
 194
194 -
 195
195 -
 196
196 -
 197
197 -
 198
198 -
 199
199 -
 200
200 -
201
-
202
-
203
-
204
-
205
-
206
-
207
-
208
-
209
-
210
-
211
-
212
-
213
-
214
-
215
-
216
-
217
-
218
-
219
-
220
-
221
-
222
-
223
-
224
-
225
-
226
-
227
-
228
 |
 |
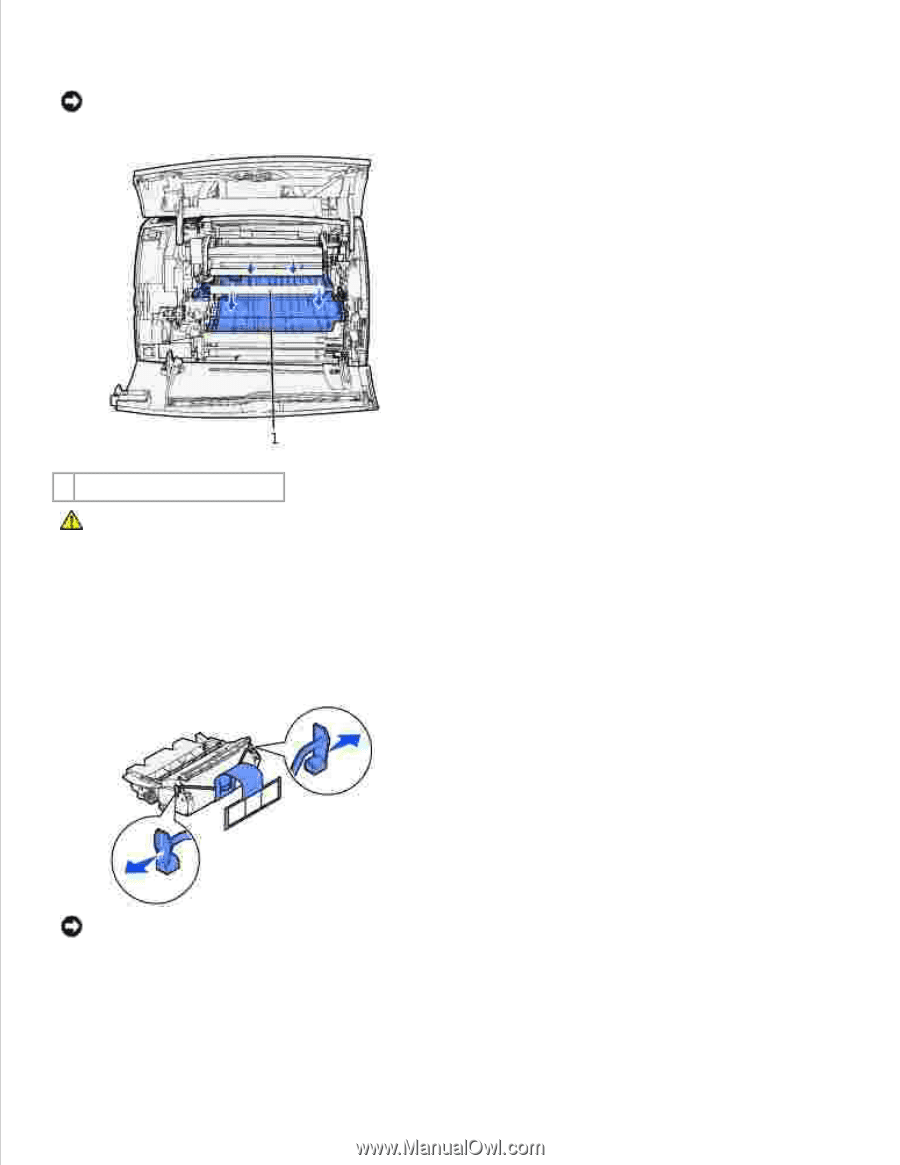
Using a clean, lint-free cloth, gently clean the shaded areas by wiping toward the front of the printer.
NOTICE:
Do not touch the transfer roller.
1
Transfer roller
CAUTION:
The rear portion of the inside of the printer is hot due to the fuser. Allow time for
the printer to cool before attempting to remove parts in this area.
Installing the new toner cartridge
Pull the tabs on each side of the plastic strap to remove the packaging from the toner cartridge. Save
the packaging and foam to return the used toner cartridge.
1.
NOTICE:
Do not touch the photoconductor drum on the underside of the toner cartridge.