Dell 725 Personal Inkjet Printer User's Guide - Page 18
Troubleshooting, Setup Problems
 |
View all Dell 725 Personal Inkjet Printer manuals
Add to My Manuals
Save this manual to your list of manuals |
Page 18 highlights
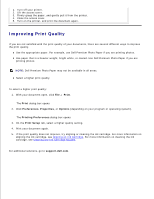
Troubleshooting Setup Problems General Problems Improving Print Quality Setup Problems Computer Problems Verify that your printer is compatible with your computer. The Dell Color Printer 725 supports Windows 2000, Windows XP, and Windows XP Professional x64 Edition. Make sure you turned on both your printer and your computer. Check the USB cable. Ensure the USB cable is firmly connected to your printer and your computer. Shut down the computer, reconnect the USB cable as shown on the "Setting Up Your Printer" poster for your printer, and then restart the computer. If the software installation screen does not appear automatically, install the software manually. 1. Insert the Drivers and Utilities CD. 2. Click Install. Determine if the printer software is installed. Click Start Programs or All Programs Dell Printers Dell Color Printer 725. If Dell Color Printer 725 does not appear in the list of programs, the printer software is not installed. Install the printer software. For more information, see Removing and Reinstalling the Software. Set your printer as the default printer. 1. In Windows XP, click Start Control Panel Printers and Other Hardware Printers and Faxes. In Windows 2000, click Start Settings Printers. 2. Right-click Dell Color Printer 725, and select Set as Default. Correct communication problems between the Printer and the computer. Remove the USB cable from your printer and your computer. Reconnect the USB cable to your printer and your computer. Turn off the printer. Unplug the printer power cable from the electrical outlet. Reconnect the printer power cable to the electrical outlet, and turn on the printer. Restart your computer.
-
 1
1 -
2
-
3
-
4
-
5
-
6
-
7
-
8
-
9
-
10
-
11
-
12
-
 13
13 -
 14
14 -
 15
15 -
 16
16 -
 17
17 -
 18
18 -
 19
19 -
 20
20 -
 21
21 -
 22
22 -
 23
23 -
24
-
25
-
26
-
27
-
28
-
29
-
30
-
31
-
32
-
33
-
34
-
35
-
36
-
37
-
38
-
39
-
40
-
41
-
42
-
43
-
44
-
45
-
46
-
47
-
48
-
49
-
50
-
51
-
52
-
53
-
54
-
55
-
56
-
57
-
58
-
59
 |
 |
