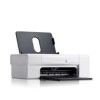
Dell 725 Personal Inkjet Printer User's Guide - Page 6
Printing Preferences Tabs, Printers and Other Hardware - paper
 |
View all Dell 725 Personal Inkjet Printer manuals
Add to My Manuals
Save this manual to your list of manuals |
Page 6 highlights
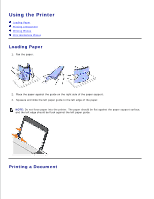
1. The Print dialog box opens. 2. In the Print dialog box, click Preferences, Properties, Options, or Setup (depending on the program or operating system). The Printing Preferences dialog box opens. To access Printing Preferences when a document is not open: 1. In Windows XP, click Start Control Panel Printers and Other Hardware Printers and Faxes. In Windows 2000, click Start Settings Printers. 2. Right-click the printer icon, and then select Printing Preferences. The Printing Preferences dialog box opens. NOTE: Changes made to the printer settings from the Printers folder become the default settings for most programs. Printing Preferences Tabs Tab Options Print Setup Quality/Speed - Select Automatic, Draft, Normal, or Photo depending on your desired output quality. Media Type - Allows you to set the paper type. Paper Size - Select the size and type of paper. Orientation - Select how the document is arranged on the printed page. You can print using portrait or landscape orientation. Multiple Copies - Customize how the printer prints several copies of a single print job: Collated, Normal, or Print Last Page First. Advanced 2-Sided Printing - Select this to print on both sides of the paper. Layout - Select Normal, Banner, Mirror, N-up, Poster, Booklet, or Borderless. Automatic Image Sharpening - Automatically select the best image sharpening level based on image content. More Options - Allows you to specify Appearance Mode options. Maintenance Install Print Cartridge Clean Print Cartridge Align Print Cartridge Print a Test Page Using Dell Picture Studio
-
 1
1 -
 2
2 -
 3
3 -
 4
4 -
 5
5 -
 6
6 -
 7
7 -
 8
8 -
 9
9 -
 10
10 -
 11
11 -
 12
12 -
13
-
14
-
15
-
16
-
17
-
18
-
19
-
20
-
21
-
22
-
23
-
24
-
25
-
26
-
27
-
28
-
29
-
30
-
31
-
32
-
33
-
34
-
35
-
36
-
37
-
38
-
39
-
40
-
41
-
42
-
43
-
44
-
45
-
46
-
47
-
48
-
49
-
50
-
51
-
52
-
53
-
54
-
55
-
56
-
57
-
58
-
59
 |
 |
