Dell 926 All In One Inkjet Printer User's Guide - Page 69
Hold the printer unit up, push the scanner support back to unlock it, and then lower the printer unit
 |
View all Dell 926 All In One Inkjet Printer manuals
Add to My Manuals
Save this manual to your list of manuals |
Page 69 highlights
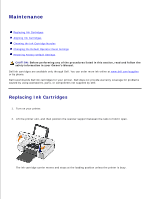
7. Insert the new ink cartridges. Make sure the black or photo ink cartridge is secure in the left ink cartridge carrier, and the color ink cartridge is secure in the right ink cartridge carrier. 8. Snap each lid closed. 9. Hold the printer unit up, push the scanner support back to unlock it, and then lower the printer unit until it is completely closed.
-
 1
1 -
2
-
3
-
4
-
5
-
6
-
7
-
8
-
9
-
10
-
11
-
12
-
13
-
14
-
15
-
16
-
17
-
18
-
19
-
20
-
21
-
22
-
23
-
24
-
25
-
26
-
27
-
28
-
29
-
30
-
31
-
32
-
33
-
34
-
35
-
36
-
37
-
38
-
39
-
40
-
41
-
42
-
43
-
44
-
45
-
46
-
47
-
48
-
49
-
50
-
51
-
52
-
53
-
54
-
55
-
56
-
57
-
58
-
59
-
60
-
61
-
62
-
63
-
 64
64 -
 65
65 -
 66
66 -
 67
67 -
 68
68 -
 69
69 -
 70
70 -
 71
71 -
 72
72 -
 73
73 -
 74
74 -
75
-
76
-
77
-
78
-
79
-
80
-
81
-
82
-
83
-
84
-
85
-
86
-
87
-
88
-
89
-
90
-
91
-
92
-
93
-
94
-
95
-
96
-
97
-
98
-
99
-
100
-
101
-
102
-
103
-
104
-
105
-
106
-
107
-
108
 |
 |

Insert the new ink cartridges. Make sure the black or photo ink cartridge is secure in the left ink
cartridge carrier, and the color ink cartridge is secure in the right ink cartridge carrier.
7.
Snap
each lid closed.
8.
Hold the printer unit up, push the scanner support back to unlock it, and then lower the printer unit
until it is completely closed.
9.