Dell 926 All In One Inkjet Printer User's Guide - Page 81

Start, Programs, All Programs, Dell Printers, Dell Photo AIO Printer 926, Dell All-In-One Center
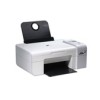
Page 81 highlights

Ensure the USB cable is firmly connected to your printer and your computer. Shut down the computer, reconnect the USB cable as shown on the Setting Up Your Printer poster, and then restart the computer. Determine if the printer software is installed. Click Start Programs or All Programs Dell Printers. If the printer does not appear in the list of printers, the printer software is not installed. Install the printer software. For more information, see Removing and Reinstalling Software. Correct communication problems between the printer and the computer. Remove the USB cable from your printer and your computer. Reconnect the USB cable to your printer and your computer. Turn off the printer. Unplug the printer power cable from the electrical outlet. Reconnect the printer power cable into the electrical outlet, and turn on the printer. Restart your computer. Change the scan resolution to a lower value if scanning takes too long or freezes the computer. 1. Click Start Programs or All Programs Dell Printers Dell Photo AIO Printer 926. 2. Select Dell All-In-One Center. The Dell All-In-One Center opens. 3. Click See More Scan Settings. 4. Select a lower scan resolution from the Select Scan Quality menu. 5. Click Scan Now.

  • 1
  • 2
  • 3
  • 4
  • 5
  • 6
  • 7
  • 8
  • 9
  • 10
  • 11
  • 12
  • 13
  • 14
  • 15
  • 16
  • 17
  • 18
  • 19
  • 20
  • 21
  • 22
  • 23
  • 24
  • 25
  • 26
  • 27
  • 28
  • 29
  • 30
  • 31
  • 32
  • 33
  • 34
  • 35
  • 36
  • 37
  • 38
  • 39
  • 40
  • 41
  • 42
  • 43
  • 44
  • 45
  • 46
  • 47
  • 48
  • 49
  • 50
  • 51
  • 52
  • 53
  • 54
  • 55
  • 56
  • 57
  • 58
  • 59
  • 60
  • 61
  • 62
  • 63
  • 64
  • 65
  • 66
  • 67
  • 68
  • 69
  • 70
  • 71
  • 72
  • 73
  • 74
  • 75
  • 76
  • 77
  • 78
  • 79
  • 80
  • 81
  • 82
  • 83
  • 84
  • 85
  • 86
  • 87
  • 88
  • 89
  • 90
  • 91
  • 92
  • 93
  • 94
  • 95
  • 96
  • 97
  • 98
  • 99
  • 100
  • 101
  • 102
  • 103
  • 104
  • 105
  • 106
  • 107
  • 108

Ensure the USB cable is firmly connected to your printer and your computer.
Shut down the computer, reconnect the USB cable as shown on the
Setting Up Your Printer
poster,
and then restart the computer.
Determine if the printer software is installed.
Click
Start
Programs
or
All Programs
Dell Printers
.
If the printer does not appear in the list of printers, the printer software is not installed. Install the printer
software. For more information, see
Removing and Reinstalling Software
.
Correct communication problems between the printer and the computer.
Remove the USB cable from your printer and your computer. Reconnect the USB cable to your
printer and your computer.
Turn off the printer. Unplug the printer power cable from the electrical outlet. Reconnect the printer
power cable into the electrical outlet, and turn on the printer.
Restart your computer.
Change the scan resolution to a lower value if scanning takes too long or freezes the
computer.
Click
Start
Programs
or
All Programs
Dell Printers
Dell Photo AIO Printer 926
.
1.
Select
Dell All-In-One Center
.
The
Dell All-In-One Center
opens.
2.
Click
See More Scan Settings
.
3.
Select a lower scan resolution from the
Select Scan Quality
menu.
4.
Click
Scan Now
.
5.