Dell 968w All In One Wireless Photo Printer User's Guide - Page 163
Editing Scanned Text Using Optical Character Recognition
 |
View all Dell 968w All In One Wireless Photo Printer manuals
Add to My Manuals
Save this manual to your list of manuals |
Page 163 highlights
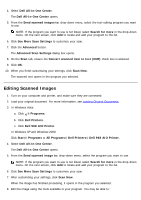
c. Click Printers. In Windows XP, click Start ® Settings® Control Panel® Printers and Other Hardware® Printers and Faxes. In Windows 2000, click Start® Settings® Printers. 2. Right-click your printer icon, and then click Printing Preferences. The Printing Preferences dialog box opens. 3. From the Maintenance tab, click Network Support. The Dell Networking Options dialog box opens. 4. From the Dell Networking Options dialog box, click Change your PC name and PIN for network scanning. 5. Follow the instructions on the screen. 6. After you specify a computer name or a PIN, click OK. Editing Scanned Text Using Optical Character Recognition (OCR) OCR software converts a scanned image to editable text within a word-processing program. A copy of OCR software was provided with your printer and should have been installed at the same time as your printer software. NOTE: If you downloaded your printer drivers and software from the Dell website, OCR software was not included. NOTE: For customers using Japanese or Simplified Chinese, ensure you have OCR software installed on your computer. 1. Turn on your computer and printer, and make sure they are connected. 2. Load your original document. 3. In Windows Vista: a. Click ® Programs. b. Click Dell Printers. c. Click Dell 968 AIO Printer. In Windows XP and Windows 2000: Click Start® Programs or All Programs® Dell Printers® Dell 968 AIO Printer.
-
 1
1 -
2
-
3
-
4
-
5
-
6
-
7
-
8
-
9
-
10
-
11
-
12
-
13
-
14
-
15
-
16
-
17
-
18
-
19
-
20
-
21
-
22
-
23
-
24
-
25
-
26
-
27
-
28
-
29
-
30
-
31
-
32
-
33
-
34
-
35
-
36
-
37
-
38
-
39
-
40
-
41
-
42
-
43
-
44
-
45
-
46
-
47
-
48
-
49
-
50
-
51
-
52
-
53
-
54
-
55
-
56
-
57
-
58
-
59
-
60
-
61
-
62
-
63
-
64
-
65
-
66
-
67
-
68
-
69
-
70
-
71
-
72
-
73
-
74
-
75
-
76
-
77
-
78
-
79
-
80
-
81
-
82
-
83
-
84
-
85
-
86
-
87
-
88
-
89
-
90
-
91
-
92
-
93
-
94
-
95
-
96
-
97
-
98
-
99
-
100
-
101
-
102
-
103
-
104
-
105
-
106
-
107
-
108
-
109
-
110
-
111
-
112
-
113
-
114
-
115
-
116
-
117
-
118
-
119
-
120
-
121
-
122
-
123
-
124
-
125
-
126
-
127
-
128
-
129
-
130
-
131
-
132
-
133
-
134
-
135
-
136
-
137
-
138
-
139
-
140
-
141
-
142
-
143
-
144
-
145
-
146
-
147
-
148
-
149
-
150
-
151
-
152
-
153
-
154
-
155
-
156
-
157
-
 158
158 -
 159
159 -
 160
160 -
 161
161 -
 162
162 -
 163
163 -
 164
164 -
 165
165 -
 166
166 -
 167
167 -
 168
168 -
169
-
170
-
171
-
172
-
173
-
174
-
175
-
176
-
177
-
178
-
179
-
180
-
181
 |
 |
