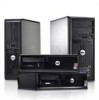
Dell OptiPlex VDI Blaster Edition Windows Embedded Standard 7 (WES7) - Adminis
Dell OptiPlex VDI Blaster Edition Manual
 |
View all Dell OptiPlex VDI Blaster Edition manuals
Add to My Manuals
Save this manual to your list of manuals |
Dell OptiPlex VDI Blaster Edition manual content summary:
- Dell OptiPlex VDI Blaster Edition | Windows Embedded Standard 7 (WES7) - Adminis - Page 1
Windows Embedded Standard 7 (WES7) Administration Guide - Dell OptiPlex VDI Blaster Edition | Windows Embedded Standard 7 (WES7) - Adminis - Page 2
that helps you make better use of your computer. CAUTION: A CAUTION indicates potential damage to hardware or loss of data if instructions are not followed. WARNING: A WARNING indicates a potential for property damage, personal injury, or death. Information in this publication is subject to - Dell OptiPlex VDI Blaster Edition | Windows Embedded Standard 7 (WES7) - Adminis - Page 3
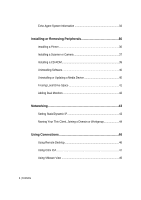
Contents Introduction 6 What is Windows Embedded Standard 7 (WES7 6 WES7 Features 6 WES7 Installation 7 Understanding Your Thin Client 8 Users and Groups 8 Creating New User Accounts 10 File-Based Write Filter (FBWF 12 Installing MUI Packs 17 Setting a Language 19 Using Your Thin Client - Dell OptiPlex VDI Blaster Edition | Windows Embedded Standard 7 (WES7) - Adminis - Page 4
Echo Agent System Information 33 Installing or Removing Peripherals 36 Installing a Printer 36 Installing a Scanner or Camera 37 Installing a CD-ROM 39 Uninstalling Software 40 Uninstalling or Updating a Media Device 40 Freeing Local Drive Space 41 Adding Dual Monitors 42 Networking 43 - Dell OptiPlex VDI Blaster Edition | Windows Embedded Standard 7 (WES7) - Adminis - Page 5
OS Build Date, Echo Agent, and Re-Imaging 50 Verifying OS Build Date 50 Verifying the Echo Agent Version and Status 51 Re-Imaging the Thin client 52 Getting Help 53 Contacting Dell 53 Contents | 5 - Dell OptiPlex VDI Blaster Edition | Windows Embedded Standard 7 (WES7) - Adminis - Page 6
also comes with Microsoft Silverlight for running interactive applications right from your Thin Client, DirectX 11 for 3D and full-color video, and supports both digital and analog television for streaming your favorite shows or even video recording. Modern Networking-WES7 can connect to hosted - Dell OptiPlex VDI Blaster Edition | Windows Embedded Standard 7 (WES7) - Adminis - Page 7
OptiPlex thin clients with WES7 can be easily managed with Devon IT Echo Management Console Dell Edition. More information can be found at support.dell.com. WES7 Installation Windows Embedded Standard 7 operating system is preinstalled on WES7 based systems from Dell. A USB Re-Imaging Utility is - Dell OptiPlex VDI Blaster Edition | Windows Embedded Standard 7 (WES7) - Adminis - Page 8
2 2 Understanding Your Thin Client Users and Groups What is a User Account? The term user account should not be confused with the actual User account that is the default account upon log-in. For each person using the terminal, the owner can create an individual account. Each user account created can - Dell OptiPlex VDI Blaster Edition | Windows Embedded Standard 7 (WES7) - Adminis - Page 9
Administrator Account By default, the User account is automatically logged in. To bypass this, you can hold during the boot process or hold and click Log Off, which can be seen by selecting the right arrow next to the Shut Down button option. NOTE: The default password for the - Dell OptiPlex VDI Blaster Edition | Windows Embedded Standard 7 (WES7) - Adminis - Page 10
Creating New User Accounts This section details how to create new users. You must first log-in using the Administrator user or an account with administrator privileges. 1 Select Start->Control Panel. 2 Select User Accounts. 3 Select Add or remove user accounts. 4 Select Create a new account. 10 | - Dell OptiPlex VDI Blaster Edition | Windows Embedded Standard 7 (WES7) - Adminis - Page 11
5 Type a name for the new user account. 6 Select either Administrator or Standard user account type. Select Create Account. What is Devon IT Echo Management Console Dell Edition? As more and more corporate networks switch to Thin Clients due to their low power consumption, low cost, and productivity - Dell OptiPlex VDI Blaster Edition | Windows Embedded Standard 7 (WES7) - Adminis - Page 12
File-Based Write Filter (FBWF) What is Disk Management? Disk Management is the management of your terminals internal local drive disk. It is quite literally the brain of your unit and taking care of the unit's disk is the best way to ensure the unit will perform for as long as possible. A carefully - Dell OptiPlex VDI Blaster Edition | Windows Embedded Standard 7 (WES7) - Adminis - Page 13
All attacks on the terminal's security or unwanted changes can be thwarted by simply rebooting the machine if the filter is turned on. Operating the machine with the Filter turned off can be dangerous to the terminal and the important OS files inside it. Introduction to FBWF The File-Based Write - Dell OptiPlex VDI Blaster Edition | Windows Embedded Standard 7 (WES7) - Adminis - Page 14
Using the FBWF The FBWF operates by providing a shadow write to the system RAM. When enabled, any writes that are normally written to the storage media, are instead redirected to the RAM overlay. During a reboot, this overlay is discarded so the operating system remains in its original state. As its - Dell OptiPlex VDI Blaster Edition | Windows Embedded Standard 7 (WES7) - Adminis - Page 15
Installing Additional Software You may install third party licensed software as long as there is adequate space on the flash media. To install additional software applications: 1 Log-in as an Administrator. Click Start->All Programs->FBWFGUI. 2 Temporarily disable the write filter by clicking the - Dell OptiPlex VDI Blaster Edition | Windows Embedded Standard 7 (WES7) - Adminis - Page 16
5 After installation, verify the application is working as expected. 6 Launch the FBWF Manager and click the Enable FBWF button. Also, make sure to re-enable the Basic Exclusions. For default exclusions, this would mean selecting the buttons for Enabled Documents and Settings for Everyone and the - Dell OptiPlex VDI Blaster Edition | Windows Embedded Standard 7 (WES7) - Adminis - Page 17
Installing MUI Packs You may install MUI (Multilingual User Interface) packs to enable the operating system to support different languages and language settings on your terminal as needed. The MUI pack installation file can not be located on the DOM, it must be - Dell OptiPlex VDI Blaster Edition | Windows Embedded Standard 7 (WES7) - Adminis - Page 18
7. A command shell window will open noting the files being copied. Be sure to leave it open. 8. A dialog box will open and keep track of the files as they are installed. 9. Once the installation is completed, the system will reboot. Make sure to let the system reboot itself without interruption or - Dell OptiPlex VDI Blaster Edition | Windows Embedded Standard 7 (WES7) - Adminis - Page 19
Setting a Language To change your display language in WES 7 1. Launch your Control Panel and, under Clock, Language, and Region, choose Change display language Understanding Your Thin Client | 19 - Dell OptiPlex VDI Blaster Edition | Windows Embedded Standard 7 (WES7) - Adminis - Page 20
2. In the Keyboards and Languages tab, choose your display language from the drop-down menu. We will use Spanish for our demonstration. 20 | Understanding Your Thin Client - Dell OptiPlex VDI Blaster Edition | Windows Embedded Standard 7 (WES7) - Adminis - Page 21
3. Next, click the Change keyboards... button. Here, we can add a new keyboard/IME configuration. Click the Add... button. Understanding Your Thin Client | 21 - Dell OptiPlex VDI Blaster Edition | Windows Embedded Standard 7 (WES7) - Adminis - Page 22
4. Choose your language and keyboard setting here. Some languages have multiple different keyboard layouts. The first selection is usually the desired selection, but you can add as many as you want. After making your selection(s), click OK. 22 | Understanding Your Thin Client - Dell OptiPlex VDI Blaster Edition | Windows Embedded Standard 7 (WES7) - Adminis - Page 23
5. Your new keyboard layout should appear in the Installed services section. To make it your new default setting, select it from the drop-down menu above. Understanding Your Thin Client | 23 - Dell OptiPlex VDI Blaster Edition | Windows Embedded Standard 7 (WES7) - Adminis - Page 24
6. In the Formats tab, choose your language/country from the drop-down menu. 24 | Understanding Your Thin Client - Dell OptiPlex VDI Blaster Edition | Windows Embedded Standard 7 (WES7) - Adminis - Page 25
7. In the Location tab, select the country/location you are in. Understanding Your Thin Client | 25 - Dell OptiPlex VDI Blaster Edition | Windows Embedded Standard 7 (WES7) - Adminis - Page 26
8. In the Administrative tab, click the Change system locale... button. 26 | Understanding Your Thin Client - Dell OptiPlex VDI Blaster Edition | Windows Embedded Standard 7 (WES7) - Adminis - Page 27
9. Windows will ask you if you would like to apply your region and language settings. Click Apply. 10. In the drop-down menu, choose the language/country that you are in and click OK. Understanding Your Thin Client | 27 - Dell OptiPlex VDI Blaster Edition | Windows Embedded Standard 7 (WES7) - Adminis - Page 28
11. When Windows asks you to restart, click Cancel. 28 | Understanding Your Thin Client - Dell OptiPlex VDI Blaster Edition | Windows Embedded Standard 7 (WES7) - Adminis - Page 29
12. Returning to the Administrative tab, click the Copy Settings button. Select both check boxes to ensure that all accounts, including the system account, are set to your desired language/input configuration. Click OK. Understanding Your Thin Client | 29 - Dell OptiPlex VDI Blaster Edition | Windows Embedded Standard 7 (WES7) - Adminis - Page 30
13. Again, Windows will ask if you would like to restart. Click Restart now. When the machine reboots, your machine will be configured to your language/location/keyboard style of choice. 30 | Understanding Your Thin Client - Dell OptiPlex VDI Blaster Edition | Windows Embedded Standard 7 (WES7) - Adminis - Page 31
3 3 Using Your Thin Client Customizing Your Thin Client This section details how to change some of the options on your thin client to fit the needs of your business or your home. Disabling the Automatic Log-In 1 Holding down the Windows button, press to access the Run: dialogue box. 2 Check the - Dell OptiPlex VDI Blaster Edition | Windows Embedded Standard 7 (WES7) - Adminis - Page 32
After the initial boot up, or when booting up after using the re-imaging utility, your thin client will display the Windows Embedded Standard desktop, taskbar, and system tray. The desktop should resemble that of a physical desktop, with pencils, folders, agendas, clocks, and calendars. The user can - Dell OptiPlex VDI Blaster Edition | Windows Embedded Standard 7 (WES7) - Adminis - Page 33
The system tray, or systray, is located to the right of the taskbar; it is a collection of icons opposite of the Start button. Some default icons include the clock and volume control, but other programs may put their own icon and shortcut in the system tray after they are installed. Double-clicking - Dell OptiPlex VDI Blaster Edition | Windows Embedded Standard 7 (WES7) - Adminis - Page 34
Network Information-This displays information about the current network connection. IP Address displays the current IP address assigned to the terminal. MAC Address displays the current MAC address assigned to the terminal. Hostname displays the name assigned to the terminal. Network Tools - Dell OptiPlex VDI Blaster Edition | Windows Embedded Standard 7 (WES7) - Adminis - Page 35
System Information-This displays information about the operating system, as well as information regarding the terminal. Operating System displays the name of the image or operating system that is in use. Processor displays the processor that the terminal is using. Memory displays the total - Dell OptiPlex VDI Blaster Edition | Windows Embedded Standard 7 (WES7) - Adminis - Page 36
of any sort. Simply plug in the printer to the terminal using the USB and follow the on screen instructions. If the printer does not automatically install itself you will have to manually install the drivers. 2 You can insert a USB flash drive or a CD on an external drive that contains the printers - Dell OptiPlex VDI Blaster Edition | Windows Embedded Standard 7 (WES7) - Adminis - Page 37
device is not Plug and Play ready, you may have to install the drivers manually. You can insert a USB flash drive or a CD on an external drive that If not, select Start->Control Panel->Devices and Printers. A wizard will guide you through the installation process. NOTE: If the device comes with its - Dell OptiPlex VDI Blaster Edition | Windows Embedded Standard 7 (WES7) - Adminis - Page 38
4 During the installation process, you are prompted to find the driver file for the device. Click Browse and locate the driver file from Step 2. Once the installation is complete, your thin client will recognize the device. 5 Click the Finish button to exit the New Hardware Wizard and complete - Dell OptiPlex VDI Blaster Edition | Windows Embedded Standard 7 (WES7) - Adminis - Page 39
plug the storage or flash device into the thin client. 2 Select Start->Control Panel. Under Hardware and Sound, select Add a device. A wizard will appear to guide you through the installation process. 3 At some point, the wizard will ask you to select the specific driver file for your CD-ROM. Click - Dell OptiPlex VDI Blaster Edition | Windows Embedded Standard 7 (WES7) - Adminis - Page 40
Uninstalling Software To uninstall any software from the terminal, use the following procedure: 1 Access the Uninstall or change a program window by selecting Start->Control Panel. 2 Under Programs, select the Uninstall a program option. This will show an inventory of programs installed on your - Dell OptiPlex VDI Blaster Edition | Windows Embedded Standard 7 (WES7) - Adminis - Page 41
Freeing Local Drive Space Sometimes you will want to free up some space on your local drive to make room for other software, applications, or programs. You can free up space by uninstalling some of the programs that you rarely use, and/or use Disk Cleanup. Uninstalling Programs Much like - Dell OptiPlex VDI Blaster Edition | Windows Embedded Standard 7 (WES7) - Adminis - Page 42
Adding Dual Monitors You can attach two monitors to the Dell FX170 OptiPlex thin clients by using a DVI Video Splitter Cable. NOTE: The Dell OptiPlex FX170 does not come with a DVI splitter. DVI video splitter cables are sold separately. CAUTION: Make sure that the unit is powered off when making - Dell OptiPlex VDI Blaster Edition | Windows Embedded Standard 7 (WES7) - Adminis - Page 43
mask, default gateway, and DNS server(s). 6 Click OK when all fields are entered correctly. Closing the menus will reconfigure your IP address immediately. NOTE: Some problems can occur if you attempt to change your IP addresses to an IP address already in use. Ping the IP to make sure it is - Dell OptiPlex VDI Blaster Edition | Windows Embedded Standard 7 (WES7) - Adminis - Page 44
Naming Your Thin Client, Joining a Domain or Workgroup Naming Your Thin Client 1 To access an Active Directory Domain, you should rename your thin client. Begin by selecting Start->Control Panel->System and Security -> System. To continue, select the Advanced system settings on the left-hand sidebar - Dell OptiPlex VDI Blaster Edition | Windows Embedded Standard 7 (WES7) - Adminis - Page 45
Using the Join a Domain or Workgroup Wizard The Join a Domain or Workgroup Wizard may also be used to join a domain or workgroup. It presents a series of questions and information boxes about your network and configures the system accordingly. 1 Select Start->Control Panel->System and Security -> - Dell OptiPlex VDI Blaster Edition | Windows Embedded Standard 7 (WES7) - Adminis - Page 46
utilizing several different connection protocols. Using Remote Desktop Remote Desktop Protocol (RDP) is a secure communication method based on Microsoft Terminal Services. It provides connection to Windows-based machines and is efficient enough to run on high-latency networks. 1 To open Remote - Dell OptiPlex VDI Blaster Edition | Windows Embedded Standard 7 (WES7) - Adminis - Page 47
ICA Citrix is one of the leaders in infrastructure solutions. It specializes in network access, VPN capabilities, remote control, and remote support applications. Citrix solutions, like the Citrix Online Plug-in, utilize the Citrix ICA protocol. ICA (Independent Computing Architecture) allows non - Dell OptiPlex VDI Blaster Edition | Windows Embedded Standard 7 (WES7) - Adminis - Page 48
NOTE: If this is your first time loading the Citrix Online Plug-in, you will be taken to a screen that asks you to Click Download to Access Your Desktop. Along the righthand side of the page, click on Already Installed to be taken to step 3. . 48 | Using Connections - Dell OptiPlex VDI Blaster Edition | Windows Embedded Standard 7 (WES7) - Adminis - Page 49
Using VMware View VMware View utilizes VMware's hypervisor technology to efficiently provide multiple instances of an operating system to remote users using the RDP or PCoIP (PC-over-IP) protocol. 1 To connect to a VMware View server, double-click the icon on your desktop called VMware View Client. - Dell OptiPlex VDI Blaster Edition | Windows Embedded Standard 7 (WES7) - Adminis - Page 50
7 7 OS Build Date, Echo Agent, and Re-Imaging Verifying OS Build Date To verify the OS Build Date, power-on and boot-up the thin client. 1 After the boot process has been completed log-in to the Administrator account. 2 Use to path: Start -> Control Panel -> System and Security -> System. Select the - Dell OptiPlex VDI Blaster Edition | Windows Embedded Standard 7 (WES7) - Adminis - Page 51
the status of the Echo Agent, use the path: Start -> Control Panel -> System and Security -> Administrative Tools. Finally, double-click Services. 5 Scroll down to the DeTOS Agent Service. The DeTOS Agent status must be Started and the startup type must be Automatic for the Echo Agent to be fully - Dell OptiPlex VDI Blaster Edition | Windows Embedded Standard 7 (WES7) - Adminis - Page 52
Re-Imaging the Thin client For information about re-imaging your thin client, please consult the Re-Imaging guide which can be found at support.dell.com. 52 | OS Build Date, Echo Agent, and Re-Imaging - Dell OptiPlex VDI Blaster Edition | Windows Embedded Standard 7 (WES7) - Adminis - Page 53
2 Click your country/region at the bottom of the page. For a full listing of country/region click All. 3 Click All Support from Support menu. 4 Select the appropriate service or support link based on your need. 5 Choose the method of contacting Dell that is convenient for you. Getting Help | 53
-
 1
1 -
 2
2 -
 3
3 -
 4
4 -
 5
5 -
 6
6 -
 7
7 -
8
-
9
-
10
-
11
-
12
-
13
-
14
-
15
-
16
-
17
-
18
-
19
-
20
-
21
-
22
-
23
-
24
-
25
-
26
-
27
-
28
-
29
-
30
-
31
-
32
-
33
-
34
-
35
-
36
-
37
-
38
-
39
-
40
-
41
-
42
-
43
-
44
-
45
-
46
-
47
-
48
-
49
-
50
-
51
-
52
-
53
 |
 |

Windows
Embedded
Standard 7
(WES7)
Administration
Guide