Dell OptiPlex VDI Blaster Edition Windows Embedded Standard 7 (WES7) - Adminis - Page 43
Networking
 |
View all Dell OptiPlex VDI Blaster Edition manuals
Add to My Manuals
Save this manual to your list of manuals |
Page 43 highlights
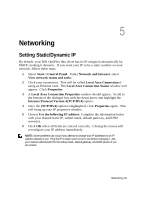
5 5 Networking Setting Static/Dynamic IP By default, your Dell OptiPlex thin client has its IP assigned automatically by DHCP, making it dynamic. If you want your IP to be a static number on your network, follow these steps: 1 Select Start->Control Panel. Under Network and Internet, select View network status and tasks 2 Click your connection. This will be called Local Area Connection if using an Ethernet card. The Local Area Connection Status window will appear. Click Properties. 3 A Local Area Connection Properties window should appear. Scroll to the bottom of the dialogue box with the down arrow and highlight the Internet Protocol Version 4(TCP/IPv4) option. 4 Once the (TCP/IPv4) option is highlighted, click Properties again. This will bring up your IP properties window. 5 Choose Use the following IP address: Complete the information boxes with your desired static IP, subnet mask, default gateway, and DNS server(s). 6 Click OK when all fields are entered correctly. Closing the menus will reconfigure your IP address immediately. NOTE: Some problems can occur if you attempt to change your IP addresses to an IP address already in use. Ping the IP to make sure it is not in use before changing it. Ask your network administrator for the subnet mask, default gateway, and DNS servers if you are unsure. Networking | 43
-
 1
1 -
2
-
3
-
4
-
5
-
6
-
7
-
8
-
9
-
10
-
11
-
12
-
13
-
14
-
15
-
16
-
17
-
18
-
19
-
20
-
21
-
22
-
23
-
24
-
25
-
26
-
27
-
28
-
29
-
30
-
31
-
32
-
33
-
34
-
35
-
36
-
37
-
 38
38 -
 39
39 -
 40
40 -
 41
41 -
 42
42 -
 43
43 -
 44
44 -
 45
45 -
 46
46 -
 47
47 -
 48
48 -
49
-
50
-
51
-
52
-
53
 |
 |
