Dell P1500 Personal Mono Laser Printer Dell™ Personal Laser Printer - Page 59
Sharing your printer, Dell Laser Printer P1500
 |
View all Dell P1500 Personal Mono Laser Printer manuals
Add to My Manuals
Save this manual to your list of manuals |
Page 59 highlights
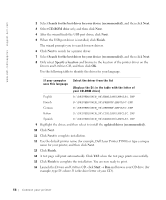
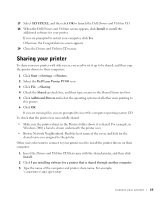
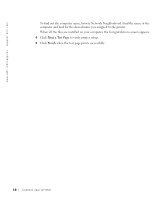
17 Select SETUP.EXE, and then click OK to launch the Dell Drivers and Utilities CD. 18 When the Dell Drivers and Utilities screen appears, click Install to install the additional software for your printer. If you are prompted to restart your computer, click Yes. Otherwise, the Congratulations screen appears. 19 Close the Drivers and Utilities CD screen. Sharing your printer To share your new printer with other users, you need to set it up to be shared, and then copy the printer drivers to their computers: 1 Click Start → Settings → Printers. 2 Select the Dell Laser Printer P1500 icon. 3 Click File → Sharing. 4 Check the Shared as check box, and then type a name in the Shared Name text box. 5 Click Additional Drivers and select the operating systems of all other users printing to this printer. 6 Click OK. If you are missing files, you are prompted to insert the computer operating system CD. To check that the printer was successfully shared: • Make sure the printer object in the Printers folder shows it is shared. For example, in Windows 2000, a hand is shown underneath the printer icon. • Browse Network Neighborhood. Find the host name of the server and look for the shared name you assigned to the printer. Other users who want to connect to your printer need to install the printer drivers on their computer: 1 Insert the Drivers and Utilities CD that came with the shared printer, and then click Install. 2 Click I am installing software for a printer that is shared through another computer. 3 Type the name of the computer and printer share name. For example, \\server1\dellprinter Connect your printer 59
-
 1
1 -
2
-
3
-
4
-
5
-
6
-
7
-
8
-
9
-
10
-
11
-
12
-
13
-
14
-
15
-
16
-
17
-
18
-
19
-
20
-
21
-
22
-
23
-
24
-
25
-
26
-
27
-
28
-
29
-
30
-
31
-
32
-
33
-
34
-
35
-
36
-
37
-
38
-
39
-
40
-
41
-
42
-
43
-
44
-
45
-
46
-
47
-
48
-
49
-
50
-
51
-
52
-
53
-
 54
54 -
 55
55 -
 56
56 -
 57
57 -
 58
58 -
 59
59 -
 60
60 -
 61
61 -
 62
62 -
 63
63 -
 64
64 -
65
-
66
-
67
-
68
-
69
-
70
-
71
-
72
-
73
-
74
-
75
-
76
-
77
-
78
-
79
-
80
-
81
-
82
-
83
-
84
-
85
-
86
-
87
-
88
-
89
-
90
-
91
-
92
-
93
-
94
-
95
-
96
-
97
-
98
-
99
-
100
 |
 |