Dell PowerEdge 4600 Rack-to-Tower Conversion Guide - Page 13
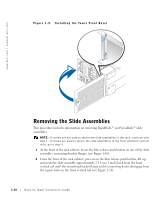
Installing the Trim Panel
 |
View all Dell PowerEdge 4600 manuals
Add to My Manuals
Save this manual to your list of manuals |
Page 13 highlights
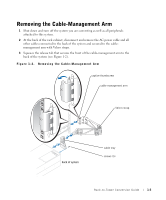
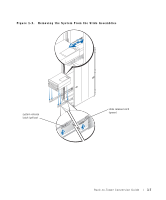
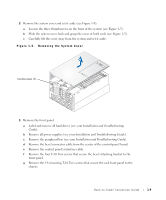
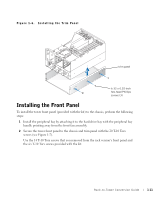
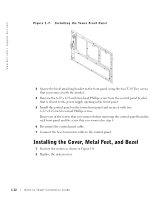
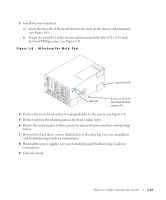
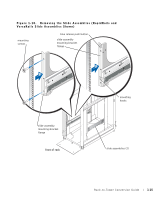
www.dell.com | support.dell.com h Lay the front panel on a smooth work surface with the outside surface facing down. i Remove the two 6-32 x 0.25-inch hex-head Phillips screws that secure the control panel board to the back of the front panel. Set the control panel and screws aside for installation on the tower front panel. Installing the Trim Panel To install the tower trim panel on the chassis, perform the following steps. NOTE: You may find it convenient to leave the chassis in the rack position (as shown in Figure 1-6) while installing the trim panel. 1 Hold the tower trim panel in position with the sides facing up as shown in Figure 1-6. NOTICE: You will need two to four persons to lift the system into position above the trim panel. One additional person may be needed to separate the trim panel from chassis obstructions. 2 Using two or four persons, lift the system chassis. 3 Lower the system chassis into the trim panel (see Figure 1-6). 4 After the chassis is lowered into place, align the three holes in the trim panel with the three holes in the chassis. 5 Secure the right side of the trim panel with three 6-32 x 0.25-inch hex-head Phillips screws (see Figure 1-6). 6 Secure the back of the trim panel with three 6-32 x 0.25-inch hex-head Phillips screws. 1-10 Rack-to-Tower Conversion Guide
-
 1
1 -
2
-
3
-
4
-
5
-
6
-
7
-
 8
8 -
 9
9 -
 10
10 -
 11
11 -
 12
12 -
 13
13 -
 14
14 -
 15
15 -
 16
16 -
 17
17 -
 18
18 -
19
 |
 |