Dell PowerEdge 6600 Rack Installation Guide (.pdf) - Page 16
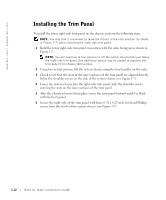
Installing the Trim Panel
 |
View all Dell PowerEdge 6600 manuals
Add to My Manuals
Save this manual to your list of manuals |
Page 16 highlights
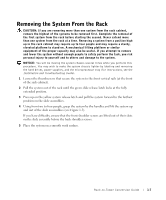
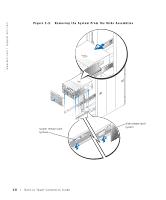
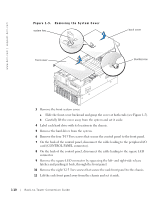
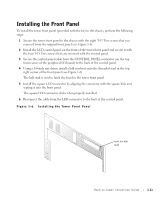
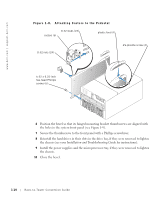
www.dell.com | support.dell.com Installing the Trim Panel To install the tower right-side trim panel on the chassis, perform the following steps: NOTE: You may find it convenient to leave the chassis in the rack position (as shown in Figure 1-7) while installing the right-side trim panel. 1 Hold the tower right-side trim panel in position with the sides facing up as shown in Figure 1-7. NOTE: You will need two to four persons to lift the system into position just above the right-side trim panel. One additional person may be needed to separate the trim panel from chassis obstructions. 2 Using two or four persons, lift the system chassis using the four handles on the sides. 3 Check to see that the slots in the inner surfaces of the trim panel are aligned directly below the shoulder screws on the side of the system chassis (see Figure 1-7). 4 Lower the system chassis into the right-side trim panel, with the shoulder screws entering the slots on the inner surfaces of the trim panel. 5 After the chassis is lowered into place, move the trim panel forward until it is flush with the front panel. 6 Secure the right-side of the trim panel with three 6-32 x 0.25-inch hex-head Phillips screws from the inside of the system chassis (see Figure 1-7). 1-12 Rack-to-Tower Conversion Guide
-
 1
1 -
2
-
3
-
4
-
5
-
6
-
7
-
8
-
9
-
10
-
 11
11 -
 12
12 -
 13
13 -
 14
14 -
 15
15 -
 16
16 -
 17
17 -
 18
18 -
 19
19 -
 20
20 -
 21
21 -
22
 |
 |